Sunday, June 12, 2016

Donna Hay's Smashed Avocado Toast w/ Hard Boiled Egg


I work in a special needs room at a local elementary school and I absolutely love it. My favorite part is that we get to teach practical life skills: cooking, crafting, hygiene, shopping, and social skills, all with the hope that the kids can be as independent as possible. I love to watch the kids' faces when they learn these new skills, but it is even more rewarding to watch them master these skills and see their confidence grow over time.

All of these skills are fun to practice, but of course I favor the days we cook. Not every student is capable of doing some of the skills we practice, but I feel like cooking is something everyone can experience in one way or another. Cooking is such a sensory experience and even if you can't see, then you can still feel the food, touch the food, hear it cooking, smell it and definitely taste it, and so on. So while we have several students who are impaired in different ways, there is usually something they can experience while cooking.

During the last few weeks of school our Spanish translator came into the room and made a Mexican feast. The kids made guacamole in her molcajete. They also made homemade corn tortillas from maseca and learned how to cook them on a comal. We cut veggies for salsa and also made a steak filling for tacos. It was a very special day. The kids were beaming, the food was delicious, and everyone learned something, including me.

The guacamole was something that everyone could participate in, more so than any other dish we created up to that point. The avocados were soft, and easy for the kids to chop and mash, and of course their pretty green color was a hit. The guacamole, because of it's soft nature, was also something everyone could eat, and for that we were thankful.  We had such a special time making and eating the guacamole that we even decided to buy the teacher in our room a mortar and pestle, as well as the ingredients to make her own guacamole, as a special end of the year gift. Now guacamole is present at every get together we have. It's our signature dish that holds special meaning.

Since that day I've been buying avocados and eating them with everything: on sandwiches, on toast, in guacamole, chopped up in a salad, and so on. Not only are they good for you, but they just make me smile!

This Smashed Avocado Toast with Hard Boiled Egg is an easy and quick recipe that is perfect for the hot summer mornings we've been having. Satisfying enough, but also light enough, so as not to weigh you down. I love the sprinkling of seeds and the refreshing pop from the mint and squeeze of lime. Perfect for enjoying before heading to the pool!


Smashed Avocado Toast with Hard Boiled Egg
Recipe Adapted from Donna Hay Website
Serves 2-4

4 eggs
 4 slices of wholemeal bread, toasted
1 avocado, mashed
1 teaspoon white chia seeds
1 teaspoon sesame seeds
1 teaspoon cumin seeds
salt and black pepper, to taste
mint springs, to serve
lime wedges, to serve

Place the eggs in a saucepan of boiling water and cook for 7 minutes. Drain and refresh under cold water. Peel, slice in half and set aside.

Place the toast on plates and top each slice with the avocado and egg. Place the chia seeds, sesame seeds, cumin seeds, salt and pepper in a small bowl and mix to combine.

Sprinkle the seed mixture and mint over the avocado and serve with lime wedges. 


Theme: Monthly Featured Chef: Donna Hay!

Sunday, June 5, 2016

Orzo Salad with Basil Vinaigrette


Gardening isn't my forte, but I manage a very small herb garden. One thing I can count on every spring is the return of my chives, and of course my mint. Once those start to sprout I always run out and grab a few basil plants. Basil seems to do well all on it's own, with very little attention. It is so nice being able to clip them whenever I'm in need and I always enjoy having them on hand in the spring and summer.

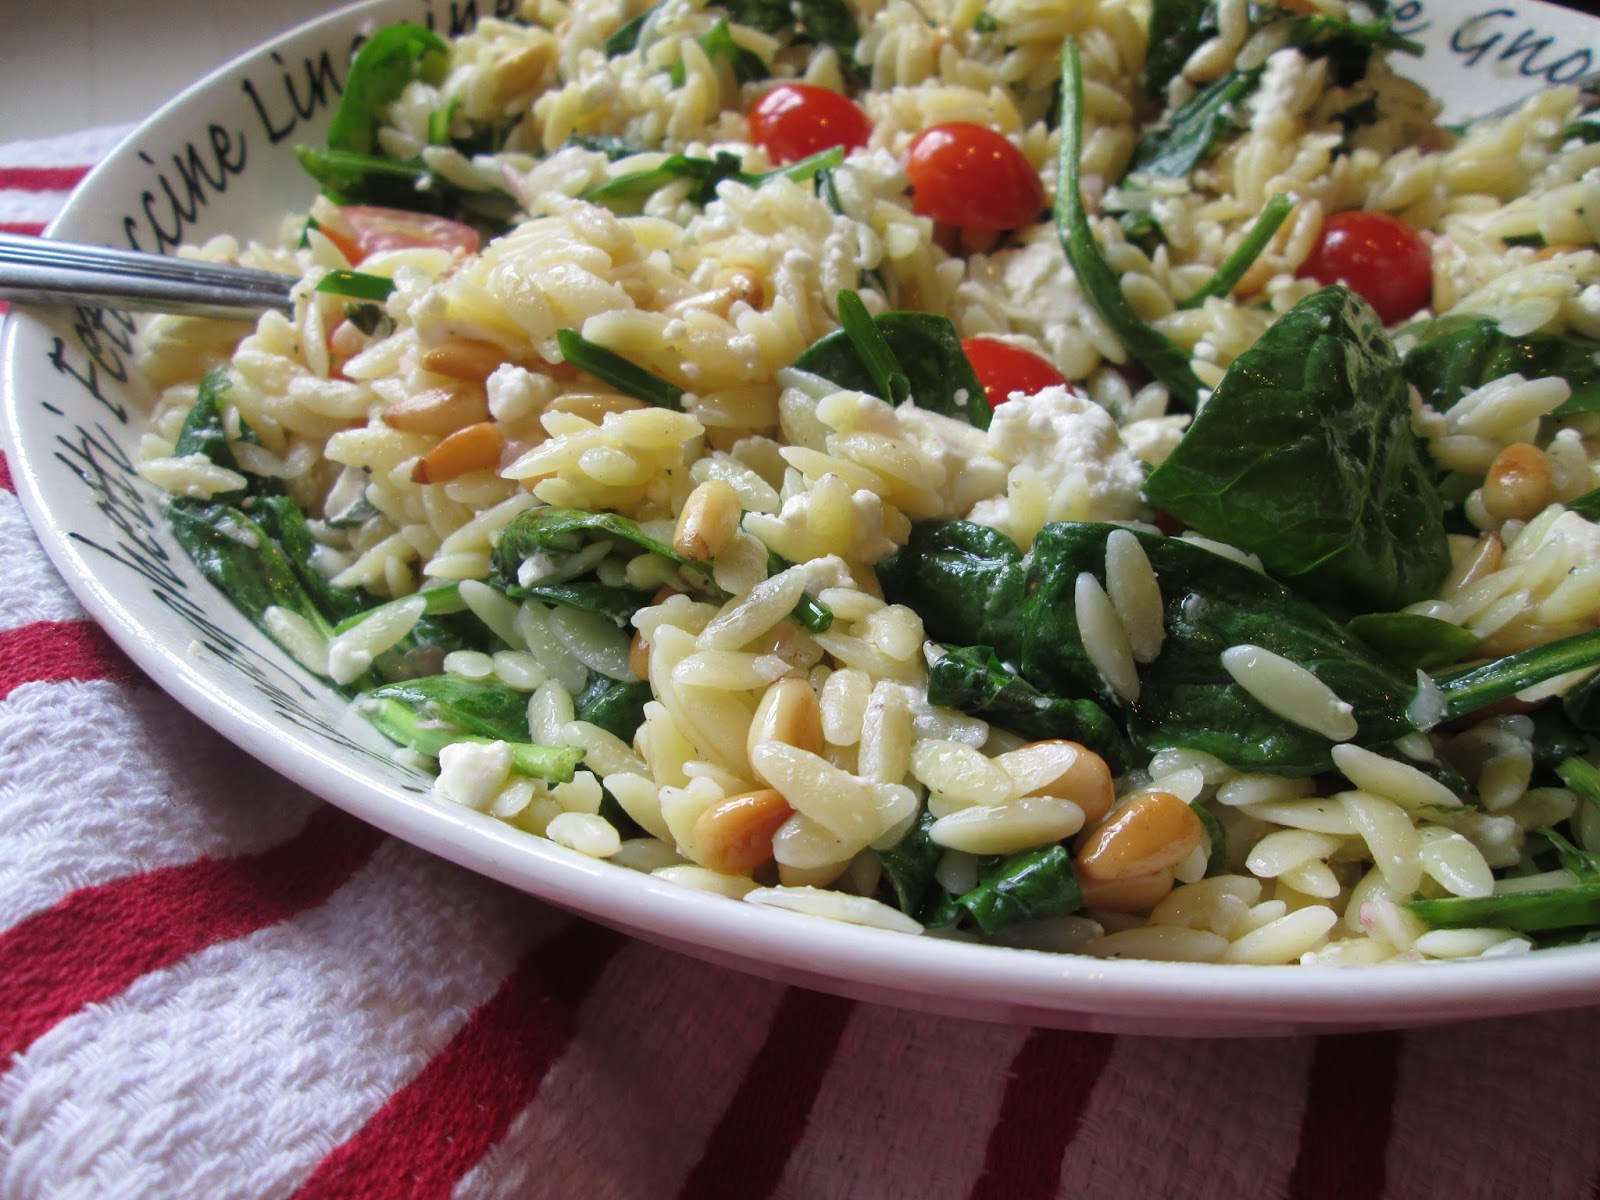
This Orzo Salad with Basil Vinaigrette was a perfect way to use up some of that fresh basil and chives from my garden.  A lovely salad of orzo, juicy grape tomatoes, spinach, toasty pine nuts, salty goat cheese, in a fresh herby vinaigrette...yum! Perfect and light for summer!

I've made a couple versions of this salad and I do have to say that I like this one best! The ratios just seem to be spot on and the salad kept very well. I can see myself making several times throughout the summer. It's absolutely lovely to have on hand and eats well on it's own, or as a side.


Orzo Salad with Basil Vinaigrette
Adapted from Curtis Stone Website
Serves 6-8

Salad
1-1/2 cups orzo pasta
3 cups fresh baby spinach leaves
12 grape tomatoes, cut in half
1/2 cup toasted pine nuts
2 tablespoons thinly sliced parsley
1/2 cup coarsely crumbled feta cheese
2 tablespoons chopped fresh chives

Basil Vinaigrette
2 tablespoons red wine vinegar
1 shallot, finely chopped
1 garlic clove, finely chopped
1/4 cup extra virgin olive oil
1/4 cup thinly sliced fresh basil
salt and pepper, to taste

 Fill a medium sized saucepan with water and bring to a boil.  Add the orzo and cook, stirring occasionally, until pasta is al dente (7-8 minutes, usually). 

While the pasta is cooking get the rest of your salad together. In a large salad bowl add the chopped shallot, chopped garlic, and sliced basil. Stir in the red wine vinegar, then slowly whisk in the olive oil until completely blended. Season the dressing with salt and pepper, to taste.

When the pasta is finished cooking, drain and set aside to cool slightly. Add the tomatoes, spinach, pine nuts, feta cheese, and herbs to the dressing.  Toss to combine. When the pasta is slightly cooled go ahead and add it to the salad, tossing until combined.  Serve warm or cold. Salad can be refrigerated and held in the fridge for 2-3 days.


grab button for I Heart Cooking
Clubs
Theme: Local & Seasonal


Sunday, May 29, 2016

Watermelon with Fresh Mint and Lime

 
There are three things synonymous with the start of summer: the last day of school, Memorial Day weekend, and slicing into the first watermelon of the season.

To me watermelon is the hallmark of summer, and there is something about slicing into that first one of the season. It takes me back to those glorious summer days as a kid, not a care in the world, watermelon in hand with juice dripping down my chin, onto my arms, and finally onto my hands. A sticky but glorious mess. Now my kids do the same thing. I could buy all the popsicles and ice cream in the world, but it's the watermelon they go crazy for.

Celebrate summer with watermelon.  Why make things harder on yourself by making all the traditional sides for your summer cookout? Leave the stove off, fire up the grill, and grab a watermelon. Get a few platters.  Slice up some watermelon for the kids on one. Slice up some more for the adults on another. Garnish the adult watermelon like this, with a fresh mint and lime syrup, and enjoy.  It's economical, it's easy, and it's much healthier than most of the traditional cookout sides. We loved it!


Watermelon with Fresh Mint and Lime
Adapted from Relaxed Cooking with Curtis Stone
Serves 6

1/3 cup sugar
grated zest and juice of 1 lime
1/4 cup thinly sliced fresh mint leaves
1/2 large oval watermelon

Stir the sugar, 2 tablespoons water, the lime zest, and 1-1/2 tablespoons of the lime juice together in a small heavy saucepan over high heat until the sugar dissolves and the syrup comes to a boil. Let the syrup cool completely and then refrigerate it until cold.

Strain the chilled syrup into a small bowl and stir in the mint (this seems like a fussy step to me so I didn't strain). Allow the mint to infuse into the syrup for at least 5 minutes. 

Place the watermelon, cut side down, on a work surface. Using a large sharp knife, cut the watermelon horizontally to form a 2-inch-thick slab. (Reserve the remaining watermelon for another use). Trim away the rind, and then cut the slab into 2-inch chunks. Transfer the watermelon chunks to a large serving platter, keeping the chunks in a single layer and maintaining the shape of the slab. Pour the cold syrup over the watermelon, and serve.


Theme: May Potluck!


Sunday, May 22, 2016

Cinnamon French Toast with Caramelized Bananas and Mascarpone

Caramel sauce. I love it, but let's face it.  It is HARD to master. I've tried countless times and failed miserably each and every time.  Until today.

The call to make Curtis Stone's Cinnamon French Toast with Caramelized Bananas and Mascarpone was so strong. Caramel failures be damned. I was bound and determined to make this happen.  Maybe it was Curtis' directions.  Maybe it was just my lucky day, but either way I was successful! I finally produced a smooth and buttery caramel sauce.

At that moment I knew this recipe would be a total game changer. Instead of "Let There Be Cake", it was now "Let There Be Caramel Sauce".  Countless variations. Caramel sauce on French Toast, pancakes, waffles, ice cream...you name it!

But for now all that mattered was that we weren't going to have plain French toast for breakfast (my plan if the caramel didn't work out).  Oh no! We were going to have French Toast dusted in cinnamon-sugar, topped with the most beautiful caramelized bananas, and a creamy dollop of Mascarpone cheese. And it was everything and more. It was so stinkin' delicious!


Cinnamon French Toast with Caramelized Bananas and Mascarpone
Adapted from Relaxed Cooking with Curtis Stone
Serves 4

Caramelized bananas
1/2 cup sugar
2 bananas, sliced on the bias
3 tablespoons salted butter

French Toast
6 large eggs
Four 1/2" thick slices of brioche bread
1/4 cup sugar
2 teaspoons ground cinnamon
2 tablespoons butter
Mascarpone cheese, to garnish


To prepare the caramelized bananas: Combine the sugar and 1/4 cup water in a large heavy saute pan over medium heat. Stir until the sugar dissolves and the liquid comes to a simmer. Then boil over medium-high heat without stirring, brushing down the sides of the pan with a wet pastry brush and swirling the pan occasionally to ensure that the syrup cooks evenly, for 6 minutes, or until the syrup begins to turn golden brown. Immediately remove the pan from the heat. Add the bananas and butter and swirl until the butter melts. Cook over medium heat for 2 minutes, or until the bananas are just tender. Set the caramelized bananas aside.

To make the French toast: Using a fork, beat the eggs in a 13 x 9" baking dish. Place the slices of brioche in the eggs and let stand, turning the slices once, for 5 minutes, or until the eggs are absorbed. (Note: Sometimes I feel like this results in soggy French toast so I usually just quickly dip my bread in the egg, allowing the excess to drip back into the dish).

Stir the sugar and cinnamon together on a large plate; set it aside. Melt the butter on a large heavy griddle pan (I like my cast iron skillet for this) over medium heat. Add the brioche slices to the hot pan and cook for about 2 minutes per side, or until golden brown on the outside and heated through. Immediately place the hot French toast in the cinnamon-sugar and turn to coat completely. (Note: If you do not like your food too sweet then you might want to elect to simply sprinkle on some cinnamon-sugar instead of dousing your French toast in the mixture. This is a very sweet breakfast!)

Divide the French toast among 4 serving plates. Spoon the caramelized bananas over the French toast. Top with a dollop of Mascarpone cheese, and serve.


Theme: Sunny Side Up!

Sunday, May 15, 2016

Ottolenghi's Slow-Cooked Chickpeas on Toast with Poached Egg


Yotam Ottolenghi is one of the most inspirational chefs of our time. He creates the most exotic dishes, full of unique textures and flavors, causing us to think outside of the box and be more creative in our own kitchens. I recently received a copy of his book, Plenty More , and was instantly drawn to his recipe for Slow-Cooked Chickpeas on Toast with Poached Egg. As a lover of chickpeas, this dish begged to be made first.

Weekday mornings are a struggle.  Breakfast needs to be quick.  This recipe is the answer to those mornings. A spicy mix of chickpeas, slow-cooked to perfection, served over a crisp slice of toast topped off with a very inviting poached egg that is oozing with glorious egg yolk. I'm pretty sure this is the perfect way to start a random weekday morning. Make this over the weekend and pop it in the fridge. In the morning all you'll need to do is reheat the chickpeas while you make some toast and an egg, and you're all set! A special and inspiring way to start your day before you head out the door.


Slow-Cooked Chickpeas on Toast with Poached Egg
Adapted from Plenty More
by Yotam Ottolenghi
Serves 4

Rounded 1 cup chickpeas, soaked in water overnight with 2 teaspoons baking soda
1 tablespoon olive oil, plus 1 tablespoon to finish
1 medium onion, coarsely chopped (1 cup)
3 cloves garlic, crushed
1-1/2 teaspoons tomato paste
1/4 teaspoon cayenne pepper
1/4 teaspoon smoked paprika
2 medium red peppers, cut into1/4 inch dice
1 beefsteak tomato, peeled and coarsely chopped
1/2 teaspoon superfine sugar
4 slices sourdough bread, brushed with olive oil and grilled on both sides
4 eggs, freshly poached
2 teaspoons za'tar
salt and black pepper, to taste

Drain and rinse the chickpeas and place them in a large saucepan with plenty of water. Place over high  heat, bring to a boil, skim the surface, and boil for 5 minutes. Drain and set aside.

Place the oil, onion, garlic, tomato paste, cayenne, paprika, red peppers, 1 teaspoon salt, and some black pepper in a food processor and blitz to form a paste.

Wipe out the chickpea saucepan, return it to the stove over medium heat, and add the paste. Fry for 5 minutes (there's enough oil there to allow for this), stirring occasionally, before adding the tomato, sugar, chickpeas, and a scant 1 cup water.  Bring to a low simmer, cover the pan, and cook over very low heat for 4 hours, stirring from time to time and adding more water when needed to retain a sauce-like consistency. Remove the lid and cook for a final hour; the sauce needs to thicken without the chickpeas becoming dry.

Place a piece of warm grilled bread on each plate and spoon the chickpeas over the bread. Lay a poached egg on top, followed by a sprinkle of za'tar and a drizzle of oil. Serve at once.


*********************************************** 

While on the subject of chickpeas, Ottolenghi's Hummus Schwarma with Lemon Sauce is hands down one of the best recipes I've shared on my blog.  Smooth and creamy hummus with crispy chunks of savory lamb, buttered and toasted pine nuts, and a bright zingy lemon sauce. It should be called Heavenly Hummus.


Sunday, May 8, 2016

Peach and Mint Iced Tea


When you live in Kentucky, the weeks leading up to the Kentucky Derby are very special. Everything is lush and green, and one glance at the horse fields helps you understand why they call it the Bluegrass State; people are coming to visit from all over the world; horses are everywhere; ladies are hat shopping; bets are being placed; mint and bourbon are being purchased with abandon; and Derby parties are a sure bet.

At a Derby party you are sure to drink a Mint Julep, a classic Derby drink made from Kentucky Bourbon, mint syrup, and a mint garnish served in pretty Mint Julep cup. There will likely be ham biscuits, Kentucky Burgoo (a spicy stew served with cornbread), Kentucky Hot Browns (turkey, bacon and tomato sandwiches smothered with cheese sauce), and Benedictine (a creamy cucumber and cream cheese spread) that is spread onto bread or crackers. For dessert there will either be Derby pie and/or Derby bars (a lovely chocolate and walnut pie that reminds me of chocolate chip pie). You will not walk away thirsty or hungry.

In the days leading up to Derby, fresh mint is in very high demand.  In order to supply the masses with mint, the grocery stores push big carts full of mint into the produce section, making the air fragrant. The fresh mint wafting through the market is the hallmark of Derby season and the culmination of what's to come. A celebration of old-fashioned Southern living that is, for the most part, untouched by modern times. A magical sort of time in Kentucky.

No matter how many mint garnishes you created, or Mint Juleps you've made, you are certain to have leftover mint.  This Peach and Mint Iced Tea is the perfect way to use it up! A subtle and refreshing blend to help soothe you after a day spent in the sun, eating and drinking to your heart's content.


Peach and Mint Iced Tea
Adapted from Relaxed Cooking with
Curtis Stone
Serves 4-6

1-1/4 cups (lightly packed) cups fresh mint leaves
3 ripe peaches, pitted
4 cups ice cubes, crushed

Pour 6 cups water into a medium sized saucepan.  Cover and bring to a boil over high heat. Remove from the heat and add 1 cup of the mint leaves. Cover and steep for 30 minutes to allow the mint to infuse the water. Then strain the mint tea into a pitcher, discarding the leaves, and refrigerate until cold.

Meanwhile, chop 2 of the peaches coarsely and place them in a blender. Puree until smooth, adding a couple tablespoons of the mint tea if necessary to hep create the puree. Strain the peach puree through a fine-mesh sieve and chill the puree. 

Thinly slice the remaining peach. In 4 tall glasses, layer the crushed ice, thin slices of peach, and the remaining 1/4 cup mint leaves, filling the glasses about halfway. Divide the peach puree among the 4 glasses. Then stir in the chilled mint tea and serve immediately.


Sunday, May 1, 2016

Peanut Butter Cookies with Chocolate Chunks


These cookies are like soft fluffy clouds of peanut butter and chocolate. No other description is necessary, so I'll just stop right there and tell you that you should make them.

On another note, let's discuss relaxed cooking, otherwise known as the lazy girl's version of cooking. This style of cooking is right up my alley. Short and simple ingredient lists, easy techniques, and quick clean up. Now saying this, let me also say that I have been known to simplify even a lazy recipe.

For example, when making the cookie dough, Curtis says to mix the dry ingredients in a separate bowl from the wet ingredients. Um, no thank you Curtis. Why dirty a separate bowl for the dry ingredients when you can add them to your wet ingredients (after mixing) with the same results? Additionally, let's talk measuring cups and spoons.  Why dirty your whole collection of measuring cups and spoons? Why not just use one measuring cup, such as a 1/4 cup measure 4 times to equal a cup and so on? And finally, why dirty 3 baking sheets when you can just use one? Can you tell I put a lot of thought into relaxed (aka lazy girl) cooking? Maybe a little too much.

Whether you make this recipe as is, or take my lazy approach, the results are amazing.  This is one delectable and addictive cookie.  Hard to stop at just one.


Peanut Butter Cookies with Chocolate Chunks
Adapted from Relaxed Cooking
with Curtis Stone
Makes between 15-20 cookies

1 cup all-purpose flour
1/2 teaspoon baking soda
1/2 teaspoon salt
1 cup natural peanut butter
1/2 light brown sugar
1/2 cup granulated sugar
8 tablespoons butter, at room temperature
2 tablespoons honey
1 large egg
1 teaspoon pure vanilla extract
5 ounces semisweet chocolate, coarsely chopped

Preheat the oven to 350F.  Line 3 heavy baking sheets with parchment paper, or spray them with cooking spray.

Mix the flour, baking soda, and salt in a medium bowl. Using an electric mixer, beat the peanut butter, brown sugar, granulated sugar, butter, honey, egg, and vanilla in a large bowl until well blended. Stir the dry ingredients into the peanut butter mixture in two additions. Stir in the chopped chocolate.

Scoop about 3 tablespoonsful of dough for each cookie onto the prepared baking sheets, spacing them about 2-1/2 inches apart. Bake for about 12 minutes, or until the cookies puff and begin to brown on top but are still very soft to the touch. Let the cookies cool on the baking sheet for 5 minutes. Then use a metal spatula to transfer the cookies to a wire rack. Enjoy the cookies warm or let them cool completely.


Theme: April Potluck!