Sunday, October 31, 2010

Slut's Spaghetti


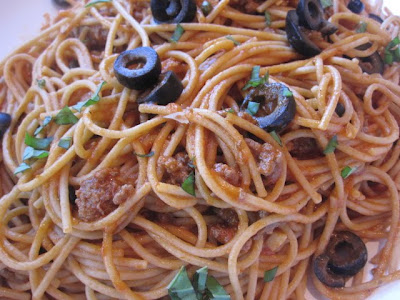
This morning Nigella Lawson opened up her cooking show, Nigella Kitchen, by making a recipe called Slut's Spaghetti. Nigella's Slut's Spaghetti is her take on an Italian classic, Pasta Puttanesca, which Nigella mentions is translated in English as "pasta cooked in a whorish fashion." Nigella explained the reasons behind the name of the dish and went on to say that she preferred to call her version simply "Slut's Spaghetti. When Nigella finished making the spaghetti, she plated it, and took the entire dish to bed with her. I love that woman!

I already had a recipe in mind for this month's Food 'n Flix movie, Mystic Pizza. While watching Nigella I had a change of heart. I stopped writing the post and got up to make Nigella's Slut's Spaghetti. What better reason to make Slut's Spaghetti than for the girls of Mystic Pizza? After all, the movie is all about three young-spirited girls who definitely are crazy about men! A classic 80's movie all about coming of age, learning about yourself, life, and naturally, lots of heartbreak. Typical young girls who I'm sure would love this pasta just about as much as they loved their men.
Nigella Lawson's Slut's Spaghetti - recipe adapted from Food Network
Nigella says:
Well, how could I resist this translation of pasta alla puttanesca, whore's pasta as it usually is described in English? The general consensus seems to be that this is the sort of dish cooked by slatterns who don't go to market to get their ingredients fresh, but are happy to use stuff out of jars and cans. I hold my hands up to that. Or maybe one should just attribute the name gamely to the fiery tang and robust saltiness of the dish? But, anyhow, what better recipe to start off this section devoted to the fruits of the larder.

Please fire up the sauce if you want, but do know that even though the first mouthful might seem not quite hot enough, the heat builds as you eat. I sometimes go a little cross-cultural in my chili-case and use hot pickled jalapenos from a jar found on the Tex-Mex shelves of the supermarket. And while you're there, do look out for the tiny French nonpareil (or nonpareilles) capers: they may be smaller, but they pack more of a pungent punch than the larger capers.
Ingredients
* 3 tablespoons olive oil
* 8 anchovy fillets, drained and finely chopped
* 2 garlic cloves, peeled and thinly sliced, crushed or grated
* 1/2 teaspoon crushed red pepper flakes, or 1 to 2 tablespoons jarred or canned jalapeno peppers (preferably red), drained, sliced, and diced, or to taste
* Salt
* 1 pound spaghetti
* 1 (14-ounce) can diced tomatoes
* 1 1/4 cups chopped drained pitted black olives
* 2 tablespoons small capers, well rinsed and drained
* 2 to 3 tablespoons chopped fresh parsley leaves, for garnish, optional
* Freshly ground black pepper

Bring a large pot of water, for the pasta, to a boil over medium heat, though you don't need to get started on the sauce until the water is pretty well boiling.

Pour the oil into a wide, shallowish frying pan, Dutch oven, or wok, and put it over medium heat.

Add the anchovies and cook for about 3 minutes, pressing and pushing with a wooden spoon, until the anchovies have almost "melted". Add the garlic and red pepper flakes or jalapenos and cook, stirring, for another minute.

This is probably the stage at which you will want to salt the boiling water and adding the spaghetti to cook, following the package instructions.

Going back to the sauce, add the tomatoes, olives, and capers to the pot with the anchovies and cook for about 10 minutes, stirring every now and again, by which time it will have thickened slightly. Taste for seasoning.

Just before the pasta is ready, remove and reserve about an espresso cupful of cooking water.

When the pasta is cooked as desired, drain and add the spaghetti to the tomato sauce, adding a little reserved pasta water, if needed, to help amalgamate the sauce. Scatter with chopped parsley, if there's some to hand, and serve in slatternly style, preferably with an unfiltered cigarette clamped between crimson-painted lips.

Make Ahead Note:

The sauce can be made 2 days ahead. Transfer the sauce to a nonmetallic bowl to cool, then cover and refrigerate as soon as possible. Reheat gently in large saucepan, frying pan, or wok, stirring occasionally, until piping hot.

Freeze Note:


The cooled sauce can be frozen in a resealable container for up to 3 months. Thaw overnight in the refrigerator and reheat as above.

Notes/Results: Big love to Nigella Lawson and the girls of Mystic Pizza for making me laugh and smile. I enjoyed watching Mystic Pizza back in the day, just as much as I enjoy watching it now. It will always be one of those classic 80's movies. It seemed fitting to combine Nigella with the girls of Mystic Pizza since all of these ladies are good at saying exactly what's on their mind. I did make one change to the recipe, based only on the fact that I was also feeding a male slut. I added one pound of ground beef. Otherwise I kept the recipe the same. It was perfectly vulgar with flavor and a very satisfying dish. A gutsy pasta recipe that best represents both Nigella and the girls of Mystic Falls.

Head on over to Food 'n Flix, a monthly celebration of movies and food. Next month's movie is going to be The Ramen Girl!

Friday, October 29, 2010

Vampire Cosmo


In the mood for a spooky spirit this Halloween weekend? Please head over to Cocktail Puppy, a great blog started by one of my favorite foodies, Natashya of Living in the Kitchen with Puppies.

I'm honored to say that I'll be contributing regularly along with Natashya, Heather of girlichef, and Danielle of Cooking for My Peace of Mind.

Time to get the party started!!

Wednesday, October 27, 2010

Recipe #56 - Stirring the Pot: Tempura Green Beans with Chile, Garlic & Sesame Aioli


I can't even tell you how many times I bought the green beans for this recipe and then ended up using them for something else. I lost track. I wanted to make them while I could still find fresh green beans, yet I was afraid I'd love them too much to stop eating them. I was right! Tyler's Tempura Green Beans with Sesame Aoili are absolutely fantastic. I told myself that I would only eat 5 of them. Yeah, right! One bite of that green bean in a light, crispy, crunchy coating sent me over the edge. Scattered with crispy bits of garlic, ginger, and chile these green beans are beyond fantastic dipped in the sesame aioli. This appetizer is sure to be a hit!

Tempura Green Beans with Chile, Garlic, and Sesame Aioli
Adapted from Stirring the Pot
Serves 2-4
Time: 35 minutes
Aioli
1/4 cup toasted sesame oil
2 teaspoons minced ginger
1 teaspoon minced red chile (I used one cayenne pepper)
1/2 cup store-bought mayo
1/2 cup sour cream
1 teaspoon lemon juice
Kosher salt and freshly ground pepper
Tempura Green Beans
1 bunch green beans (about 1lb), root-end trimmed (1 pound usually equals 2 handfuls)
3/4 cup all-purpose flour
1/4 cup cornstarch
2 tablespoons baking powder
1 teaspoon kosher salt
1 egg yolk
3/4 cup club soda, chilled
vegetable oil, for deep-frying
Kosher salt
1 lime, cut into wedges, for garnish
1/4 bunch fresh cilantro (about 4 sprigs), for garnish

For the aioli, heat sesame oil in a small pan over low heat. Add ginger, garlic, and chile and saute until fragrant and crispy. Drain ginger, garlic and chile and set aside, reserving the oil.

In a blender combine mayo, sour cream, and the reserved sesame oil. Add lemon juice and season with salt and pepper. Puree until smooth. Set aioli aside.

For the Tempura Green Beans, in a large bowl combine flour, cornstarch, baking powder, and the 1 teaspoon salt. Make a well in the center and add yolk. Gradually whisk in club soda, slowly working your way out from the center to form a smooth batter.

Pour 2-3 inches oil into a large heavy pot and heat to 375F. Dip green beans into batter, shake off excess, and fry a few at a time for 4-5 minutes, until golden and puffy. Drain on paper towels; sprinkle with crispy fried ginger, garlic, and chile. Garnish with lime wedges and cilantro and serve with Aioli.

Notes/Results: These were a huge hit and everyone loved them. The green beans remained somewhat firm, yet tender, and the tempura batter was extremely light and crispy. At times sesame oil can be a bit strong and I was concerned that the aioli would be overpowering, but that was not that case at all. It was a wonderful accompaniment to the beans. The crispy bits of chile, garlic, and ginger really added to the flavor of the dish. We kept trying to sprinkle those bits over our beans and finally decided to add the crispy bits to the aioli so that we wouldn't miss out on the flavor. A total hit all around. I would make these again when I wanted to splurge.

Tuesday, October 26, 2010

Giada De Laurentiis and Chocolate Rice Pudding


On Saturday afternoon I went to the second annual food show in Lexington. Giada De Laurentiis was the celebrity chef this year and I was so pleased to have the chance to meet her. Giada was very gracious to her fans at the book signing. She took the time to talk, pose for pictures, and give hugs. By the time I arrived to have my book signed, security was ushering her along. I managed to snap this picture while she was signing my copy of Giada's Family Dinners. I had a million questions, or things I wanted to say to her, but I think I got awestruck. She is absolutely radiant in person! I managed to say something silly like "It's so nice to meet you." (Brilliant, right?)

Later in the day, Giada did a cooking demonstration where she pulled members of the audience up on stage to help her cook. She took a lot of questions during the cooking demo and was very open with the audience. She talked about some of her most embarrassing moments, discussed the filming for her show, and also her family. You could really tell that she enjoys talking to her fans.

The highlight of the show, at least for me, was when one gentleman asked her for a knife so he could cut his spaghetti. Giada replied "You can't cut pasta. You suck it!" The audience roared with laughter.

Another member of the audience asked the ultimate food question. "What is your favorite thing to eat?"

Giada replied very quickly. "Dessert. Chocolate to be exact."

I had to chuckle because Chocolate Cravings is our theme this week at I Heart Cooking Clubs, where we are celebrating Giada's recipes for the next 6 months. How fitting!

Never having made or ate a rice pudding before, I decided on Giada's Chocolate Rice Pudding. During her cooking demo, Giada talked about how she prefers semisweet chocolate to milk chocolate. She told us that many times she tends to write her recipes to include semisweet chocolate and that we should use whichever chocolate we prefer. I prefer milk chocolate, which is what I used in this recipe. The rice pudding is accented with orange zest and orange liqueur, giving the pudding that fantastic flavor of orange and chocolate. I garnished mine with more orange zest and orange segments on the side. Perfect colors for the Halloween weekend coming up!
Chocolate Rice Pudding
Adapted from Giada at Home
Serves 6-8
5 cups whole milk
2/3 cup Arborio rice
3/4 cup sugar
1-1/2 teaspoons grated orange zest (from 1 medium orange)
1 vanilla bean, split lengthwise
1 tablespoon unsweetened cocoa powder
1-1/2 tablespoons orange liqueur
1 cup semisweet chocolate chips (I used 3/4 cup milk chocolate, 1/4 cup semisweet)

In a medium heavy-bottomed saucepan, combine the milk, rice, sugar, and orange zest. Scrape in the seeds from the vanilla bean and add the bean to the saucepan. Bring the milk to a boil, stirring occasionally. Reduce the heat to medium-low and simmer, stirring frequently, until the rice is tender and the mixture thickens, 35-40 minutes.

Remove the pan from the heat and discard the vanilla bean. Stir the cocoa powder and orange liqueur into the mixture. Add the chocolate chips and stir until melted. Allow the mixture to cool for 10 minutes, stirring occasionally.

Spoon the rice pudding into serving bowls. Cover and refrigerate for at least 2-1/2 to 3 hours or up to 1 day before serving.

Now cooking the recipes of Giada De Laurentiis!

Sunday, October 24, 2010

Symon Sundays meets French Fridays with Dorie


There were some wonderful selections for Symon Sundays this time around. The first one, Crab Tater Tots, was a delicious potato croquette loaded with crab meat, breaded in panko, and deep-fried. OH YEAH! These were delicious sprinkled with a little old bay seasoning and served with homemade tartar sauce. My Mom and I really enjoyed them!
Crab Tater Tots
Serves 6-8
Makes up to 35 tots (I halved the recipe with excellent results)
2 tablespoons unsalted butter
1/4 cup a/p flour
1 large egg
1 cup mashed potatoes
canola oil, for deep-frying
1/2 pound lump crab meat
Panko bread crumbs, for breading
kosher salt

In a small saucepan, combine the butter with 1/4 cup water over high heat. When the water comes to a simmer and the butter is melted, add the flour. Reduce the heat to medium and stir until the resulting paste pulls away from the sides of the pan, 1 to 2 minutes. Remove from the heat. Allow to cool for 5 minutes. Add the egg to the pan and stir vigorously until the egg is incorporated into the flour mixture. Stir in the mashed potatoes and let cool.

Pour enough oil into a medium pot so that the oil comes 3 inches up the sides. Heat the oil to 350F.

While the oil heats, gently fold the crab into the potato mixture; the lumpier the batter the better. Using two soup spoons, shape the mixture into quenelles, or 2-inch footballs. (You should end up with about 35). Roll in the panko. Deep-fry, working in batches and turning once, until crisp, brown, and heated through, 2 to 3 minutes. Drain on paper towels and season with salt.

The second selection for Symon Sundays was the Ohio Creamed Corn with Bacon. I was still able to find corn on the cob, but I paid a premium for it, $5 for 4 ears. My family and I loved this recipe though, so I have to say that it was worth the inflated price.
Ohio Creamed Corn with Bacon
Adapted from Live To Cook by Michael Symon
Serves 4-6
5 ears of corn
1 teaspoon EVOO
1/4 pound thick-cut bacon, cut into 1-inch strips
1 medium yellow onion, diced
1 garlic clove, minced
1 teaspoon kosher salt, or more to taste
1/2 recipe Corn Cob Stock (if you'd like the recipe, leave me a comment)
1/2 cup creme fraiche (I used 2% milk)
1 tablespoon unsalted butter
1/2 cup chopped fresh cilantro
Grated zest of 1 lime
Cut the kernels from the cobs and set the kernels aside. (Use the cobs to make the stock).

Heat a large saucepan over medium heat and glaze the bottom with the olive oil. Add the bacon and cook, stirring as needed, to render the fat and brown the pieces, 5 minutes. Add the onion and sweat it for about 45 seconds. Add the garlic and continue to cook, stirring, for another 30 seconds. Add the reserved corn and the salt and cook for 2 minutes.

Pour in the corn cob stock and bring to a simmer. Cook until the liquid reduces to approximately 1 cup, 10 minutes. Add the creme fraiche (milk, in my case) and simmer until the mixture begins to thicken, about 3 minutes. Stir in the butter. Remove the pan from the heat and stir in the cilantro and lime zest. Season with salt if needed before serving.

On Friday, I was supposed to post this Hachis Parmentier for French Fridays with Dorie. I tried. I wrote the post. I hit publish. I repeated these actions several times. Without using expletives, let's just say that Blogger had other plans.
Moving on, this is a wonderful French rendition of a meat and mashed potato pie, sans veggies. I opted to make a variation of Dorie's recipe using ground beef and 1/2 pound spicy sausage. The meat filling was exceptionally aromatic and flavorful and the mashed potato topping was light and airy. I topped mine off with a delicious French Comte cheese. Golden brown on the edges with cheese and butter, this was a definite family pleaser when placed on the dinner table.

I am submitting both Michael Symon recipes to both Brenda of Brenda's Canadian Kitchen for her Cookbook Sundays event and also to Ashlee of Veggie by Season who is the host of our wonderful Symon Sundays event.

Thursday, October 21, 2010

Ellie Krieger's Pumpkin Pie Muffins (slightly adapted) with Spiced Maple-Honey Cream Cheese


If you're like me and you've been drooling over everyone's pumpkin-inspired delicacies, but trying to behave yourself, you will LOVE this recipe. It's like a no-guilt pumpkin fix that you can feel good about. Unless, of course, you can't stop eating them....there's always that possibility.

Ellie's muffin recipe uses buttermilk, which is responsible for making the muffins perfectly moist and tender. An even mix of all-purpose flour and whole wheat combine to create a perfectly light muffin, not dense whatsoever. I made a few changes to the spices, added some maple extract, and topped my muffins with a sprinkle of raw cane sugar for a sweet finish. To go along with the muffins I made a Spiced Maple-Honey Cream Cheese spread which makes these feel a little sinful, even though they're really not.

Pumpkin Pie Muffins
Adapted from Ellie Krieger's The Food You Crave
Ellie says "These scrumptious muffins are brimming with fragrant pumpkin pie spices that will fill your kitchen with their aroma as they bake and heighten your anticipation of that first warm bite."

Cooking spray/muffin liners
1 cup all-purpose flour
1 cup whole-grain pastry flour or whole wheat flour
1 teaspoon baking soda
1/2 teaspoon salt
1 teaspoon ground cinnamon
1/2 teaspoon ground ginger
1/4 teaspoon ground cloves
1/8 teaspoon ground nutmeg
NOTE: I replaced the ginger, cloves & nutmeg with 1/2 tsp pumpkin pie spice. I also added 1/2 teaspoon of ground cardamom
3/4 cup firmly packed dark brown sugar
3 tablespoons unsulfured molasses
1/4 cup canola oil
2 large eggs
1 cup canned solid-pack pumpkin
1 teaspoon vanilla extract
NOTE: I also added about 1/2 teaspoon maple extract
3/4 cup lowfat buttermilk
1/4 cup unsalted raw pumpkin seeds

Preheat the oven to 400F. Coat a 12-cup muffin pan with cooking spray. (I just used muffin liners).

In a medium bowl, whisk together both flours, the baking soda, salt and spices. In a large bowl. whisk together the sugar, molasses, oil, and one of the eggs until combined. Add the other egg and whisk well. Whisk in the pumpkin and vanilla (also maple extract, if using). Stir in the flour mixture in two batches, alternating with the buttermilk, just until combined. Pour the batter into the prepared muffin pan, filling each about 2/3rds full, and sprinkle the tops with the pumpkin seeds (I also sprinkled with raw cane sugar at this point). Tap the pan on the counter a few times to remove any air bubbles. Bake until a toothpick inserted in the center of one of the muffins comes out clean, about 20 minutes.

Let cool on a wire rack for 15 minutes. Run a knife around the muffins to loosen them and unmold. Enjoy warm or let cool completely before storing in an airtight container in the refrigerator for up to 3 days or in the freezer for up to 3 months.

Spiced Maple-Honey Cream Cheese
Just something I mixed up to help satisfy my pumpkin & cream cheese craving.
4 ozs. softened cream cheese
1 tablespoon maple syrup
1 teaspoon honey
1/2 teaspoon cinnamon, or to taste

Mix together with a spoon. Can be used on all sorts of fun things: muffins, toast, biscuits, graham crackers, and even freshly sliced apples and pears.

Notes/Results: These muffins were everything I hoped they would be. The perfect, and much healthier option, to overindulging in pumpkin roll, pumpkin cupcakes, or a pumpkin pie blizzard. Ellie notes in the recipe that the muffins freeze well, which is great news for me since no one else in my house likes pumpkin. (Yes, everyone in my house is crazy!)These muffins are deliciously moist and tender, with a slight crunch on top from the pumpkin seeds. They are delicious all on their own, but do benefit from a light spread of cream cheese (flavored or even unflavored).

Nutritional Facts
Serves 12
Serving Size: 1 Muffin
Calories: 205
Total Fat: 7g
Protein: 5g
Carb: 32g
Fiber 2g
Chol: 36mg
Sodium: 239mg


I am submitting this to my sweet friend Roz over at La Bella Vita for her Seasonal Saturday event.

Tuesday, October 19, 2010

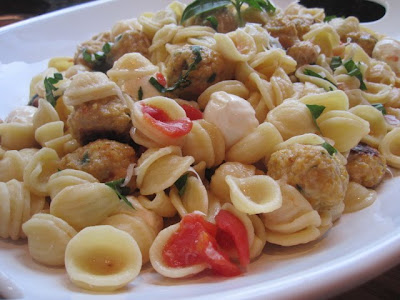
Orecchiette with Mini Chicken Meatballs


I have been wanting to make this particular recipe for a long time. Although it has received some mixed reviews, I just couldn't resist it. There is just something about those cute little mini chicken meatballs and those fluffy little balls of bocconcini mozzarella. Not to mention,this recipe uses one of my favorite pasta shapes: orecchiette. I love how the shape of the orecchiette allows the pasta to "cup" all the other ingredients. It just makes me happy!

I did make some changes to this recipe. I read online that the chicken meatballs were rather loose and hard to form. Many people suggested reducing the recipe down to one egg instead of two. One egg for one pound of ground chicken made perfect sense to me, so I went with that. The recipe also calls for only 1/4 cup of breadcrumbs to bind the mixture. I think I easily used at least one cup of breadcrumbs to bind the mixture. It was pretty loose. When the meatballs were completely mixed and ready to be formed I realized that something very important was missing: GARLIC!

I double-checked the recipe and nope, no garlic. How can this be so, Giada? I remedied this situation by using 3 big cloves of garlic, mincing them into the meatball mixture. Also, Giada sautes her meatballs. I pretty much despise sauteing or frying meatballs, so I baked mine for about 20 minutes at 350F. Sauteing/frying meatballs does give more color, but I'll stick with baking mine, even if they are on the pale side.

The mini chicken meatballs are added to a sauce made from chicken broth and fresh tomatoes (or in my case, canned diced tomatoes) and cheese....lots of cheese - yum! The sauce was a tad on the bland side so I added more GARLIC! Do you see the theme here? I used my mini grater and grated about 4 regular sized cloves of garlic right over the sauce while it was cooking on the stove.

Orecchiette with Mini Chicken Meatballs, adapted from Food Network
* 1 pound orecchiette pasta
* 1/4 cup plain bread crumbs (NOTE: you may need almost 1 full cup to bind)
* 1/4 cup chopped fresh flat-leaf parsley
* 2 large eggs, lightly beaten (NOTE: one egg is more than enough)
* 1 tablespoon whole milk
* 1 tablespoon ketchup
* 3/4 cup grated Romano
* 3/4 teaspoon salt
* 3/4 teaspoon freshly ground black pepper
* 1 pound ground chicken
* 1/4 cup olive oil
* 1 1/2 cups low-sodium chicken stock, hot
* 4 cups cherry tomatoes, halved
* 1/2 cup freshly grated Parmesan
* 8 ounces bocconcini mozzarella, halved
* 1/2 cup chopped fresh basil leaves
NOTE: I added 3 large garlic cloves (minced) into the meatballs. I also added about 3-4 regular sized garlic cloves (grated) into the sauce.
Directions

Bring a large pot of salted water to a boil over high heat. Add the pasta and cook until tender but still firm to the bite, stirring occasionally, about 8 to 10 minutes.

In a medium bowl, stir together the bread crumbs, parsley, eggs, milk, ketchup, Romano cheese, and the salt and pepper. Add the chicken and gently stir to combine.

Using a melon baller (or a teaspoon measure), form the chicken mixture into 3/4-inch pieces. With damp hands, roll the chicken pieces into mini meatballs.

In a large (14-inch) skillet, heat the oil over medium-high heat. Working in batches, add the meatballs and cook without moving until brown on the bottom, about 2 minutes. Turn the meatballs over and brown the other side, about 2 minutes longer. Add the chicken stock and tomatoes. Bring to a boil. Using a wooden spoon, scrape up the brown bits that cling to the bottom of the pan. Reduce heat to low and simmer until tomatoes are soft and meatballs are cooked through, about 5 minutes. Drain the pasta, reserving about 1 cup of the pasta water. Transfer pasta to a large serving bowl and add the Parmesan. Toss to lightly coat orecchiette, adding reserved pasta water, if needed, to loosen the pasta. Add the meatball mixture, mozzarella cheese, and 1/2 cup of the basil. Gently toss to combine. Garnish with the chopped basil.

Notes/Results:
We loved this recipe with the adaptations. I think that Giada had children in mind when writing this recipe and therefore wrote it on the bland side, without a lot of aromatics. It is a very kid-friendly dish, but the meatballs could easily be spiced up however you like. I think it's one of those recipes that you have to just build on and take in your own direction. I'll definitely be making it again and I'm really looking forward to that little container of leftovers that I hid in the fridge.

Now cooking the recipes of Giada De Laurentiis

Sunday, October 17, 2010

Trick-or-Treat Turnovers


These Trick-or-Treat Turnovers are lots of fun for the kids (and adults too)! Canned biscuit dough is flattened to a four inch circle and filled with a beef filling. A second biscuit is flattened into another 4 inch circle and carved just like a pumpkin. The carved biscuit is placed over the biscuit with the meat mixture and pinched to seal the edges. Each Trick-or-Treat Turnover is brushed with a lightly beaten egg and baked until golden, about 15 minutes.

The filling for the Trick-or-Treat Turnovers can easily be switched to anything your heart desires. The possibilities are endless. You could even build a little "build your own station" with lots of chopped up little fillings and different cheese so that each person could customized theirs to their own liking. Either way, it really is a very fun way to spend time together in the kitchen.

Trick-or-Treat Turnovers
Adapted from Taste of Home Ultimate Halloween Magazine, also found online HERE
Makes 8 very large turnovers
1/2 pound of ground beef (I used 95% lean)
1 tablespoon finely chopped onion
4 ounces cubed part-skim mozzarella cheese
1/4 cup prepared mustard (I subbed tomato paste)
2 tubes (16.3 ounces each) large refrigerated flaky biscuits (I used Grands Golden Wheat,Reduced Fat)
1 egg, lightly beaten

In a large skillet, cook beef and onion over medium heat until meat is no longer pink; drain. Add cheese and mustard; cook and stir until cheese is melted. Cool slightly.

Flatten each biscuit into a 4-in circle; place four biscuits in each of two greased 15-in x 10-in x 1-in baking pans. Spoon 2 heaping tablespoons of meat mixture onto each.

Using a sharp knife or cookie cutters, cut out jack-o'-lantern faces from remaining biscuit circles; place over meat mixture and pinch edges to seal tightly. Reroll scraps if desired and cut out stems for pumpkins.

Brush with egg. Bake at 350F for 10-15 minutes (mine took about 20 minutes) or until golden brown.

Notes/Results:
These turnovers are probably our favorite Halloween-inspired recipe so far. Everyone really had a great time and enjoyed customizing their own pumpkin. I'm thinking of making these for our neighborhood Halloween party and creating a build your own station for the kids. There are a couple of notes worth sharing. The turnovers themselves are quite big. I think it would be possible to cut one biscuit in half and use one one biscuit to make each turnover. Also, depending on the filling they can be a little on the dry side. I think they would be great served with a dipping sauce on the side. Depending on your filling you could use honey mustard, marinara, cheese sauce, or barbecue sauce.

I am submitting these little handheld Halloween treats to my friend Deb at Kahakai Kitchen for her Souper Sundays event. Happy 2nd birthday Souper Sundays!


I am submitting this to my friend Brenda at Brenda's Canadian Kitchen for her weekly celebration of cookbooks, Cookbook Sundays.

I am also submitting these turnovers to my friend Roz over at La Bella Vita for her Seasonal Saturdays event.

Friday, October 15, 2010

World Bread Day: Italian Pub Burgers on Mini Ciabatta Rolls


The two-step bread making process has been intimidating me for a long time, but I finally decided to give it a whirl. I owe it all to World Bread Day. It was the final push I needed to get in the kitchen and just do it. No more procrastination. It was time to face my fears.

My inspiration for World Bread Day was Giada's Italian Pub Burgers, which are served on beautiful Ciabatta Rolls. Enamored with those little Ciabatta Rolls in Giada's book, I decided to make my own for World Bread Day. Having just received Nick Malgieri's new book, Bake!, I decided to use his recipe for Ciabatta dough and adapt it to make 16 Mini Ciabatta Rolls.

It all began with a simple yeast-based sponge dough. A simple combination of bread flour, water, and yeast. It took all of 5 minutes to prepare and couldn't have been simpler.

The next day, I mixed all of the sponge dough with more bread flour, yeast, salt and water to make the Ciabatta dough. From this point on, this dough was a huge labor of love.

I mixed the dough with my Kitchenaid for 3 minutes and let the dough rest for 10 minutes. Then I did it again. Mix the dough for 3 minutes, let it rest for 10. I oiled a large bowl and let the dough rest for 30 minutes. When the dough was removed from the oiled bowl, I formed a rectangle and folded the dough in to make three layers. I turned the dough 90 degrees and folded it, yet again, into 3 layers. After the first folding, the dough had to rest another 15 minutes. When I read the words "repeat this process" I wanted to scream. After resting for 15 minutes, I removed the folded dough and folded it into three layers two more times. Big surprise - yep! Another 15 minutes of resting. After lots of folding and resting, I turned the dough over so that the fold was underneath and formed it into a 10-inch square. I bet you can guess what happened next. Yep, the dough had to rest for another 30 minutes. Ugh! After the dough rested for 30 minutes, I cut the 10-inch square of dough into 16 mini rolls. I placed the rolls onto a baking sheet lined with cornmeal and covered them with a kitchen towel for yet another 30 minute rest.

In the end, we loved the rolls. They were amazingly light and delicate with a wonderful taste and texture. I did notice that my rolls were rather pale. I was terrified of overcooking them, but maybe I should have left them in the oven to develop more color? Not sure.
The Mini Italian Pub Burgers were unbelievably delicious. My favorite Giada recipe to date. The burger itself is a combination of beef, lots of Parmesan cheese, garlic, parsley, and tomato paste. It's topped with Taleggio cheese(I used Fontina) and a basil leaf. Not only is it pretty to look at, but it is cheesy wonderful deliciousness, especially when served on a homemade Ciabatta roll.
Italian Pub Burgers
Adapted from Giada at Home
Serves 8
Vegetable or canola oil, for the grill
2-1/4 pounds ground chuck
3/4 cup freshly grated Parmesan cheese
1/2 cup packed fresh flat-leaf parsley leaves, finely chopped
3 garlic cloves, finely chopped
3 tablespoons tomato paste
1-1/2 tsps. salt
1/4 teaspoon freshly ground black pepper
8 small ciabatta rolls, sliced in half
1/4 cup olive oil
8 slices (4-1/2 ounces) Taleggio cheese (I used fontina)
8 large basil leaves

Place a grill pan over medium-high heat or preheat a gas or charcoal grill. Lightly oil the grill pan or grilling rack with vegetable oil.

In a large bowl, combine the ground chuck, Parmesan cheese, parsley, garlic, tomato paste, salt and pepper. Using clean hands, gently mix the ingredients and form into 8 patties, each about 1 inch thick and 4 inches in diameter.

Grill the burgers for 3 minutes on each side, until coked to medium.

Brush the cut side of each roll with the olive oil and toast on the grill for 1 to 2 minutes, until slightly golden.

To serve, put 1 mini burger on the bottom half of each of the rolls. Divide the Taleggio cheese on top of the burgers. Place a basil leaf over the cheese and put the other half of each roll on top.

Note: I reduced the burger portion of this recipe in half to make 14 mini burgers.

Happy World Bread Day!

French Fridays with Dorie: Spicy Vietnamese Chicken Noodle Soup


I have to say that I am loving all of Dorie's recipes and her Spicy Vietnamese Chicken Noodle Soup is no exception!

In her book, Around the French Table, Dorie's Spicy Vietnamese Chicken Noodle Soup is white and very creamy in appearance. This silky white appearance comes from the use of coconut milk, which we all know is some really great stuff! I used light coconut milk and added quite a bit of soy sauce to my version. I'm wondering if that's why my soup took on a golden color? Either way, it was absolutely delicious garnished with slices of cayenne pepper, hot chili oil, cilantro, Thai basil, and a little wedge of lime on the side.

A perfectly flavored and comforting bowl of soup that is healthy and delicious. I know that I'll be making this one again.

Next Friday: hachis Parmentier

Tuesday, October 12, 2010

Italian Baked Chicken with Pastina


I hit the jackpot at the grocery store the other day. Barilla's Pastina was on sale for $.39 cents a box. We all know that pasta isn't expensive, but $.39 cents a box? That's just a steal!

I love a good deal about as much as I love pasta, so you can imagine what I did to their display. I emptied it. Yep! I pretty much took every box that was within my reach. You know what I was thinking? YOU CAN NEVER HAVE ENOUGH PASTA!

When my husband carried in the groceries he noticed several grocery bags filled with little blue boxes. Curiously he emptied the bags and lined up the little blue boxes on the counter. Fourteen boxes of pastina sat there staring up at him. It was at that moment when I wondered if I had went a little overboard. What do you think? How many boxes would you have bought?

Needless to say, we've been eating and enjoying lots of pastina. I'm actually really happy that I bought so many boxes because they've been great to have on hand. The little stars are so cute, the kids love them, and they cook in about 4-5 minutes. They are perfect for busy weeknight meals. In fact, we've enjoyed them so much that I chose to use them for this week's I Heart Cooking Clubs theme, which is Served Family Style.
Italian Baked Chicken with Pastina
by Giada De Laurentiis, recipe found on Food Network
* 1 cup pastina pasta (or any small pasta)
* 2 tablespoons olive oil
* 1/2 cup cubed chicken breast (1-inch cubes)
* 1/2 cup diced onion (about 1/2 a small onion)
* 1 clove garlic, minced
* 1 (14.5-ounce) can diced tomatoes with juice
* 1 cup shredded mozzarella
* 1/4 cup chopped fresh flat-leaf parsley
* 1/4 teaspoon kosher salt
* 1/4 teaspoon freshly ground black pepper
* 1/4 cup bread crumbs
* 1/4 cup grated Parmesan
* 1 tablespoon butter, plus more for buttering the baking dish

Directions

Preheat the oven to 400 degrees F.

Bring a medium pot of salted water to a boil over high heat. Add the pasta and cook until just tender, stirring occasionally, about 5 minutes. Drain pasta into a large mixing bowl.

Meanwhile, put the olive oil in a medium saute pan over medium heat. Add the chicken and cook for 3 minutes. Add the onions and garlic, stirring to combine, and cook until the onions are soft and the chicken is cooked through, about 5 minutes more. Put the chicken mixture into the bowl with the cooked pasta. Add the canned tomatoes, mozzarella cheese, parsley, salt, and pepper. Stir to combine. Place the mixture in a buttered 8 by 8 by 2-inch baking dish. In a small bowl mix together the bread crumbs and the Parmesan cheese. Sprinkle over the top of the pasta mixture. Dot the top with small bits of butter. Bake until the top is golden brown, about 30 minutes.

Notes/Results: This is one of those kid-friendly meals that the whole family will enjoy. We all loved the crispy and buttery topping made from breadcrumbs, Parmesan and butter. I also think this recipe lends itself well to adaptations. Next time, I'd like to sneak in more veggies!

Currently cooking the recipes of Giada De Laurentiis!

Sunday, October 10, 2010

Michael Symon's Mom's "Bellybuster" Lasagna


This lasagna is definitely a bellybuster! In total there is four pounds of meat, three pounds of cheese, one pound of lasagna noodles, as well as some other seasonings and flavorings. This recipe for lasagna was the recipe that Michael Symon grew up eating every Wednesday night, his Mom's recipe.

Michael says that he could smell the lasagna baking from houses away and I believe it. It was a cool day when I made this lasagna and I had all the windows open. My daughter and her friends were playing outside. Once the meat hit the pan and began to sizzle there were two ten year old boys standing at my window. I had to laugh. I always knew that most men loved meat. I guess I just didn't know that it started at such an early age.

Michael says "You could smell the lasagna baking houses away, and Wednesday was the only night of the week that I was more than happy to come in from outside and be early for dinner."

Mom's Lasagna
Serves 8 (easily serves 10 to 12)
1/2 cup olive oil
1 onion, diced
4 garlic cloves, minced
kosher salt
1 pound pork neck bones (**note below)
1 pound ground veal
1 pound ground beef
1 pound spicy Italian sausage, loose or removed from the casing
1/2 cup dry white wine
4 cups chopped peeled tomatoes, or 1 28-ounce can San Marzano, with their juice
3 bay leaves
1 pound dried lasagna noodles
2 pounds whole-milk ricotta cheese
1/4 cup chopped fresh flat-leaf parsley
1/4 cup chopped fresh basil leaves
1/4 cup chopped fresh oregano leaves
2 large eggs
1 pound fresh mozzarella cheese, grated
1/2 cup grated Parmesan cheese

In a large Dutch oven or heavy pot, heat the olive oil over medium heat. Add the onion, garlic, and a three-finger pinch of salt and sweat them until they're translucent, 2 minutes. Add the neck bones and brown them, about 5 minutes. Add the ground veal and beef and sausage, season with another healthy pinch of salt, and continue cooking until the meat is browned, about 10 minutes. Add the white wine, tomatoes and their juice, and the bay leaves, scraping the bottom of the pot with a wooden spoon, making sure to get all of the browned bits into the sauce. Season the sauce with the salt and simmer for 2 hours over medium heat. Remove the bay leaves and neck bones and let cool. Skim any fat that rises to the surface.

Bring a large pot of water to a boil. Add enough salt so that it tastes seasoned and allow the water to return to a boil. Add the noodles and cook until al dente. Drain well and set aside.

Meanwhile, in a medium bowl mix together the ricotta, parsley, basil, oregano, and eggs with a pinch of salt.

Preheat the oven to 350F.

In a lasagna pan 9X13 inches is optimal - ladle about 1 cup sauce on the bottom. Arrange a layer of noodles on this followed by a layer of sauce and then some of the ricotta mixture, smoothing it with a spatula to the edges. Repeat the process until the pan is full. Finish with a final layer of noodles, sauce, the mozzarella, and Parmesan.

Cover the lasagna with foil and bake for 1 hour. Uncover and bake for 30 minutes. Let cool for 30 minutes before cutting and serving.

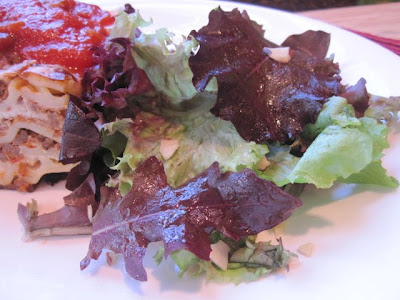
I served the lasagna with a green salad and Michael's Red Wine Vinaigrette.

Red Wine Vinaigrette
Makes About 1-1/2 cups
1 tablespoon minced shallot
1 teaspoon minced garlic
1/2 cup red wine vinegar
1/2 teaspoon kosher salt
1-1/4 cups extra-virgin olive oil
1 tablespoon chopped toasted almonds (optional)
1 teaspoon diced seeded fresno chile pepper (optional)
2 tablespoons sliced fresh mint (optional)
Combine the shallot, garlic, vinegar and salt in a medium mixing bowl. Whisk in a few drops of the oil and then begin adding the oil in a thin stream, whisking continuously. After all the oil has been incorporated, whisk in any optional ingredients you may be using.

Notes/Results:
The lasagna received rave reviews. My husband was more than pleased with this meaty version and declared it delicious. You could really taste both the flavors from the beef, as well as the pork. This is not a super saucy lasagna. Since the meat and tomato mixture simmers for 2 hours most of the tomato sauce cooks out. We enjoyed this most served on tomato sauce or with extra tomato sauce poured on top. Michael's Red Wine Vinaigrette and a green salad was the perfect accompaniment.

This brings me to my question regarding pork neck bones. Have any of you ever cooked with them? If so, what did you think?

I chose Michael's lasagna recipe because I was curious about using pork neck bones. I didn't anticipate any issues with them, but found that the bones splintered off into several small pieces after simmering for 2 hours. Does anyone know if this is a common problem when using pork neck bones?

I am submitting this to Symon Sundays hosted by Ashlee of Veggie By Season.

I am also submitting this to Brenda of Brenda's Canadian Kitchen
in celebration of her Cookbook Sundays event.