Showing posts with label beans & legumes. Show all posts

Friday, July 4, 2025

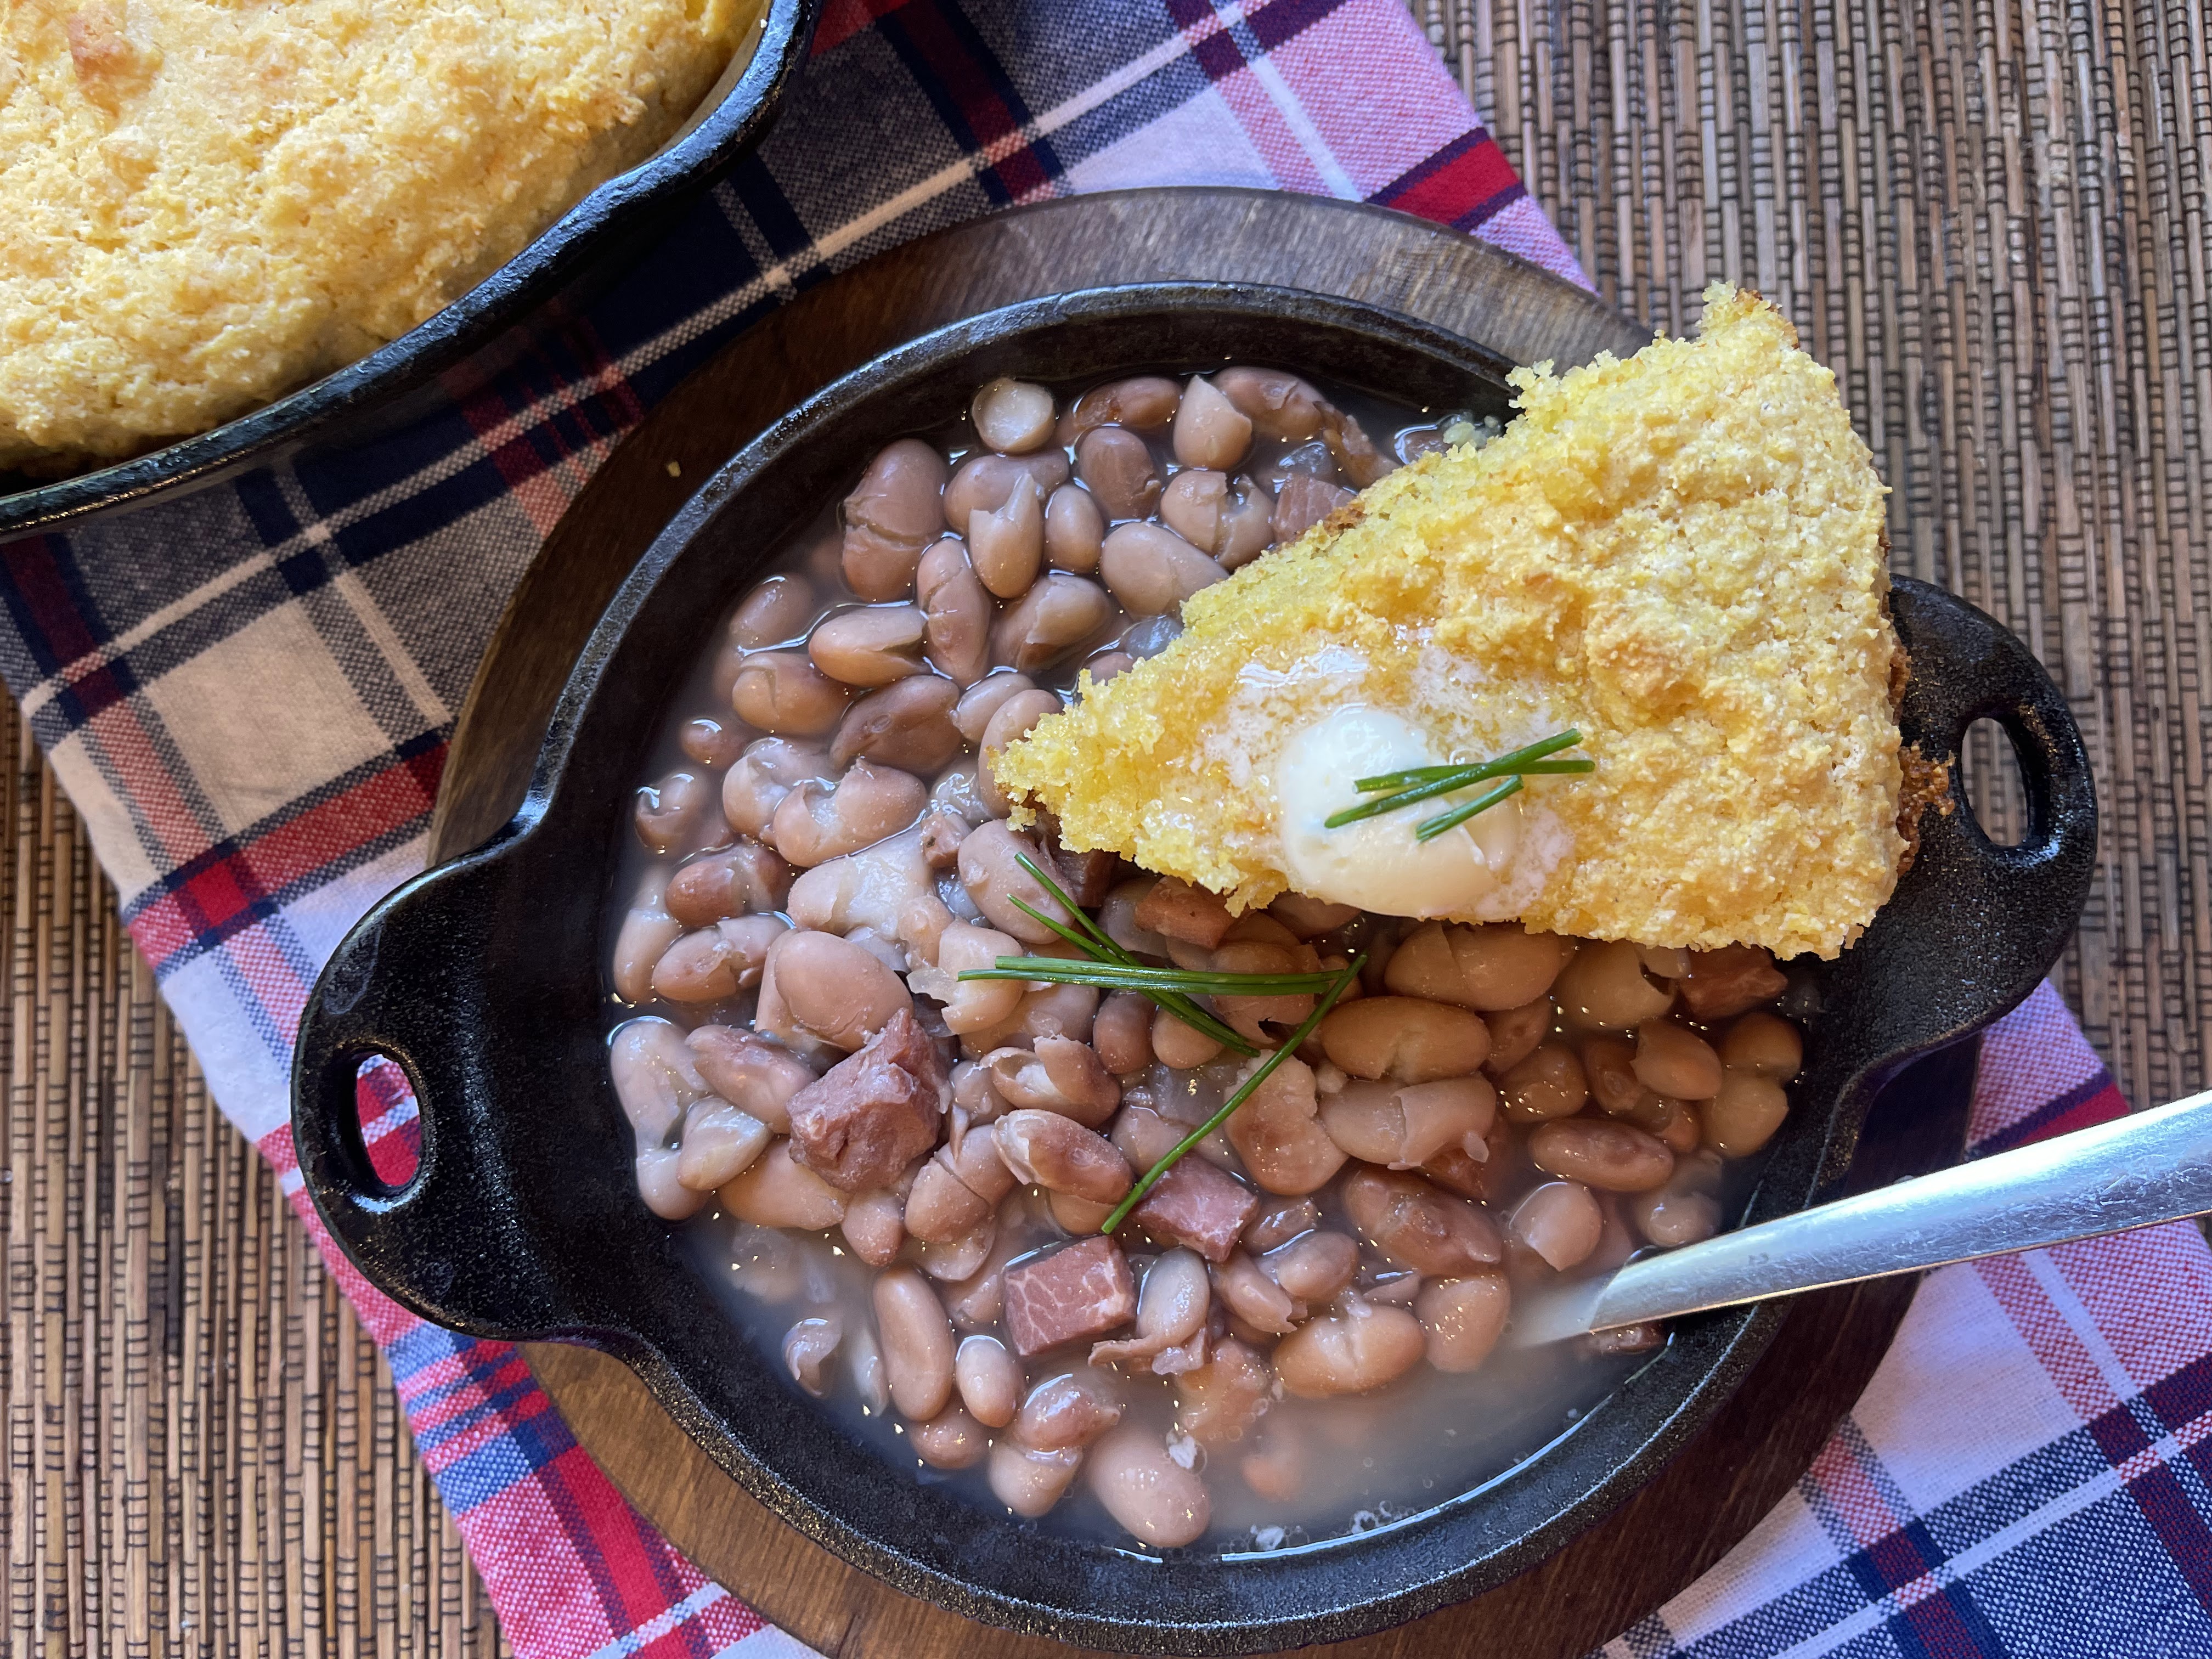
Southern Summer Series: Just A Few Miles South #6: Whitesburg Soup Beans and Buttermilk Cornbread!

Every summer I like to chose a cookbook or a special focus and do a summer cooking series. Some of the summer series that I've done in the past are: popsicles; ice creams; cookies; salads; and healthy recipes. One series I've always wanted to do is a series of southern summer recipes. So, this summer I chose a local cookbook from James Beard Nominee, Ouita Michel. Each week I will be cooking recipes from Ouita's Just A Few Miles South Cookbook

We're over halfway through with our Southern Summer Series, which is kinda sad because that means that summer is a little over halfway over. But, things are still delicious so that's good. This week we have a Kentucky staple from the hills of Appalachia, Whitesburg Soup Beans and Buttermilk Cornbread.

This is complete and total comfort food and it's really not all that unhealthy either. 

The beans take about 7 hours, four to five hours to soak and then another two hours to cook, so plan accordingly. The cornbread only takes about 20-30 minutes, and you should serve it as hot as can be straight from the skillet so have the beans hot and ready to go!

The soup beans are mild but flavorful and comforting and they pair so dang well with the Buttermilk Cornbread. 

When it comes to the cornbread, try to save yourself some bacon fat to season the bottom of the cast iron pan before adding the cornbread batter in. The cast iron pan and the bacon fat heat up in the pan and the pan should be really hot when you pour the cornbread batter in. You should hear a sizzle. This ensures a really nice crust on the bottom. The skillet cornbread bakes up fast, 15 minutes or so and you wanna serve it straight away with a nice ice cream size scoop of butter on top.

Now you're ready for total comfort food. Ladle some soup beans in a bowl and cut yourself a wedge or two of cornbread and get to dippin'!  


Whitesburg Soup Beans

Adapted from Just A Few Miles South

by Ouita Michel

Makes 2 quarts

1 pound dried pinto beans

1 cup chopped white onion

5-6 ounces boneless country ham, diced

1-1/2 tablespoons minced garlic

2 teaspoons Worcestershire sauce

2 teaspoons hot sauce

2 teaspoons kosher salt

 1 teaspoon freshly ground black pepper

Pick pinto beans for pebbles, rinse until clean, and place in a 4-quart Dutch oven. Cover with cold water and soak 5-6 hours. Drain. Return to the pot, cover beans with about 3 quarts of water, and bring to a boil over medium-high heat. Add remaining ingredients. Cover and bring to a boil, stirring occasionally. Turn down to a slow simmer and continue to cook until the beans change color and are slightly softened but not mushy, about 2 hours. Taste for seasoning. Serve with Buttermilk Cornbread or Hoecakes.


Buttermilk Cornbread

Adapted from Just A Few Miles South

by Ouita Michel

Makes 1 large skillet bread or 12 wedges

1-1/3 cups white or yellow cornmeal

1/2 cup all-purpose flour

1/2 teaspoon baking soda

1 teaspoon baking powder

1/2 teaspoon salt

1 large egg, beaten

1-1/3 cups buttermilk

2 tablespoons butter, melted

1 tablespoon butter or bacon drippings

Place a 9-inch cast-iron skillet in the oven and preheat to 400F. In a medium bowl, mix together cornmeal, flour, baking soda, baking powder, and salt. Add egg, buttermilk, and melted butter and mix well with a whisk. Carefully remove the hot cast-iron skillet from the oven and drop in 1 tablespoon butter or bacon drippings, swirl quickly to coat the pan, and return to the oven for another 2-3 minutes, until the butter bubbles and turns dark golden brown. Remove the skillet from the oven again and pour in the batter. Return immediately to the oven and bake 18-23 minutes, until the edges are brown and the center is firm to the touch. Cut into 12 wedges. Serve immediately with butter and/or Whitesburg Soup Beans. 


 Southern Summer Series: Just A Few Miles South


Sunday, December 15, 2024

How Sweet Eat's Cheesy Double Bean Quesadillas with Guacamole and Salsa


I've talked about my love for beans several times over the years. Beans just hang out in the pantry being all cheap and delicious and healthy. Waiting for you to use them in something delicious, satisfying, and healthy. What's not to love?

Cheesy Double Bean Quesadillas? Yes, please. Made all festive and delicious with some green Guacamole and red Salsa. Double yes!

If you're looking for something easy, economical, and fun to help save time and money this Christmas, then this recipe is it!

All you need are some flour tortillas, 1 can of black beans, 1 can of cannellini beans, pepperjack cheese, sharp white cheese, and butter or oil. Then for the Guacamole I used 2 avocados, cilantro, garlic, lime juice, and salt. I almost always have some sort of salsa on hand. 

This is a meal that can come together for under $10 and less than 30 minutes. You simply grate the cheeses, mash the beans, whip up a fresh guacamole and then cook those quesadillas low and slow until the insides are hot and the tortillas are golden and crisp.

We loved these and will be having them again!

Cheesy Double Bean Quesadillas 

Adapted from How Sweet Eats

by Jessica Merchant

Makes 2/Serves 4-6

1 can black beans

1 can cannellini beans

2 ounces sharp white cheddar cheese, freshly grated

2 ounces pepperjack cheese, freshly grated

4 tortillas, about 10"

butter or olive oil, for frying

Guacamole and salsa, for serving

Guacamole 

Adapted from Homesick Texan

by Lisa Fain

Serves 4

2 ripe Haas avocados, peeled, pitted, and cut in half

2 cloves garlic, minced

1 Serrano chile, seeded and diced

1/2 cup chopped cilantro

1 tablespoon freshly squeezed lime juice

1/2 teaspoon salt

To Make the Guacamole: Mash the avocado with a fork in a bowl or Mexican mortar and pestle (molcajete) until desired consistency. Stir in the garlic, Serrano, cilantro, lime juice, and salt, then taste and add more salt if desired. Serve immediately. 

To Make the Quesadillas: In a large bowl, mash together black and cannellini beans with a fork, spoon or potato masher. Heat an electric griddle or skillet over low heat. Add a bit of butter or olive oil.

Place 2 tortillas down, covering each with a bit of both cheeses, then evenly distribute the mashed bean mixture (feel free to warm the bean mixture slightly) over top. Place the tortilla on the griddle or skillet, then cover bean mixture with the remaining cheese and the other tortilla. Cook until the bottom is crispy and golden brown, then gently flip and cook for another 2-3 minutes until beans are warm and tortilla is crispy and golden. You will want to cook the quesadillas low and slow to warm the beans through and melt the cheese. When they tortillas are golden brown and to your liking, take off the heat, cut, and garnish with guacamole and/or salsa.

Red and Green @ IHCC!
 

Sunday, March 7, 2021

Ottolenghi's Balilah {The Perfect Healthy Snack}

Ottolenghi writes, "In Jerusalem, Balilah is a popular Palestinian street food consisting of fresh chickpeas seasoned with cumin and lemon juice and it makes the most gratifying snack." He also states, "On the corner of the souk in the Old City stood the very popular balilah man. He had large piles of freshly cooked chickpeas on his stall, steaming and beautifully decorated with parsley and lemon. Like a magician, he used to whip the balilah into a newspaper cone in a flash and serve it to the eager customer."

I don't know about you, but I am a bean lover and that sounds heavenly. I have wanted to make this recipe forever and I am so glad I have finally got around to it! It is the perfect snack!

This balilah is so quick and easy to whip together, especially with canned chickpeas. Simply drain the beans, add chopped parsley, sliced green onions, chopped lemon, olive oil, cumin, salt and pepper. Give it all a mix and you are good to go. Of course, I feel this is better even the next day when the flavors have had a chance to meld together. You can even add chopped tomato or cucumber, or even feta cheese. You can eat this as a snack on its own, or served in pita or with pita chips. You can eat it warm, room temp, or cold straight from the fridge. It is also great served over chicken or fish or thrown into a salad. It is so versatile and delicious and it certainly won't last long!


Balilah

Adapted from Jerusalem

by Yotam Ottolenghi & Sami Tamimi

Serves 4, or more

1 cup dried or 2 (15oz.) cans  chickpeas

1 teaspoon baking soda, if using dried beans

1 cup chopped parsley

2 green onions, thinly sliced

1 large lemon

3 tablespoons olive oil

2-1/2 teaspoon ground cumin

salt and freshly ground black pepper

If Using Dried Beans: The night before, put the chickpeas in a large bowl and cover with cold water at least twice their volume. Add the baking soda and leave at room temp to soak overnight. Drain the chickpeas and place them in a large saucepan. Cover with plenty of cold water and place over high heat. Bring to a boil, skim the surface of the water, then decrease the heat and simmer for1 to 1-1/2 hours, until the chickpeas are very soft but still retain their shape. 

If Using Canned Beans: Use two 15.5 oz. cans! Drain the chickpeas and place in a large bowl.

To Make The Balilah: Put the parsley and green onions in a large mixing bowl. Peel the lemon by topping and tailing it, placing on a board, and running a small sharp knife along its curves to remove the skin and white pith. Discard the skin, pith, and seeds and coarsely chop the flesh. Add the flesh and all of the juies to the bowl.

Once the chickpeas are ready, drain and add them to the bowl while they are still hot (If you are using canned beans you can heat them up if you like). Add the olive oil, cumin, 3/4 teaspoons salt, and a good grind of pepper. Mix well. Allow to cool down until just warm, taste for seasoning, and serve.


Sunday, January 17, 2021

Split Pea Soup with Crispy Kielbasa {And A California Tale}


Imagine this, it's the very early 00's and me and my husband are visiting California. We're leaving L.A and driving "the 5" all the way to San Francisco. Now, I don't know what we were expecting, but I can tell you this experience did not end up anywhere near anything we had dreamed up in our east coast minds. I don't know if "the 5" has changed much in the last 20 years, but at the time it was a lot of nothing: Six Flags, some brown mountains, nothing but brown dirt and maybe mountains, aqueducts, signs for orchards, windmills, thousands upon thousands of cows, and then a pea soup restaurant called Pea Soup Anderson's. Now, if you're gonna be making this drive you're gonna get hungry and you're probably not gonna be craving pea soup, but that's all you're gonna get. So pea soup it is!

Now, in all of my 45 years, I've never felt more like I was in an episode of The Twilight Zone more than the day we made that drive. So, in the middle of nowhere, we drove up to a pea soup restaurant thinking, "what in the absolute world is going on?" I can remember inhaling dust while walking into the restaurant, everything was so brown and so dry, and when we walked inside I was taken aback. The inside of the restaurant was pea green too! Mind blown. Still is. I remember being totally tripped out. I know we ate the pea soup and some bread. I just can't remember the pea soup because everything else was so darn out of place that day. I'm thinking I must've liked it because I remember buying pea soup and eating it at work in the years that followed.

Fast forward 20 years and me and my husband still laugh about our ride down "the 5". Then I came across Ina Garten's recipe for Split Pea Soup with Crispy Kielbasa and I thought, "why the heck not?" It took me weeks to find a ham hock and the rest was easy peasy.

I have to say we were not overly impressed. Don't get me wrong, the soup is good and if you love split pea soup then you would love this recipe! The crispy kielbasa is really great and the soup is A LOT better the second day, but it's just not something that we crave or feel we need to eat on a regular basis. So, if split pea soup is your jam, then you'd probably love this recipe and a drive up "the 5". But if split pea soup is not your jam, then you might wanna drive up the 101 if you're ever in California, and skip this recipe.


Split Pea Soup with Crispy Kielbasa

Adapted from Modern Comfort Food

by Ina Garten

Serves 6

olive oil

2 cups chopped leeks, white and light green parts, spun dried (2 leeks)

1-1/2 cups chopped yellow onion (1 large)

2 cups 1/2" diced, scrubbed carrots (3 large)

1 tablespoon minced garlic (3 cloves)

1 pound dry green split peas

8 cups good chicken stock (preferable homemade)

1 smoked ham hock

8 fresh thyme sprigs, tied with kitchen twine

2 large fresh bay leaves

salt and pepper

12 ounces smoked kielbasa, halved lengthwise and sliced diagonally in 1/4" thick pieces

minced fresh parsley, for serving

Heat 1/4 cup olive oil in a large (11 to 12") pot or Dutch oven, over medium-high heat. Add the leeks, onion, and carrots and cook for 7 to 8 minutes, stirring occasionally, until tender and starting to brown. Stir in the garlic and cook for one minute. Stir in the peas to coat with oil and cook for one minute. Add 8 cups of the chicken stock, 2 cups water, the ham hock, thyme bundle, bay leaves, 2 teaspoons salt, and 1 teaspoon pepper. Bring to a boil, lower the heat, and simmer, partially covered, for 1-1/4 hours, stirring occasionally, until the peas are very tender and falling apart. After 45 minutes, stir more frequently, scraping the bottom of the pot to be sure the soup doesn't burn.

Discard the thyme bundle, bay leaves, and ham hock. Transfer 2 cups of the soup to the bowl of a food processor fitted with the steel blade and puree. Return the puree to the pot, adding more chicken stock or water if the soup is too thick.

To serve, heat 2 tablespoons olive oil in a medium (10 to 11") saute pan over medium heat. Add the kielbasa and saute for 5 to 6 minutes, tossing occasionally, until the kielbasa is browned. Serve the soup hot with the kielbasa and parsley sprinkled on top.


Sunday, October 11, 2020

Giada's California Turkey Chili w/ Quinoa and Pine Nut Pilaf

 
Fall break is a glorious invention. An entire week off in the beginning of October to enjoy the most beautiful and wonderful time of year. It is simply the best! We went to the zoo, we caught up on appointments, we played board games, we read books outside, we binge watched shows, and we slept in! 

We are closing a beautiful week spent outdoors with a rather rainy gloomy day, but I am ok with that because it is perfect weather for making chili, Giada's California Turkey Chili w/ Quinoa and Pine Nut Pilaf to be exact. This is a recipe I've been wanting to make for ages and I'm so happy to finally be getting around to it.

Now, 99% of our world makes absolutely ZERO sense right now and to illustrate that, we are going back to "in person" school this week right as our state suffers the most coronavirus cases it has ever had! What the what? Does anything make sense anymore? Well, I'll tell you what does make sense: chili. Chili always makes sense. Chili is perfect for meat eaters, vegetarians and vegans. Chili works for everyone. 

So as I mask up and head back to the germiest place known to man, I will pack this chili and take delight in something that does actually make sense. A delicious and healthy chili packed with creamy white beans and chunky bits of savory turkey packed in an extremely flavorful broth served over the most delicious quinoa and pine nut pilaf, which helps to give the chili great texture. 

Now, I will confess that I am partial to Giada's recipes. We usually almost always love them, but this chili is a step above the rest. It really is SO GOOD! If you're wanting to try your hand at a new chili recipe, this one is solid gold. I absolutely loved all the flavors from the poblanos, onions, celery, tomato paste, and spices. You can add garnishes if you like, but really and truly this chili doesn't need anything added to it. It is simply perfect the way it is! Five stars, Giada! 


California Turkey Chili w/ Quinoa and Pine Nut Pilaf

Adapted by Food Network

by Giada DeLaurentiis

Serves 4-6

For the Chili

2 tablespoons olive oil

4 large cloves garlic, smashed, peeled and chopped

2 large poblano chiles, stemmed,seeded and diced

1 celery stalk, chopped

1 large onion, chopped

1-1/2 pounds ground turkey 

1 tablespoon all-purpose flour

4 tablespoons tomato paste

3 tablespoons chili powder

1 tablespoon ground cumin

2 teaspoons (packed) brown sugar

1 teaspoon dried Mexican oregano, crushed

salt and black pepper, to taste

1/2 teaspoon ground cinnamon*

1/8 teaspoon ground cloves*

3 cups chicken broth

One 15-16 ounce can cannellini beans, rinsed and drained

Simplest Quinoa and Pine Nut Pilaf, recipe below

Assorted garnishes, such as chopped onion, shredded Cheddar, chopped tomatoes, and/or sour cream

Simplest Quinoa and Pine Nut Pilaf

1-1/4 cups whole grain quinoa 

1-3/4 cups chicken broth

salt and pepper, to taste

1/3 cup chopped fresh cilantro or parsley

1/3 cup pine nuts

*Notes: I omitted the cinnamon and cloves because I don't care for those flavors in chili.

For the Chili: Heat the oil in a heavy, large pot over medium-high heat. Add the garlic, poblanos, celery and onions. Saute until the vegetables soften, 5 to 6 minutes. Add the turkey and saute until no longer pink, breaking up the turkey with the back of a spoon, about 7 minutes. Sprinkle the flour over and stir to blend. Add the tomato paste,chili powder, cumin, sugar, oregano, salt and pepper, cinnamon and cloves*. Cook 1 to 2 minutes, stirring to blend. Add the broth and beans. Bring to a simmer. Reduce the heat to medium-low and simmer until the flavors blend and the chili thickens to desired consistency, stirring often, 20 to 30 minutes. Season with more salt and pepper.

For the Quinoa Pilaf: Place the quinoa in a fine sieve. Rinse under cold running water 1 full minute. Set aside to drain. Bring the broth, salt and pepper to a boil in heavy, medium saucepan over medium-high heat. Stir in the quinoa. Cover, reduce the heat to medium-low and simmer until the quinoa is tender and all the broth is absorbed, about 15 minutes. Turn off the heat. Let the quinoa stand, still covered,for 10 minutes. Meanwhile, preheat the oven to 350F. Scatter pine nuts on a small rimmed baking sheet. Toast the nuts until golden, stirring occasionally, about 5 minutes. Cool on the baking sheet. Mix the parsley and pine nuts into the quinoa.

To Serve: Spoon Simplest Quinoa and Pine Nut Pilaf into deep bowls. Ladle chili over. Serve with garnishes, such as chopped radishes, pickled jalapeno, crumbled cheese, tortilla chips, and or pico de gallo. See list of garnishes above, as well.


Sunday, April 26, 2020

Ina Garten's Classic Hummus with Veggies {Perfect Quarantine Snack}!


As a bean lover, I almost always have lots of canned and dried beans on hand, especially chickpeas! Hummus is one of my favorite things on earth and I do not discriminate. Sure, I love a luscious and velvety hummus made from scratch like Yotam Ottolenghi makes, but I also love a quick puree made with canned chickpeas, like this Ina Garten recipe.

Luckily, this week I received lots of fun colorful veggies in my Misfits Market box. This meant I was able to throw together a classic hummus with lots of veggies for dipping.

If I were to offer any tips regarding the sourcing of ingredients, it would be this: This is the perfect time to take advantage of companies like Misfits Market (who deliver fresh organic produce direct to your doorstep) and it would also be the perfect time to sign up for a CSA or your local farmer's market!

I have been receiving my Misfits Market box every single week during quarantine and it has saved me. I am able to put together lots of different meals with the staples in my pantry, such as beans, pasta, grains, and eggs. In addition to Misfits, I have also signed up to order weekly from a local farmer's market.

I recommend that everyone try to source a local farmer's market that is practicing good social distancing.This is a direct source, and a sure way, to keep getting quality ingredients on your table!

Each week my farmer's market publishes a list of goods online. I've seen a wide range of goodies on there each week, pretty much everything one would NEED to live. Seriously, it is fabulous! I place my order online and when I arrive everything is NO CONTACT! I simply pop my trunk and someone (who is wearing a mask and gloves) places everything in my trunk and I drive away with all my fresh goodies. It's as simple as can be!

Then I am able to make fresh dishes like this hummus with veggies and feel good about my choices!

This is a classic everyday hummus and one I can see myself making over and over again, due to the ease. The recipe does call for hot sauce, which I thought a little odd, but I went ahead with it. I have to admit that I like my hummus pretty classic so I would skip the hot sauce next time around. If you like the heat then you would probably enjoy it.  I just prefer pure unadulterated hummus.

I am quite fond of serving hummus with pita, but right now I'm really trying to be healthy and pack in some vitamin C. Lucky for me, I received some baby bell peppers and just three of them have a whopping 260% of your vitamin C for the day. I also enjoyed this with thinly sliced mini cucumbers and the other classic veggies, such as carrots and celery. This made for a wonderfully delicious and healthy snack to keep in the refrigerator!


Classic Hummus
Adapted from Food Network
by Ina Garten
Makes around 2 cups

4 garlic cloves
2 cups canned chickpeas, drained, liquid reserved (this is equal to one can)*
1-1/2 teaspoons salt
1/3 cup tahini
6 tablespoons freshly squeezed lemon juice (2 lemons)
2 tablespoons water or liquid from can of chickpeas
8 dashes of hot sauce, if you like*
Veggies, pita, etc. for serving

 Notes: This recipe calls for one 14.5 oz. can of chickpeas. I love hot sauce, but I did not care for it in this recipe, so if you like a more classic hummus than feel free to omit it. I would definitely omit it the next time around. I love to garnish hummus with many different things: drizzle of olive oil, reserved beans, sumac, za'atar, herbs, feta cheese, and especially buttered and toasted pine nuts (my all-time favorite). I also love to serve hummus with pita, baby peppers, carrots, celery, cucumber, etc. Jazz it up and make it color because then it is very hard to resist!

Turn on the food processor or high speed blender and drop the garlic down into it and process until it's minced. Add the rest of the ingredients to the food processor (or blender) and process until the hummus is coarsely pureed (this is your personal preference - I processed until it was very smooth). Taste, for seasoning, and serve chilled or at room temperature.


Cooking what we can during Quarantine @ IHCC

Sunday, February 2, 2020

Madhur Jaffrey's South African Natal Red Kidney Bean Curry


Let the mustard seeds start popping! Last weekend I traded in some books at Half Price Bookstore, and it was must have been my lucky day, because I found a copy of Madhur Jaffrey's From Curries to Kebabs Recipes From The Indian Spice Trial from 2003. It was a massive score because I didn't even know this book existed and let me tell you, it is FULL of the most delicious and comforting curries, not to mention some delectable looking kebabs, and everyone loves a kebab.

There is sure to be one curry after another here on Stirring the Pot this winter. A quick look through the cookbook had me making a list of specialty ingredients my store doesn't carry.  Plus I needed to stock up on some necessary spices. Sometimes Amazon is a necessary evil and I reluctantly placed an order for some dried red hot chiles, dried curry leaves, cumin, hot curry powder, and some cumin seeds. A few days later I had all the necessary ingredients on hand to make several dishes in this book.

I set about by soaking my red kidney beans and adding baking soda to them, which was a trick I learned from Yotam Ottolenghi. The baking soda tenderizes the beans. The next day I set about cooking the beans so they would be ready the following day when it was time to make the curry. The baking soda trick worked because my beans only needed about half the cooking time suggested, around an hour. I saved my bean cooking liquid just in case. I was glad I did.

The next day I was making a delicious and comforting bean curry in under a half-hour.  I set about making the tomato mixture, adding all the fragrant spices and chiles, testing and tasting the mixture along the way. While taste testing, I found that while delicious, I wanted and craved more garlic, green chile, dried red chile, ginger. So I doubled all those ingredients.

The result was an extremely spicy, fragrant, flavorful, and comforting vegan curry that was an absolute dream over rice. I highly recommend this recipe. Again, it is perfect for people on all diets, healthy and nutritious, plus also vegetarian, vegan, and gluten-free.

I can already tell this Madhur Jaffrey cookbook is going to be one of my all-time faves. We've cooked with 19 chefs at I Heart Cooking Clubs and I can honestly say that Madhur's recipes have been the most reliable and are always a hit. I've yet to cook one that wasn't remarkable.


Natal Red Kidney Bean Curry
Adapted From Curries to Kebabs
by Madhur Jaffrey
Serves 6

1-1/2 cup dried kidney beans
1 teaspoon baking soda
3 tablespoons olive oil
3 whole dried hot red chiles
1/2 teaspoon whole brown mustard seeds
1/2 teaspoon whole cumin seeds
a generous pinch of ground asafetida*
10 to 15 fresh curry leaves, if available*
3 medium tomatoes (about 1 pound), grated on the coarsest part of a grater
1/4 teaspoon ground turmeric
1 teaspoon ground coriander
1 teaspoon ground cumin
1 to 2 fresh hot green chiles, finely chopped
1 clove garlic, crushed
1 teaspoon peeled fresh ginger, grated to a pulp
1 teaspoon sugar
1-1/2 teaspoons salt, to taste

Note: I used dried curry leaves because it was all I could get my hands on. I feel as though they worked fine. I did remove them prior to eating. Ground thyme can be substituted for ground asafetida. I have done it numerous times. I added double the garlic and ginger listed above for additional flavor and also for their immune support. The original recipe did not mention the bean cooking liquid, but I saved mine and added about a cup to the curry. I feel as though you would want to do the same as the tomato mixture isn't enough to create a comforting base without it.

Cover the beans generously in water, add the baking soda (helps to tenderize them), and leave to soak overnight. Drain the next day, put in a medium-large pan, add 6 cups of water, and bring to a boil. Partially cover with a lid, reduce the heat to low, and cook gently for 2-2-1/2 hours, or until the beans are tender. You will notice that you should have about a cup of bean cooking liquid leftover. Save this and use this later on when you add the tomato mixture.

Meanwhile, pour the oil into a medium pan and set over medium-high heat. When the oil is hot, put in the red chiles, mustard seeds, cumin seeds, and asafetida. As soon as the mustard seeds begin to pop, add the curry leaves, and tomatoes. Stir once, then add the turmeric, coriander, cumin, green chiles, garlic, ginger, sugar, and salt. Stir and bring to a boil. Reduce the heat to low and simmer gently for 5 minutes.

When the beans are tender, pour the spiced tomato mixture into the pan with the beans and the remaining bean liquid. Note: If you have over a cup or so of bean cooking liquid you may wish to strain some. Bring to a simmer, and cook, uncovered, on very low heat, for 20-25 minutes. 


Sunday, July 14, 2019

Ottolenghi's Hummus with Ful


Hummus is one of my very favorite things to eat.

If I had to guess, I'd say hummus is beloved the world all over the world. How do I know that? They sell over 20 variations and dedicate an entire refrigerator case to it in the supermarket.

If you love hummus as I do, then leave that storebought hummus at the supermarket because NO ONE will ever write a better hummus recipe than Yotam Ottolenghi. I've made several versions, and all of them are good....come on, it's hummus people, HOWEVER Yotam Ottolenghi takes hummus to a whole new level. EVERY SINGLE TIME!

Years ago I made Ottolenghi's Hummus Kawarma with Lemon Sauce which is his basic hummus recipe with chunks of seasoned lamb, toasted buttered pine nuts, and the most flavorful lemon sauce. It was heaven on earth, and to this day, it remains one of the best dishes I've ever made on my blog. You probably already know this because I have not stopped talking about it and I likely never will.

Ottolenghi's Heavenly Hummus Kawarma with Lemon Sauce

Today's hummus recipe is much different than Ottolenghi's Hummus Kawarma, starting with the hummus itself. Ottolenghi's Hummus with Ful begins with a tahini-based hummus, much thicker and heartier than his basic hummus. This hummus with the tahini is like velvet. It's so smooth and creamy and decadent. Top that hummus with ful, a paste made of fava beans, olive oil, garlic, lemon juice, and cumin. The ful is delightfully zingy from the hefty dose of lemon juice and carries a punch of flavor from the garlic and the cumin. When you pour the ful over the hummus you are in for a double bean flavor explosion. Then come more toppings: whole cooked chickpeas for texture, chopped parsley to add that herbaceous quality, a good dusting of paprika to add some earthiness, and more olive oil and lemon juice to round things out.

Proceed to have your hummus loving mind blown. This hummus was very good warm, but my eyes nearly rolled back in my head when I tasted it chilled. How in the world can something as humble as beans taste so very extrodinary? Is it just me?

Ottolenghi says to serve this hummus with onion wedges and quartered hard-boiled egg, which was very different than anything I've served with hummus before. I like onions, so I dunked an onion wedge in to the hummus and used it as a scoop...different, delicious, and not overwhelmingly oniony. Goes very well together. I love hard-boiled eggs and hummus, but thought they were just OK together so I'm not sure I'd mix the two together again. However, I absolutely LOVED eating this hummus with some warmed naan bread that I tore up and dunked right in. The naan bread is so soft and fluffy and it is so wonderful for dunking into this rich, decadent, heavenly hummus.

So, what are you waiting for? You have hummus to make! Go look up ANY Yotam Ottolenghi hummus recipe and get busy. It will change your life!


Hummus with Ful
Adapted from Plenty
by Yotam Ottolenghi
Serves an army

For The Hummus:
2-1/2 cups dried chickpeas
1-1/2 tablespoons baking soda
1-1/4 cups tahini paste
3 tablespoons lemon juice*
6 garlic cloves, crushed*
salt and pepper, to taste

For the Ful:
1-1/2 cups dried fava beans
1/3 cup olive oil
1/3 cup lemon juice
1 tablespoon ground cumin
4 garlic cloves, crushed
1 teaspoon salt

For the Garnish:
1/3 cup olive oil
1/3 cup lemon juice
1 teaspoon sweet paprika
6 tablespoons roughly chopped parsley
3 eggs, hard-boiled and quartered
1 medium red onion, cut into 6 wedges

Optional:
Pita, naan, crackers, and/or veggies for dipping and dunking

Soak the chickpeas and fava beans overnight. Place them in two separate bowls and cover with double their volume of cold water. Add 1 tablespoon baking soda to the chickpeas. Set both aside. The next day, drain and rinse both.

Place the soaked chickpeas and remaining baking soda in a medium saucepan and cover with double their volume of cold water. Bring to the boil, then simmer very gently for 2 to 3 hours (mine were cooked in less than 2 hours), or until totally soft and easy to mush. Add more water during cooking, if necessary, to keep them immersed. Drain them, retaining the cooking liquid**

Transfer the warm chickpeas to a food processor, reserving a few to garnish at the end, and add the tahini, lemon juice, garlic, and salt to taste. Blitz for a minute or two until totally smooth. Add some of the cooking liquid and blitz again. You want the mixture to be very soft, almost runny, but just holding its shape. Taste and add more salt if you like. (I found that I needed to add another clove of garlic and a few more tablespoons of lemon juice for more flavor). 

To make the ful place the fava beans in a medium saucepan and cover with double their volume of water. Simmer gently for about 3 hours (they may take longer), adding more water if necessary. By the end of the cooking time, hardly any liquid should be left in the pan (drain it out if needed) and the beans should have begun to disintegrate, or will do so easily when crushed with a fork. Remove from the heat and add the olive oil, lemon juice, cumin, garlic, and salt. Taste and adjust the seasoning.

To serve, spread the warm hummus in small individual plates. Spoon the ful in the center and drizzle the olive oil and lemon juice on top and around. Sprinkle with paprika, garnish with the reserved chickpeas, plenty of parsley, and serve egg and onion on the side. 


Sunday, December 9, 2018

Lentil, Sausage, and Brown Rice Stew


"House to myself. Quiet music playing. Chop. Slice. Sizzle
Stir. Nothing but my senses. I am at peace."

I love a quiet kitchen. Gives me time to think while I do some of my favorite things: chop, slice, stir. The sound of onions sizzling in the pan, and the aroma that follows shortly thereafter, hold the promise of good things to come.

Kitchen therapy is the best kind of therapy. Crafting something with my own two hands. It doesn't get any better than that.

This stew lends itself perfectly to kitchen therapy as I sliced, chopped, stirred, and smelled my way to happiness. Not to mention, I was even more satisfied at the chance to use up an abundance of brown rice and lentils I found languishing about in my pantry. I always feel quite accomplished when I use up all the bits and bobs laying about.

This is a soul-soothing wintry stew that comes together with humble ingredients and love. I'm convinced it holds the power to heal whatever ails you.
Ruth says, "In cold weather when we ponder what dish will provide comfort all weekend long, we decide with remarkable frequency to make this stew. The beauty of using brown rice is that it keeps its texture during the long cooking time (white rice becomes too soft). Adding about a pound of smoked sausage makes a great dish even better. For a vegetarian meal, use vegetable stock in place of the chicken stock"

Lentil, Sausage Brown Rice Stew
Adapted The Gourmet Cookbook
by Ruth Reichl
Serves 6-8

1 (28-ounce to 32-ounce) can whole tomatoes in juice
5 cups chicken stock 
3 cups water
1-1/2 cups lentils picked over and rinsed
 1 cup brown rice
3 carrots, halved lengthwise and cut crosswise into 1/4" wide pieces 
1 onion, chopped
1 celery rib, chopped
3 garlic cloves, minced
1 teaspoon chopped fresh thyme
1 bay leaf
1/3 - 1/2 cup minced fresh cilantro or flat-leaf parsley (to taste)
2 tablespoons cider vinegar, or to taste
salt and black pepper, to taste

 Combine tomatoes, with their juice, stock, water, lentils, rice, carrots, onion, celery, garlic, thyme, and bay leaf in a 6-quart heavy pot and bring to a boil. Reduce heat, cover, and simmer, stirring occasionally, until lentils and rice are tender, 45 to 55 minutes.

Stir in cilantro, vinegar, salt, and pepper and discard bay leaf. Stew will be thick, and it will continue to thicken as it stands; if desired, thin with additional hot chicken broth or water before serving.


Kitchen Therapy @ I Heart Cooking Clubs

Every Sunday @ Kahakai Kitchen


Sunday, February 4, 2018

Butternut Squash Hummus


It's Superbowl Sunday and we all know what that means: it's time to get your dip on! Now, most Superbowl parties have a variety of dips that are sinfully delicious, using copious amounts of cheese, mayo, and meat. Don't get me wrong, I do love all of those, but this time around I'm opting for a healthier option: Ina Garten's Butternut Squash Hummus. It's been on my go-to list for a long time!

I've always liked butternut squash, but I fell head over heels in love with it when I made Ina'a Butternut Squash and Ricotta Bruschettas. That recipe is so good it has me craving butternut squash on the regular, so I figured this recipe for Butternut Squash Hummus would be a good way to satiate that craving.

I love traditional hummus of any variety, but this is definitely NOT your traditional hummus! This recipe gets it's roots from a Yotam Ottolenghi recipe and if you're familiar with Ottolenghi's recipes than you know that he is known for building complex flavors and textures. This recipe definitely tastes like an Ottolenghi recipe, which is always a good thing.

I think the first thing worth noting is that this hummus does not taste of chickpeas, or beans, in any way. There is an entire can of chickpeas in the recipe, and it does help to lend a creamy texture, but it's the butternut squash that is the heart of the dish. The complex flavors come in with the variety of ingredients Ina uses to flavor this hummus. For example, the Greek yogurt gives the dip a bit of tang, the small amount of Sriracha provides a surprising amount of heat, the tahini and the toasted squash seeds lend a nutty flavor, and the drizzle of maple syrup adds a touch of sweetness. All in all you've got a sweet, spicy, savory, nutty, creamy and crunchy delight of a dip!

I am absolutely crazy for this dip! I love the gorgeous orange color, all the fun toppings, and the complex flavors. I find myself strangely addicted to it! This is one of those recipes that is even better the day after once all the flavors have had a chance to meld. I'm really looking forward to enjoying this for lunch throughout the week. I would definitely make this again!


Butternut Squash Hummus
Adapted from Cooking For Jeffrey
by Ina Garten
Serves 6-8

1-1/4 pounds butternut squash, peeled and 1-inch-diced
3 tablespoons olive oil
1 teaspoon cinnamon*
salt and pepper, to taste
1 (15.5 oz) can chickpeas, drained with liquid reserved
1/2 cup plain Greek yogurt
1/4 cup tahini
1/3 cup freshly squeezed lemon juice (2 lemons)
4 teaspoons
minced garlic (4 cloves)
1 teaspoon Sriracha
Pure Grade A maple syrup, for serving (optional)
Toasted pita bread, or pita chips, for serving
Toasted butternut squash seeds, for garnish

Notes: I opted to leave out the cinnamon in this recipe. I like cinnamon in sweet dishes, but prefer to omit it from savory dishes. I tossed the butternut squash seeds with a touch of olive oil, salt, and pepper and roasted them at 400F for about 10 minutes.

 Preheat the oven to 400F. Place the butternut squash on a sheet pan and drizzle with the olive oil. Sprinkle with the cinnamon, 2 teaspoons salt, and 1 teaspoon pepper.Toss with your hands and spread the squash out in one layer on the pan. Roast for 25 minutes, until tender, and set aside for 15 minutes to cool.  

Reserve 1/3 cup of squash for the garnish and transfer the rest to the bowl of a food processor fitted with a steel blade.  Add the chickpeas, yogurt, tahini, lemon juice, garlic, Sriracha, 1 tablespoon salt, and 1 teaspoon pepper and pulse until coarsely processed but not pureed. Add 1/4 cup of the reserved chickpea liquid and pulse a few times to combine. If the hummus is too thick, add more liquid a few tablespoons at a time. Taste for seasonings, transfer to a serving bowl, garnish with the reserved butternut squash, toasted butternut squash seeds, if using, and drizzle with maple syrup, if desired, and serve at room temperature with toasted pita bread or pita chips. 


Sunday, January 7, 2018

Tuscan Mashed Chickpeas {#Foodgoals}

I love the first few weeks of January when everyone is sharing their new year's resolutions. There is a certain kind of hope in the air. The kind that says I can do anything I set my mind to. You can almost feel the slate being cleared. A fresh start for everyone!

I always make several different types of resolutions. My biggest resolution this year has to do with my family. I've learned that if we want quality family time then we've really got to carve it out for ourselves, otherwise, life gets way too busy. This year our biggest goal is to spend more quality time together as a family (without phones or electronics).

For Stirring the Pot I set three #Foodgoals. The first is to share my mom's recipes in order to preserve them for the future. The second is to teach my daughter how to cook a few dishes and also to share her experiences. The last resolution should be simple, but it's something I just forget to do, and that is to share ALL of my dishes (even the dishes I don't put on my blog) on my Instagram page. This is just a fun resolution so that I can look back over the year and see everything I made all in one place. I'm looking forward to sharing all these kitchen adventures with you and know that I am much more likely to stick with these resolutions if I share them with you!

This week I'm lightening things up with this healthy Tuscan Mashed Chickpea dip. If you've followed me here for anything length of time, then you know that hummus is a real favorite of mine. Now, I'm not suggesting that hummus isn't healthy, because it definitely can be. What I am going to say is that it can be full of oil and/or tahini which makes it a bit heftier in the calorie department.

These Tuscan Mashed Chickpeas are mashed with chicken broth instead of oil and are therefore noticeably lighter than your traditional hummus. Now, Ina does tell you to drizzle oil here and there and you can do that and feel good about it. I chose to drizzle just a tiny bit to keep things light. 

Think of this as a fresh alternative to hummus, chunky in texture and bright in flavor. I personally loved the touch of tomato and Parmesan cheese and found it to be a welcome change. You can certainly serve this on grilled country bread, but I enjoyed this best with some Triscuit crackers and also with carrots and celery. I think this would be great served in lettuce cups or wraps and I also think this would make a great spread for a sandwich! I'd definitely make it again.


Tuscan Mashed Chickpeas
by Ina Garten
Serves 6-8

2  (15.5 ounce) cans chickpeas
1/2cup chicken stock
3 tablespoons olive oil, plus extra for serving
2 ripe medium-size tomatoes, seeded and small-diced
1/4 cup freshly grated Parmesan cheese
3 tablespoons minced fresh flat-leaf parsley
2 tablespoons freshly squeezed lemon juice
salt and pepper, to taste
To serve: grilled country bread, crackers, and/or veggies

Pour the chickpeas into a colander and rinse them under cold running water. Drain well. Place the chickpeas in the bowl of a food processor fitted with the steel blade. Add the chicken stock and pulse until the chickpeas are coarsely chopped but not pureed.

In a medium saute pan, heat the 3 tablespoons of olive oil over medium heat. Add the tomatoes and saute for 3 to 4 minutes until the tomatoes are softened. Add the garlic and cook for 1 minute more. Add the chickpeas, stirring to combine with the tomatoes and garlic. Cook for about 5 minutes, stirring occasionally until heated through. Off the heat, stir in the Parmesan, parsley, lemon juice, salt and pepper and taste for seasonings. Pile in a serving bowl, drizzle with olive oil and serve warm or at room temperature.

IHCC: Lighten It Up!