Sunday, December 22, 2019

Tessa's Omeleta {American-Style}


Early this year I tried Tessa's Omeleta Horiatiki with potato, feta, and oregano. Needless to say, this omeleta has some of my all-time favorite ingredients: egg, potato, and feta. I instantly fell in love. Tessa's recipe went right to my favorites list for the year.

This time of year is full of reflection and I feel a great amount of comfort & joy in recipes that are loved so well they become part of my regular rotation.

This time of year is also as busy as can be and I find a great amount of comfort & joy in recipes that are easy to make, yet delicious.

This time of year is also the time I go COMPLETELY out of my way to stay out of the store. So, it is with the GREATEST amount of comfort & joy that some version of this recipe can be made with ingredients found at home.

This time of year is also for Christmas vacation, sleeping in, and enjoying LOTS of leisurely breakfasts, my all-time favorite meal.

So, on day 2 of my 16-day Christmas vacation, I raided the fridge and came up with this Christmasy version of Tessa's Omeleta, keeping the potato crust (because that is a must) and adding some steamed broccoli for the green, some chopped cooked bacon for the red, and some good ol' American cheddar cheese to bring it all together.

Wishing you all a Very Merry Christmas and a Happy New Year!

Omeleta
Adapted from Food From Many Greek Kitchens
by Tessa Kiros
Serves 4

1/8 cup olive oil
1 small potato, peeled, cut into 1/8 inches rounds
3 eggs, scrambled
steamed chopped broccoli
couple pieces chopped cooked bacon
1/4 cup shredded cheddar cheese
salt and black pepper, to taste
red pepper flakes, to taste

Note: This recipe is halved to make a personal pan sized frittata.

Heat the oil in a small 6" or 8" inch nonstick skillet. Add the potato rounds and fry gently on both sides until golden (but not too crisp) and completely cooked through. Salt and pepper lightly. Sprinkle with red pepper flakes, if using. 

If you have a broiler, preheat it now. Pour the eggs into the skillet, shuffling gently so that they can leak down and around the potatoes. Add the broccoli, bacon, and cheese and cover with a lid until the eggs are set throughout but still runny on top. Keep an eye on the heat to ensure that the bottom doesn't burn but forms a golden crust. Take the lid off and place the skillet 4 inchesor so under the broiler. When the omeleta is no longer runny, remove from the heat and leave it with the lid on for a couple minutes. Loosen the edges and slide it out of the skillet onto a serving plate. Serve hot, with a grind of black pepper, to taste.


Sunday, December 15, 2019

Ina Garten's Chocolate Dipped Shortbread Cookies


Shortbread can be a tricky thing. The dough tends to be a crumbly mess and takes quite a bit of finesse. I've tried my hand at shortbread half a dozen times with various results.

This time around I read up on some tips. Proper shortbread is a few simple ingredients: butter, flour, sugar, salt, and maybe vanilla. The first ingredient, butter, is the most prominent ingredient and it holds a fair amount of moisture. One of the secrets to achieving the desired crumbly texture and sweet flavor is to allow the dough to dry out, or rest. Chilling, or resting, the dough allows the moisture from the butter to evaporate, and with less water in the dough, the sugar concentrates. Since the dough is comprised of only three essential ingredients, this is a crucial step to ensure that all the flavors stand out.

Also, I didn't want to overwork the dough and have tough, hard cookies so I took a slightly different approach than Ina. I didn't use my stand mixer because I feel like I tend to overmix with it. Instead, I used my hand mixer until the dough started to come together and then I used my hands to warm up the butter in the dough and help everything come together.  This was a successful approach and the dough came together quickly with the warmth from my hands. Our hands are our best tools, and since the first recorded recipe for shortbread was printed in Scotland in 1736, I'm positive this is the way to go.

Ina calls for you to shape the freshly mixed dough into a flat disk and chill. For the life of me, I can't understand this step. First, it's entirely unnecessary and second, it has you kneading the tar out of the dough, essentially overworking it. Why not shape the dough into a rectangular log so that when you remove the chilled dough you can simply slice it and bake it? So I did it my way.

When I went to slice the dough  I was worried that it would crumble apart. It did not. It sliced like a dream and baked up the most beautiful shortbread cookies I've ever made! This is a fabulous recipe! The cookies themselves are GINORMOUS, but have the perfect texture and flavor, especially with the added chocolate. This is going to be my new go-to shortbread recipe. The only thing I might do differently next time is experiment with making them smaller. These cookies as written are about 2 inches wide and one inch thick. Too big, even for a sweets lover.


Chocolate Dipped Shortbread Cookies
Adapted from Food Network
Recipe by Ina Garten
Makes 20-24

3/4 pounds butter, at room temperature (3 sticks butter)
1 cup sugar, plus extra for sprinkling
1 teaspoon pure vanilla extract
3-1/2 cups all-purpose flour
1/4 teaspoon salt
6-7 ounces very good semisweet chocolate, finely chopped

Preheat the oven to 350F. In the bowl of an electric mixer fitted with a paddle attachment (or in a large mixing bowl with a hand mixer as I did), mix together the butter and 1 cup of sugar until they are just combined. Add the vanilla. In a medium bowl, sift together the flour and salt, then add them to the butter and sugar mixture. Mix on low speed until the dough starts to come together. Dump onto a surface dusted with flour and shape into a flat dish (or skip a step and shape the dough into a rectangular shaped log so that you can immediately slice the cookies once the dough has chilled). Wrap in plastic and chill for 30 minutes. 

Roll the dough 1/2" thick and cut with a 3 by 1-inch finger-shaped cutter (or do things much simpler by following my directions above, making a log with the dough and slicing the dough into cookies once chilled). Place the cookies on an ungreased baking sheet (I used parchment) and sprinkle with sugar. Bake for 20 to 25 minutes (mine were done in 20 minutes), until the edges begin to brown. You do not want to overcook these cookies so check frequently and pay close attention! Allow the cookies to cool to room temperature.

When the cookies are cool, place them on a baking sheet lined with parchment paper. Put 3ounces of the chocolate in a glass bowl and microwave for 30 seconds, stir with a wooden spoon. Continue to heat and stir in 30-second increments until the chocolate is just melted. Add the remaining chocolate and allow it to sit at room temperature, stirring often, until it is completely smooth. Stir vigorously until the chocolate is smooth and slightly cooled; stirring makes it glossier.

Dunk the cookies or drizzle the cookies as you wish, with as much chocolate as you like. I was afraid the cookies would crumble when I dunked mine (my chocolate was quite thick) so I used a spoon to coat the cookies. This is where you can be creative and put a small amount of chocolate or coat them entirely in chocolate. Have fun with it! Make it your own!


Sunday, December 8, 2019

Giada's Sausage and Broccoli Pizza


You ever notice how you can make something 20 or 30 times, the same exact way, and yet it turns out differently from time to time? This happens to me frequently. I've made a lot of pizzas. They always turn out good. Then I made this pizza, the same way I always do, and it turned out extra fabulous!

Beautiful golden-brown crust rising up perfectly around the edges with lots of bubbles (I love bubbles on pizza crust), cheese perfectly melted, just the right amount of toppings, and a little bit of oil on top (some people like to blot that oil on top, not me - that's good flavor right there).

I was marveling at the pizza as I pulled it out of the oven. How in the world did the pizza turn out so well? I'll confess: I didn't even want to make the pizza so it definitely was not made with love. I also used the same ingredients as I usually do. So, what gives?

While I'm not sure why it turned out so well I can only hope that I can get the same results again because this pizza was INSANELY DELICIOUS! Golden brown pizza crust with my favorite Rao's sauce, spicy Italian sausage, broccoli, melty mozzarella, nutty Parmesan, topped off with red pepper flakes, fresh torn basil, and marinated garlic and olives. There's just a little bit of everything going on here. It's pizza perfection. The perfect treat for enjoying while we trim the Christmas tree.


Sausage and Broccoli Pizza
Adapted from Food Network
by Giada De Laurentiis
Serves 4

1/2 cup fresh basil leaves, torn
1/2 cup plus 2 tablespoons extra virgin olive oil
salt, to taste
One 28-ounce can tomato paste*
1 pound spicy Italian sausage, casing removed*
1 bunch broccoli, cut into bite-size florets (about 3 cups)
3 tablespoons flour
12 ounces fresh mozzarella, torn into pieces
1 cup Parmesan
red pepper flakes, to taste
Optional: Marinated olives and garlic, for topping*

Notes: I only used about 1/2 to 1/3 pound of sausage. This recipe calls for making a homemade pizza sauce. I love Rao's pizza sauce so I used that. I also added marinated black and green olives and marinated garlic from the olive bar at my local Whole Foods.

In a medium bowl, combine the basil, 1/2 cup of the olive oil, the salt and tomato puree. Stir together until combined. Cover with plastic wrap and refrigerate for at least 3 hours to allow flavors to marry. (Or, alternatively, buy your favorite jarred pizza sauce - I used Rao's and I love it. My all-time favorite).

Preheat the oven to 500F. Place a rack on the highest level and also on the lowest level (you will be switching starting the pizza on the bottom rack and moving to the upper rack).

Heat a large skillet over medium-high heat. Add the remaining 2 tablespoons olive oil and the sausage and cook, breaking apart with a wooden spoon to form bite-size pieces, until golden brown and cooked through, about 10 minutes. Add the broccoli to the pan and stir to mix with the sausage. Remove from the heat and cool to room temperature. 

Dust an upside-down rimmed baking sheet with the flour. Gently stretch the pizza dough and place it on the dusted tray. Continue to stretch out to 1/4" thick, leaving it a little thicker around the edges. Spread 1 cup of the sauce over the dough and top with the sausage and broccoli.  Spread the sausage and broccoli around evenly and top with torn pieces of mozzarella, filling in the holes and distributing evenly. Then top with the Parmesan. If using the marinated garlic, as I did, scatter it over the pizza. Add a sprinkling of red pepper flakes, if you wish.

Place the into the oven on the bottom rack first. You really want to cook the bottom of the pizza first. Bake for about 5-6 minutes. Then switch the pizza to the upper rack and cook for about 5 minutes, until golden brown and bubbly. Top the pizza with more Parmesan, torn basil, and marinated olives, if you wish. The olives really brighten up the dish and lend a fresh zingy flavor.


Tree Trimming Treats @ IHCC


Sunday, December 1, 2019

Ruth Reichl's Deviled Eggs


We love to have deviled eggs on just about any holiday. Fourth of July, Easter, Thanksgiving, Christmas, or any other get together. Everyone usually loves them and they are always the first thing to disappear.

My Mom used to make the very best deviled eggs. The problem is I can't find her recipe and I don't remember how she made them. I know she used mayonnaise, chopped pickle, a little pickle juice, and some paprika, but I can't quite master it.

So now I'm on the hunt for the very best deviled eggs.  I've tried a few recipes and so far none have come close.

I knew Ruth's version wouldn't be like my Mom's, but I still wanted to give it a try. Ruth's version is different than most in that it calls for 6 eggs, 1/4 cup mayo, 1 teaspoon Dijon, and 1/8 teaspoon cayenne pepper. I was really drawn to her use of cayenne pepper, and since we love spicy food, I was really hoping for some deliciously spiced deviled eggs with a kick.

Turns out Ruth's eggs are good, but not great. Upon tasting the filling, I found myself adding more mayonnaise. As a lover of all mustards, I thought the Dijon would be a welcome touch, but upon tasting immediately learned that regular yellow mustard was the way to go as far as deviled eggs are concerned. Mostly though, I thought the cayenne would be more prominent, or at the very least lend a slightly spicy kick, but alas I couldn't detect any heat either.

Deviled eggs seem quite simple, but I've found that everyone likes them a different way and they can, therefore, be quite hard to get just right. I'm still on the search for the perfect recipe.

Do you have a favorite deviled egg recipe?


Deviled Eggs
Adapted from The Gourmet Cookbook
by Ruth Reichl
Makes 12

6 large eggs
1/4 cup mayonnaise
1 teaspoon Dijon mustard
1/8 teaspoon cayenne
salt and black pepper, to taste
Optional: a pastry bag fitted with a 1/2" star tip or plastic bag with the corner snipped

Start by boiling your eggs however you like. I like to place my eggs in a pan, cover with water, bring the water to a boil, cover the pan, shut off the heat, leave the pan on the burner and let them stay for 10 minutes. Then I immerse the eggs in cold water for about 30 minutes.

Ruth says to put eggs in a 3-quart heavy saucepan, cover with cold water by 1-1/2 inches, partially cover pan, and bring to a rolling boil. Reduce heat to low, cover completely, and cook eggs for 30 seconds. Remove from heat and let stand, covered for 15 minutes.  Then transfer to a bowl of ice and cold water and let stand for 30 minutes; drain.

Peel eggs and halve lengthwise. Carefully remove yolks and mash in a bowl with a fork (I like to blend all the filling ingredients in a bowl with my hand mixer).  Add mayonnaise, mustard, and cayenne and stir with fork until smooth. Season with salt and pepper.

Fill pastry bag, if using, with yolk mixture and pipe (or spoon) into egg whites. Sprinkle with paprika and chives, if desired.
 

Sunday, November 24, 2019

My Top Ten Favorites of 2019!


It's been a rough week or so in The Stirring The Pot household. I came down with both a sinus and ear infection, plus bronchitis, then I wasn't quite recovered from that before I came down with the stomach bug. I was still coughing and recovering from the stomach bug when I came down with a fever. So, I've spent the weekend sleeping and resting and can now say that I finally feel as though I'm on the mend.

We're supposed to be making dishes with ingredients we're thankful for, but I didn't quite feel like getting back in the kitchen, so I'm going to be sharing My Top Ten Favorites of 2019, all of which I'm very thankful for!

(click on the recipe title to be directed to the original post with recipe)
These may very well be my favorite recipe of 2019. They are the best chicken wings I've ever had, hands down. Cooked under a broiler, they are perfectly crispy on the outside and so very tender and juicy inside. Plus, Bittman's homemade buffalo sauce is complete perfection, flavorful and garlicky.

Surely this is not the first time you're seeing this famous tart. Do yourself a favor and make it.

These should speak for themselves. I mean if Jacques Pepin and Julia Child got together and created  a mashed potato recipe, then you already know it's gonna be THE ONE. Add in some homemade garlic powder, which has been one of my favorite ingredients to cook with this year, and you have a winner.

This pizza had me dreaming I was on a cliffside surrounded by good looking Italian men somewhere on the Amalfi coast (hey, Amalfi is know for its lemons, is it not)? If you love white pizza, this pizza is for you. Cheesy, with a hint of spice, lemon, and fresh basil. It's simply light and luscious.

Ina is known for being the Queen of Chicken, but I've also crowned her the Queen of Plum Desserts. Have you ever looked at the sheer number of plum desserts she has? No, well you need to. Then you need to come around to plums and realize that they make for one of the most amazing fruity desserts around, with their ability to be both sweet and sour. This recipe is a major winner! Sweet, sour, juicy plums topped off with a hefty dose of nutty crumble. This dessert is a dream!


Homemade hummus is one of the best dishes there is, as far as I'm concerned. And, if you're going to make it, then turn to no one other than Yotam Ottolenghi. Make his Hummus Kawarma with lemon sauce and crispy bits of ground lamb, which is oh so heavenly, OR make this Hummus with Ful, which is really like having two bean dips in one. Either way, you're in for a velvety delicious dip that has the most wonderful mouth feel! One of the best things on the planet for sure!

This dish is another one that is at the very top of the list. In fact, of the two potato dishes in this roundup, this one is my favorite! First, you have a crusty baked potato skin coated in herbs and spices and then you fill it with a whipped feta topping?  It's total perfection. In fact, the potato never had it so good. This is quite easily the most flavor a potato has ever had. In fact, I'm adding the ingredients to my grocery list as we speak.

This is one of those dishes that you make and you know it's going to be good, but then you end up being absolutely blown away. This is hands down my favorite frittata dish. The reason: the sliced potatoes slide to the bottom of the pan and create a crispy potato layer on the bottom. Plus, feta cheese is my favorite. I look for any reason to eat some feta (see above). However, this dish would be easy enough to change up. Keep the potatoes and add different veggies, cheeses, and herbs. Delicious!

When I posted this recipe I said, "The bottom line is...Food Cart Curry Chicken is something I think just about anyone would love, very family-friendly, and this recipe is perfection. I highly recommend giving it a try!' I still stand by this. I think it could be part of every home cook's go-to chicken dishes!

This recipe for Baked Cheddar Olives is just special. It was my very favorite Ruth Reichl recipe and is one of my very favorite recipes of this year, if not the favorite. It's retro, it's fun, and it's so delicious! The best part is, it's cheap, easy, and made with pantry ingredients. Think of these like a cheesy cracker wrapped around a juicy little tangy olive. Absolutely perfect for the upcoming holidays! Once you pop 'em, you can't stop.

Can't wait to see what amazing dishes come out of The Stirring The Pot kitchen in 2020!

Sunday, November 10, 2019

Giada's Calabrian Chile Pasta


When it comes to quick and simple weeknight meals, Pasta is King! Not only is pasta comforting and delicious, but it can be put on the table in less than 30 minutes.

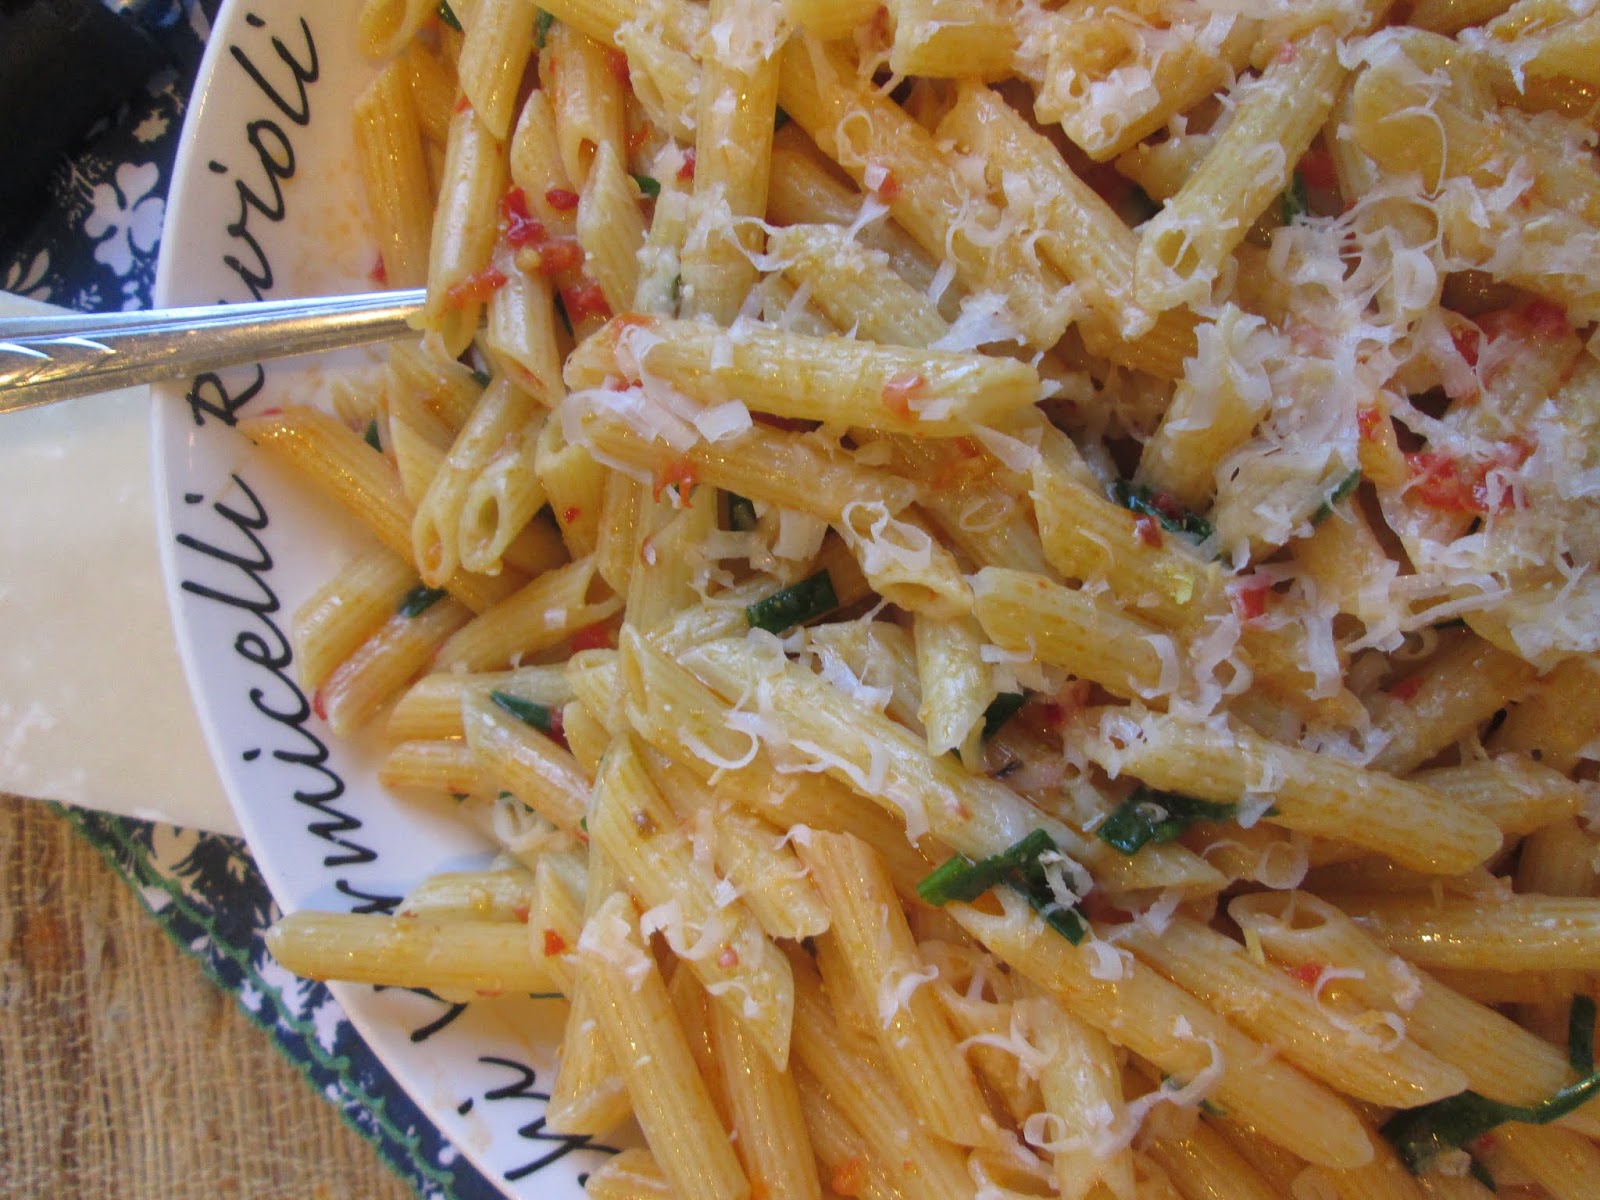
Giada's Calabrian Chile Pasta is probably the easiest pasta dish around. From start to finish it can be on your table in about 20 minutes. The secret: you don't have to wait for a big pot of water to boil. For this dish, you cook the pasta in a skillet with about 1" of water, which takes only minutes to boil.

I loved this method of cooking pasta because not all of the water cooks out and the residual water, filled with the starch from the pasta, remains and helps to create a very silky smooth pasta sauce. All you have to do is add the Calabrian Chile Paste, Pecorino, olive oil, lemon zest and juice, and chives. When you toss all that together in the pan you get the most luxurious pasta sauce, spicy and so silky and smooth.

I really liked this dish, and other reviewers on Food Network did as well. I enjoyed this method for cooking the pasta and will most definitely use it again. I am a little conflicted about the flavor of the dish. It was good, but I felt like something was missing. It definitely needs some garlic. I also think it needs more than a splash of lemon juice. I found I needed to add quite a bit to brighten up the dish. Overall, it was good, but it has the potential to be great. I'd like to play with the recipe a bit more, perhaps even trying different brands of Calabrian Chile Paste.


Calabrian Chile Pasta
Adapted from Food Network
by Giada De Laurentiis
Serves 4-6

1 pound penne pasta
2 teaspoons salt
1 cup grated Pecorino
1-pint cherry tomatoes, quartered
3 tablespoons Calabrian hot pepper paste
1/3 cup chopped chives
1 teaspoon grated lemon zest, from 1 lemon
1 teaspoon lemon juice, from 1/2 lemon or more, depending on taste
1/3 cup extra virgin olive oil
Optional: add garlic, to taste, if you wish

Note: I omitted the cherry tomatoes simply because the grocery store didn't have them.

In a 10-inch high-sided saute pan, bring 1 inch of water (about 4 cups) to a boil over high heat.  Add the penne and salt.  Cook, stirring often, until the pasta is al dente, about 9 minutes (mine was about 7 minutes); there should be a little water left in the pan.

Remove the skillet from the heat and sprinkle the pecorino over the pasta; toss to coat. Add the tomatoes, chile paste, chives, lemon zest, lemon juice, and olive oil, and toss.

Note: If you'd like to add garlic I think it would be best to saute a few minced cloves in the skillet before cooking the pasta.


Sunday, November 3, 2019

Nigella's Clean Out The Pantry Granola Muffins (w/ Caramel Apple Granola)


We started I Heart Cooking Clubs back in the fall of 2009 with The Domestic Goddess, Nigella Lawson, as our very first chef. I fell in love with Nigella and the way she writes about food. I think we all did. I cooked a lot of delicious Nigella recipes, but my favorite Nigella recipe was, and continues to be, these Granola Muffins!

I made Nigella's Granola Muffins for the first time back in February of 2010. That time around I made them with a very simple oats and honey granola and I fell in love. I drizzled them with a touch of honey and gobbled them up.

Back in 2018, I made Nigella's Granola Muffins with oats and honey granola again, but changed things up by adding sliced almonds, dried cherries, and coconut chips. They were equally delicious and I loved the added texture of the added nuts and dried fruit.

Now I'm making them again using a seasonal Caramel Apple Granola from Trader Joe's. This granola has a mix of oats, sweet and tart apple slices, peanuts, and pumpkin-spiced pumpkin seeds and let me tell ya...it makes for a delicious autumn-inspired muffin!

I love these muffins for so many reasons. They're so simple, so versatile, and so delicious. They're also a great way to clean out your pantry. Have some leftover granola, dried fruit, or nuts? Go ahead and throw it in. Have fun trying different combinations! Whichever granola and add in's you chose you are sure to have a tasty treat! You really can't go wrong!


Granola Muffins
Adapted from Feast 
by Nigella Lawson
Makes 12

1-1/2 cups all-purpose flour
1 teaspoon baking soda
1/4 teaspoon salt
1 cup buttermilk
1 egg
3/4 cup light brown sugar
1/3 cup vegetable oil
2 cups granola
Optional: Any kind of dried fruit, or nut, or chocolate chip for added flavor

Preheat the oven to 400F. Line a 12-cup muffin tin with paper muffin cups (I never line with cups, choosing to butter and lightly flour them instead).

Combine the flour, baking soda and salt in a large bowl. In a wide-necked pitcher whisk together the buttermilk, egg, sugar, and oil. Pour this into the dry ingredients and mix lightly to combine. Fold in the granola and then fill the muffin tin. Bake for 25 minutes (mine only needed 20 minutes), until the muffins have risen and become golden brown. 

Remove from oven, let cool, and enjoy!