
Every once in awhile I have a total fail in the kitchen. It's usually when I'm baking, as is the case with these banana and honey rolls. I've had my eye on Jamie's banana and honey rolls since we first started cooking with him 6 months ago. Instead of adding water to the dough Jamie adds a banana puree. Instead of adding sugar, he adds honey. It was something new and it really caught my eye. Since it's bread baking week at IHCC I thought I'd give them a go.
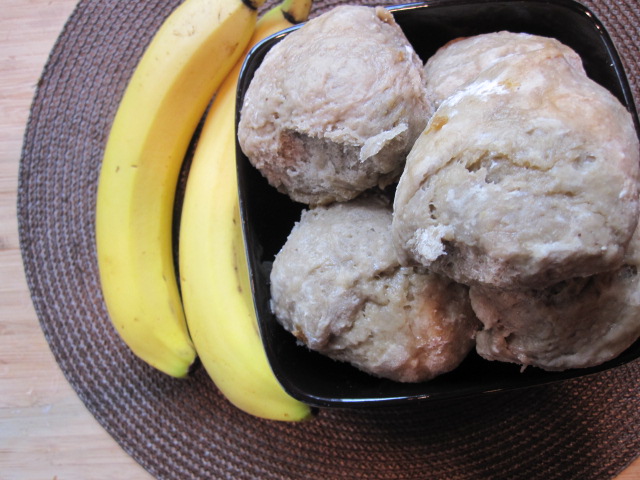
It's possible that I messed up when I converted the recipe from metric. It's possible that I over mixed the dough. It's also possible that the recipe is flawed somewhere. Either way, these rolls didn't achieve the desired golden brown color and they were very dense, too dense. It was akin to eating a brick.
Below is a picture of Jamie's banana and honey roll. It looks perfectly fluffy and golden brown with gorgeous caramelized honey on top. Nothing like my poor rolls. Oh well, you can't win them all.

Banana and Honey Rolls
Adapted from JamieOliver.Com
Makes 10
1kg strong bread flour (about 7 & 1/2 cups)
6 bananas, pureed into a liquid
6 bananas, pureed into a liquid
8 tablespoons honey
3 packets of yeast (7g each)
1 level tablespoon fine sea salt
extra flour for dusting
3 packets of yeast (7g each)
1 level tablespoon fine sea salt
extra flour for dusting
Optional: One handful of cracked almonds
Begin by making your banana puree:
*First of all, peel your bananas then purée them in a blender or food processor. The mix will be surprisingly wet. Pour it into a measuring cup, then top up with water until you have just over 2 cups.
Stage 1: making a well
Pile the flour on to a clean surface and make a large well in the centre. Pour half your banana puree into the well, then add your yeast, half the honey (4tbsp), salt and stir with a fork.
Stage 2: getting it together
Slowly, but confidently, bring in the flour from the inside of the well. (You don't want to break the walls of the well, or the banana puree will go everywhere.) Continue to bring the flour in to the centre until you get a stodgy, porridgey consistency – then add the remaining banana puree. Continue to mix until it's stodgy again, then you can be more aggressive, bringing in all the flour, making the mix less sticky. Flour your hands and pat and push the dough together with all the remaining flour. (Certain flours need a little more or less water, so feel free to adjust.)
Stage 3: kneading!
This is where you get stuck in. With a bit of elbow grease, simply push, fold, slap and roll the dough around, over and over, for 4 or 5 minutes until you have a silky and elastic dough.
Stage 4: first prove
Flour the top of your dough. Put it in a bowl, cover with cling film, and allow it to prove for about half an hour until doubled in size – ideally in a warm, moist, draught-free place. This will improve the flavour and texture of your dough and it's always exciting to know that the old yeast has kicked into action.
Stage 5: second prove, flavouring and shaping
Once the dough has doubled in size, knock the air out for 30 seconds by bashing it and squashing it. You can now shape it or flavour it as required – folded, filled, tray-baked, whatever – and leave it to prove for a second time for 30 minutes to an hour until it has doubled in size once more. This is the most important part, as the second prove will give it the air that finally ends up being cooked into your bread, giving you the really light, soft texture that we all love in fresh bread. So remember – don't fiddle with it, just let it do its thing.
Stage 6: cooking your bread
Very gently place your bread dough on to a flour-dusted baking tray and into a preheated oven. Don't slam the door or you'll lose the air that you need. Bake according to the time and temperature given with your chosen recipe. You can tell if it's cooked by tapping its bottom – if it sounds hollow it's done, if it doesn't then pop it back in for a little longer. Once cooked, place on a rack and allow it to cool for at least 30 minutes – fandabidozi. Feel free to freeze any leftover bread.• from Happy Days with the Naked Chef I’m still really mad about bread – I love it. It’s so exciting. It’s such a rewarding, therapeutic, tactile thing and you’ll be so proud of yourself once you’ve cracked it.
***
For the banana honey bread:
At Stage 5 divide the dough into 10 balls. Then pack these next to each other in a flour-dusted baking pan where they will rise together. Before putting in the oven, drizzle generously with the rest of the honey so that the top of the bread will caramelize, going nice and golden. Bake in your preheated oven at 375°F for 20 minutes. Allow to cool for a little while, but it’s best served still warm with lots of butter and a glass of milk for breakfast while you read the paper. Also fantastic used in bread and butter pudding or simply heated up with a bit of ice cream.  |
| Theme: Ready, Breadie? |

So sorry they didn't work out! Ah well, there's always next time.
ReplyDeleteKim, my failures in the kitchen are usually with baking too! I'm glad I'm not alone, but sorry they didn't come out. As Natashya said, next time!
ReplyDeleteToo bad they didn't turn out...they sound like they should have been good.
ReplyDeleteThe banana and honey rolls may not have turned out but, darn they sound delicious. They look good too.
ReplyDeletePart of the cooking experience is that sometimes it does not work out. So, you try again-if still no success, toss the recipe out (laugh).
Cheers to you.
Velva
Sorry they didn't turn out. I had my eye on these but didn't have time for bread this week. I'm always leery of converting during baking.
ReplyDeleteI hate it when a recipe is a fail. I appreciate your honesty. I have to say, Jamie's rolls do look mouth watering. Those darn metric measurements! Ga!
ReplyDeleteI give you BIG kudos for attempting them and not taking the easy way out like I did. ;-)
ReplyDeleteYOu know, I've had that in my bookmarks too! I have seen people have good and bad results with this recipe.
ReplyDeleteNOt every recipe can be a winner I guess. Sorry it didn't work out, because in theory, the flavours sound really good.
*kisses* HH
It would be nice if those whacky brits would convert those measurements for us so we don't screw up. Sounded like a win anyway.
ReplyDeleteSorry these didn't work for you, but I love that you posted a fail. It's so easy to just toss our failures in the trash and it takes a lot of courage to put it out there for others to learn from.
ReplyDeleteI'm so sorry these didn't work out for you! They really do sound like they could have such promise...
ReplyDeleteaw bummer! i tend to struggle in the baking department too, it's probably why i don't do it often, i much happier cooking. sorry these didn't work out, i can see how they initially had such a-ppeal (no pun intended ;)
ReplyDeleteOoops! They sure sound delicious. I hate when I have high expectations and then the recipe ends up being a bust!
ReplyDelete