Showing posts with label Vegetarian. Show all posts

Sunday, July 20, 2025

Garden Fresh: Double Herb Kale Pesto on Ravioli!

Normally this time of year my herb garden is growing like crazy and needs a really good trimming. This year, however, the herbs are slow going. I think it's got something to do with our weird weather pattern this summer. It literally alternates between raining cats and dogs and flooding to HOT AS THE SUN AND DRY AS A BONE. There's been no in between. Not at all!

I like to make a pesto every summer, but I didn't have enough herbs so I found this recipe for Kale Pesto! This pesto is mostly made from the curly kale, with a handful of basil and parsley. I only had a handful of each herb so it was meant to be.

Kale, pine nuts, garlic, basil, parsley, Parmesan cheese, olive, salt and pepper all get whirled up in the blender or food processor and you're ready to go. 

This pesto would be good in eggs, or on pizza, but it is also good on pasta! I had some ravioli that was perfect for this pesto so I tossed the ravioli with a little bit of this Kale Pesto. 

The Kale Pesto does taste healthy and it is green veggie and kale-forward, but I like kale so I'm okay with that. You could thin the kale pesto with a touch of cream if you wanted to soften the kale flavor a touch.

Either way, this is delicious and somewhat healthy and a fun recipe to try! 


Double-Herb Kale Pesto

Adapted from Seriously Delish

by Jessica Merchant 

Makes 1 cup

For The Pesto: 

1/4 cup pine nuts, toasted

2 garlic cloves, minced

2 cups green curly kale

1/3 cup torn fresh basil

1/4 cup torn fresh parsley

2 tablespoons freshly grated Parmesan cheese

5 to 6 tablespoons extra virgin olive oil

1/4 teaspoon salt

1/4 teaspoon freshly ground black pepper

Add the pine nuts and garlic to a food processor and pulse until crumbly. Add the kale, basil, and parsley to the processor and puree until combined and only tiny bits of green appear. Add the cheese, pulsing once more, and then with the processor on, stream in the olive oil until the pesto comes together. Scrape down the sides of the food processor when necessary. Add the salt and pepper and pulse once more. Taste and season additionally if desired. Store the pesto in a sealed container or jar in the fridge for up to 1 week.   


Herbalicious @ IHCC!

Sunday, June 8, 2025

15 Minute Meal: {Lemon Parmesan Cauliflower Gnocchi}


Sometimes summer days go by in a total blur. Busier and faster than any work day. In the past week we've had 89,700 things to do. I need a quick 15 minute recipe.

But I need a delicious 15 minute recipe that hopefully uses some of my fresh herbs from the garden because my parsley and basil and chives are going nuts! Maybe because we've had SO MUCH RAIN! Holy cow, I've never seen so much rain in my life as we've got in Kentucky this spring. Wow1

So, let's talk about a 15 minute recipe. We want it to be delicious and comforting because...if you don't have time to cook  then you are too busy for comfort. So we need comfort food. 

Pasta, but let's make it a little healthier and use up some cauliflower gnocchi. I love cauliflower gnocchi and keep it in stock from Trader Joe's, but if you don't like cauliflower gnocchi, you can use regular gnocchi. It will be just fine. 

Brown the gnocchi in butter on both sides in a skillet. Then add in heavy cream, the zest of 2 lemons, and Parmesan cheese. The sauce will coat the gnocchi quickly. Season with salt, pepper, and fresh herbs. Taste to adjust seasoning and serve straight away!

You will have a rather indulgent very comforting hug in a bowl in no time flat and clean up is also easy. We really loved this especially with freshness of the lemon zest and herbs. It is a perfect summer meal when you're on the go and in a hurry. Give it a try! 


Lemon Parmesan Cauliflower Gnocchi

Adapted from How Sweet Eats

by Jessica Merchant

Serves 1 to 2 

12 ounces cauliflower gnocchi, frozen or fresh/thawed

3 tablespoons butter

1/3 cup cream

1/4 cup finely grated Parmesan cheese, plus more for topping

2 lemons, zest freshly grated

salt and pepper, to taste

fresh herbs: like basil and/or parsley for topping

Heat the butter in a nonstick skillet over medium heat. Once melted and bubbling, add in the cauliflower gnocchi. It can be frozen or thawed1 cook the gnocchi for 2 to 3 minutes, without tossing, until it gets golden brown on one side. Flip an cook for 2 to 3 minutes more. You want it golden brown on both sides and by that point, it should be cooked and warmed through.

Pour in the heavy cream, the lemon zest, and a pinch of salt and pepper. Stir in the Parmesan. taste and season with more salt and pepper if needed. The gnocchi will soak up a bit of the ream, but it still adds a wonderful richness and texture to the dish. Top with fresh herbs and serve, with more Parmesan for topping. 

15 Minute Meals @ IHCC!


Sunday, April 6, 2025

Marcela Hazan's Spaghetti with Cherry Tomato Butter Sauce {One of my Favorite Pasta Recipes}!

This pasta dish is simple and outstanding and is very much inspired Italian culinary Queen Marcela Hazan. It is hands down one of my all-time favorite pasta dishes!

Marela's recipe calls for canned crushed tomatoes, butter, and an entire onion (removed after cooking). This version has the same ingredients but a few tweaks to make the dish more to our liking.

All you need is pasta, preferable a long noodle like spaghetti, fettuccine, or linguini. Then you'll need a stick of butter, a diced onion, some cherry tomatoes, salt and pepper, and some herbs for garnish.  You'll also need some pasta water but that comes later in the recipe.
The main flavor component of the dish is going to come from the cherry tomatoes. Try to find the best you can. The recipe calls for 36 ounces of halved cherry tomatoes, but we just like a subtle tomato flavor so I use about 12 ounces of tomatoes.
You can see how the butter, onion, and tomato melt together to make one creamy savory sauce. This process takes about 20-25 minutes. After you've cooked your sauce about 10 minutes, you can add the pasta to the boiling water. Once the pasta is one or two minutes less than al dente (it will finish cooking in the sauce) YOU NEED TO BE SURE AND SAVE ABOUT TWO CUPS OF PASTA COOKING WATER to finish the dish! The pasta cooking water is what brings the sauce and the pasta together and makes the final dish creamy and delicious. DO NOT FORGET THE PASTA WATER!

This is a very simple and insanely delicious pasta dish! Do not underestimate how delicious this is! This is the 4th time I've made it and people inhale it each and every time. The pasta is so sweet and savory with a subtle flavor from the tomato and onion. It is buttery and delicious and really hits the comfort food spot. Plus, it can be made in about 30 minutes and is perfect for weeknights. This recipe is going to be a top favorite dish of the year for me and one that I cook on repeat in my kitchen. We love it!


Spaghetti with Cherry Tomato Butter Sauce

Adapted from Marcela Cucina

Serves 6-8

1 pound spaghetti, fettuccine, or linguini

1 stick of butter

1 medium onion, diced

36 ounces cherry tomatoes, halved*

salt and pepper, to taste

1/4 cup minced flat-leaf Italian parsley

1/4 packed cup basil, hand torn

2 cups reserved pasta water

Notes: I have made this dish about 4 times now and it turns out differently each time, depending on the tomatoes. Some tomatoes are sweeter than others and juicier than others. I like to use only 12 ounces of cherry tomatoes. In lieu of using fresh cherry tomatoes you can also use cans of cherry tomatoes. It is crucial to reserve the pasta water to thin the sauce and help the sauce adhere to the pasta. Pasta water is also crucial for leftovers to keep them from drying out.

In a large pan saute the onion in butter over medium-low heat until soft (about 5 minutes) then add the tomatoes. Season the tomatoes initially with a teaspoon of salt. Cook the sauce over medium heat for 20-30 minutes (stir frequently and lower heat if scorching) or until the cherry tomatoes have burst and softened and the butter has completely blended in with the tomatoes.

Meanwhile, bring a large pot of salted water to a boil. When the sauce is almost to your liking begin boiling the pasta to 1 minute less than al dente. A few minutes before the pasta finishes cooking add 1 cup of pasta water to the sauce and stir to combine. Continue to cook the sauce over medium heat. Add the pasta to the sauce and toss to coat. Cook until the pasta is just al dente then turn off the heat and season to taste with more salt and pepper as required. Add the herbs, toss once more, then plate. If the sauce is at all dry, add more of the reserved pasta water a few ounces at a time to loosen it up. Serve with grated Parmesan cheese. Enjoy!


 Welcome Marcela Hazan @ IHCC!


Sunday, March 9, 2025

How Sweet Eats Parmesan Broccoli Roll {A Great Vegetarian Dish}!!


When you spring clean your home, you can't forget about your pantry, fridge, and freezer! I find it so much fun to make a game out of cooking up all the bits and bobs in my kitchen. That's where this recipe for How Sweet Eats Parmesan Broccoli Roll comes into play!


I had one roll of puff pastry, loads of broccoli, tons of garlic, and bits and bobs of cheese leftover. One thing about me is I WILL HAVE CHEESE AT ALL TIMES. When How Sweet Eats shared this recipe I knew it was time to put all those things together to create one flaky, crispy, buttery, cheesy, garlicky, veggie-filled puff of pastry. I mean, it really doesn't get better than this!


Parmesan Broccoli Roll

Adapted from How Sweet Eats

by Jessica Merchant

Serves 2-4

2 tablespoons olive oil

8 garlic cloves, minced

3 cups broccoli florets, chopped

salt and pepper, to taste

1/2 teaspoon crushed red pepper

1 sheet of puff pastry, thawed

1-1/2 cups shredded mozzarella or Italian blend cheese

1/2 cup finely grated Parmesan cheese, for topping

1 egg + 1 teaspoon water, beaten for egg wash


Note: Jessica of How Sweet Eats notes that she likes to use full sheet puff pastry but I use Pepperidge Farms and adapt the size of the puff pastry to my recipe. I may not be able to use all the filling, but I will save it for later or make two rolls.

Preheat the oven to 425F. Line a baking sheet with parchment paper. Heat the olive oil in a skillet over medium-low heat. Add the garlic and cook for 30 seconds. Add in the broccoli with a pinch of salt and pepper. Cook until slightly softened, about 3 to 4 minutes. Stir in the pepper flakes. Slice the puff pastry in half lengthwise. Keep one piece on the parchment paper. Sprinkle the mozzarella cheese on the one long sheet of puff pastry, leaving a 1/2 inch border. Top with the broccoli in an even layer. Sprinkle the Parmesan on top. Use the egg wash to brush the border of the puff pastry. Place the other slice of puff pastry on top, pressing down the edges to seal. Slice a few slits in the top to let steam escape. Bake for 20 to 25 minutes, until golden and puffed. Remove and let cool slightly before sprinkling with Parmesan. Slice and serve!

Spring Cleaning @ IHCC!


Sunday, January 19, 2025

How Sweet Eats Winter Rice Bowls {A Hearty Vegetarian Main Dish}

 If you're craving some healthy comfort food, this is it! A wintery vegetarian bowl of jasmine rice, kale, roasted sweet potato rounds and sliced Brussels sprouts, with cannellini beans, topped with crispy fried shallots and pomegranate seeds. Let me tell you it is stunning in person - like eating a bowl of jewels. The colors really pop.

I also love the all the textures with the massaged kale, crispy Brussels and fried shallots, the big savory slices of sweet potato with the sweet pop of the pomegranate seeds. Not to mention, the beans really round the meal out making it very satisfying. This bowl of wintery goodness is a flavor and texture explosion that is sure to please everyone. I will be making this one again!

Winter Rice Bowls

Adapted from The Pretty Dish

by Jessica Merchant

1 large sweet potato, sliced into 1/4" rounds

1/2 pound Brussels sprouts, stems removed, sliced

3 tablespoons olive oil, divided

1/2 teaspoon + a pinch of salt

1/2 teaspoon + a pinch of black pepper

1/2 teaspoon garlic powder

3 cups chopped green curly kale

2 cups cooked jasmine rice

1 can (15 ounces) cannellini beans, rinsed and drained

1/4 cup pomegranate arils

Crispy Shallots

vegetable or canola oil

2 large shallots, sliced

2/3 cup flour

1/2 teaspoon salt

1/2 teaspoon smoked paprika

1/2 teaspoon garlic powder

1/4 teaspoon black pepper

Before you begin the recipe you should have 2 cups cooked jasmine rice. If you do not, go ahead and cook the jasmine rice prior to starting on everything else as you need time for the jasmine rice to dry out and fluff up.

Preheat the oven to 400F. Line 2 baking sheets with parchment paper. On 1 sheet, place the sweet potato rounds. On the other sheet, place the sliced Brussels sprouts. Drizzle both the potato and sprouts with 2 tablespoons of the olive oil. Toss to coat. Sprinkle with 1/2 teaspoon each of the salt and pepper and the garlic powder. Roast for 15 minutes, tossing, then continue to roast until veggies are golden brown and cooked through. The amount of time will vary - but mine cooked about 15 minutes, then 5 more minutes. She allots 30 minutes in the recipe. It will depend on how big your potato and sprouts are.

While the vegetables are roasting, toss the kale with the remaining 1 tablespoon olive oil and pinch of salt and pepper. Massage the oil into the kale. The kale should reduce in size by about half once it is massaged well enough.

In a large bowl, toss together the rice, cannellini beans, and kale. Add in the Brussels sprouts and potato rounds. Be careful how you toss the veggies or you will break up the potato rounds.

To Make The Crispy Shallots: In a medium saucepan, heat about 2" oil over medium-low heat. You want the oil to reach about 350F, but after a few minutes of heating, I'll test it out by throwing a shallot slice in. While the oil is heating, in a small bowl, stir together the flour, salt, paprika, garlic powder, and pepper. Dredge the shallot slices in the flour mixture. Add them in batches to the oil. Fry until just golden and crispy, then remove with tongs or a slotted spoon and place on a paper towel to drain excess grease. Repeat with remaining shallot slices.

To Plate The Bowls: Put the rice and vegetable mixture into bowls and reheat if necessary, or desired. Top the rice bowl with the crispy shallots and gently toss. Top with a sprinkling of pomegranate arils and serve!


For The World! @ I Heart Cooking Clubs!


Sunday, June 30, 2024

Giada's Fried Cheese-Stuffed Zucchini Blossoms {A Fun Summer Appetizer}!

 So I was finally able to score some beautiful zucchini blossoms at the farmer's market and I was able to buy enough to make two recipes! The first recipes I was shared was Ina Garten's Zucchini Flower and Leek Frittata (click here for that) and also this recipe for Giada Delaurentiis' Fried Cheese-Stuffed Zucchini Blossoms!This is a pretty simple recipe but it does require some finesse and preferably....small hands! You've got to open up these delicate zucchini flowers, remove the stamen, rinse and fill with the cheese mixture below, then twist the flowers to seal.

The cheese mixture is a combination of goat cheese, cream cheese, heavy cream, basil, green onion, and salt and pepper. I think you could simply some of that by buying different flavors of goat cheese and/or cream cheese and make the filling your own if you like! 

Then you make a simple tempura batter consisting of flour, salt and sparkling water and VERY CAREFULLY dip the stuffed flowers in the tempera and fry them in the oil. This takes some finesse and tender loving care, but is overall easy. 

I liked this fried zucchini flower recipe so much better than Ina's Zucchini Flower and Leek Frittata. The texture of the zucchini flowers in the frittata was somewhat soft, hard to cut, and maybe a little slimy or less than pleasing. The texture in Giada's Fried Cheese-Stuffed Zucchini Blossoms was way better. I loved the light crispy batter on these zucchini flowers and they were really tasty dunked in some marinara. Now for the ultimate question: Would I try to source zucchini flowers again? Would I make this recipe again? No, I don't think so. While I enjoyed cooking with zucchini flowers and trying two different recipes, it's not something that I loved or would seek out and make again. But, I am very happy to have tried it and crossed it off my list!


Fried Cheese-Stuffed Zucchini Blossoms

Adapted from Food Network

by Giada De Laurentiis

Makes 8

1 cup all-purpose flour

1 cup sparkling water

3/4 teaspoon salt, plus extra for seasoning

1/3 cup (2 ounces) goat cheese, at room temperature

2 tablespoons (1 ounce) cream cheese at room temperature

2 teaspoons heavy cream

1 tablespoon chopped fresh basil leaves

1 green onion, finely chopped

black pepper

8 zucchini blossoms*

vegetable oil, for frying

Optional: marinara sauce for dipping

*Cook's Note: Zucchini blossoms can be found at farmer's markets and specialty grocery stores. As an alternative, try using baby bell peppers. Cut off the tops and remove the seeds. Fill with the cheese mixture and dip the cut end in flour before dipping in the batter. 

 In a medium bowl, whisk together the flour, water, and salt until smooth. Set aside.

In a small bowl combine the goat cheese, cream cheese, heavy cream, basil, and green onion. Mix until smooth. Season with salt and pepper, to taste. Spoon 1-1/2 to 2 teaspoons filling into each blossom. Close the blossoms and gently twist the petals to seal.

In a large heavy-bottomed saucepan, pour enough oil to fill the pan about a third of the way. Heat over medium heat until a deep-frying thermometer inserted in the oil reaches 350F (if you don't have a thermometer a cube of bread will brown in about 1 minute.) Dip the stuffed zucchini blossoms in the batter and allow any excess batter to drip off. Fry for 1 to 2 minutes, turning occasionally, until golden brown. Allow the cooked blossoms to drain on paper towels.

Season with salt and serve with your favorite marinara sauce or vinaigrette.


 June IHCC Potluck @ I Heart Cooking Clubs


Saturday, June 22, 2024

Creamy Lemon Zucchini Spaghetti To Celebrate The Summer Solstice!

One of the dishes I love to eat most in the summertime is a cheesy vegetarian pasta laden with fresh veggies and herbs. I literally dream about it all year!

Luckily, How Sweet Eats just posted this Creamy Lemon Zucchini Spaghetti that is right up my alley. It was kismet because I happened to have all the things on hand: spaghetti, lemon, Parmesan, cream, and lemon then also fresh baby zucchini from the farmer's market, as well as fresh basil and chives from my garden. I love it when things come together like that!

Think of this pasta dish as a creamy summertime pasta dish that is lighter than most cream-based pasta dishes. The way we accomplish the lighter feel is by using 2 cups of starchy pasta water and just 1/2 cup of cream. When you marry the caramelized cooked down zucchini with the pasta and the pasta cooking water you get a creaminess that only calls for very little cream. Also, Parmesan cheese is a lighter cheese, and when you add the Parmesan in stages, alternating the starchy pasta water, it produces creamy cheesy results for a lot less calories.

I'm gonna say, this might be THE pasta dish of the summer! It's economical, it's easy, and it's everything you crave in a pasta dish, creamy and comforting but with the bright pop fresh zing of summertime produce, veggies, and lemon zest. I also think it's very kid-friendly because most kids are veggie-averse and with the zucchini shredded and cooked down, you really don't notice it as much. 

What is your favorite summertime pasta dish?  

Creamy Lemon Zucchini Spaghetti

Adapted from How Sweet Eats

by Jessica Merchant

Serves 4

3 to 4 cups freshly grated zucchini, before squeezing

2 tablespoons butter

1 tablespoons olive oil

salt and pepper, to taste

4 garlic cloves, minced

1 pound spaghetti or other long noodle

1/2 cup heavy cream

2 tablespoons freshly grated lemon zest

1/3 cup finely grated Parmesan cheese

1/2 cup chopped fresh basil, plus more for topping

3 tablespoons chopped fresh chives

1/3 cups Parmesan cheese

Freshly grate the zucchini. Place it in a large kitchen towel and squeeze out as much of the liquid as possible.

Heat the butter and olive oil in a large skillet or dutch oven over medium heat. Add the zucchini with a big pinch of salt and pepper. Stir to toss. Cook, stirring over, until the zucchini melts down and becomes caramelized, about 20 to 25 minutes (mine only took about 10-12 minutes). Stir in the garlic.

While the zucchini cooks, bring a pot of salted water to boil and cook the spaghetti. When its finished, reserve 2 cups of the starchy pasta water.

Transfer the pasta to the pan with the zucchini - you can take it right from the pot and place it in the zucchini skillet. Add 1 cup of the reserved starchy water and the heavy cream. Stir and toss until combined. Stir in the lemon zest and the finely grated Parmesan.

Add another 1/2 cup of the starchy water, stirring to combine. Add in the fresh basil and chives. Taste and if needed, add in more salt, pepper or lemon zest or Parmesan. 

Top the pasta with the Parmesan and a bunch of fresh basil. Serve immediately!


 Summer Solstice @ I Heart Cooking Clubs!


Sunday, June 16, 2024

Ina Garten's Zucchini Flower and Leek Frittata {A Thing of Beauty}

I am my Lost Kitchen Era, where I am obsessed with Erin French's The Lost Kitchen show, restaurant, food, plating, and all the edible flowers she uses to garnish her dishes! I love how Erin goes to the local farms and is inspired by what is in season to make beautiful dishes. 

I wanted to create a Lost Kitchen dish in my own kitchen, so I went to the Lexington, Kentucky Farmers Market and I found zucchini flowers! I was so excited because I had never cooked with zucchini flowers before.

So I turned to the one and only queen, Ina Garten and I found her recipe for Zucchini and Leek Fritatta. This was a major win as it allows me to really channel the whole edible flowers vibe of The Lost Kitchen.

I searched the market for the rest of the ingredients needed: pancetta, leeks, baby zucchini, fresh thyme, eggs, half and half, Gruyere, and fresh basil. This added up to be a pricier dish than most recipes I cook, but that's ok, because as I shared above, I'm in my Lost Kitchen Era and I have a major need to cook with edible flowers.

This was more laborious than most dishes, with a lot of prep, as I had to clean the zucchini flowers, removing the stamen, and dry them. I had to cut and wash the leeks, which was a rather sandy and dirty task.I had to cut and wash the basil, the thyme, the zucchini. Cut and cook the bacon. Shred the cheese. Crack and beat 8 eggs. Cook the frittata filling. It was more involved than your regular everyday frittata, but no worries, this was THE FRITTATA to end all fritattas! It was going to be adorned with the most beautiful zucchini flowers. Doesn't it look gorgeous going into the oven?

Doesn't it look gorgeous coming out of the oven? I mean wow...It's stunning! Ina says to allow the frittata to cool for five minutes and then cut into it. I am dying to see how it all tastes.

The frittata slices perfectly and each person gets their own zucchini flower with their portion, how brilliant! The frittata is brimming with zucchini, zucchini flowers, bacon, leeks, and my favorite...Gruyere cheese. I love all these ingredients so much!

I go to take a long awaited bite and the zucchini flower is soft and baked into the frittata. It is an odd texture, soft and hard to cut into, the whole flower wants to stay together. Something about the flavor and texture is not appealing. I push the flower off and take a bite of the egg and filling, the flavors are too strong and overpowering. I take another bite and something here is just not working. I keep taking bites because I love all the ingredients, it appears to have baked up perfectly, and Ina Garten has never let me down, but the dish just didn't work for me. I am, however, very happy to have made the dish and finally get a chance to work with zucchini flowers. I like to try new things even if they don't work out. I do have another zucchini flower recipes up my sleeve, so stay tuned for that. The verdict is still out!

 Seasonal and Local Produce @ IHCC


Sunday, June 9, 2024

Roasted Asparagus with Parmesan Breadcrumbs

My new favorite thing is making fresh Parmesan Breadcrumbs. You cook fresh breadcrumbs on the stove top with butter and olive oil until golden brown and toasty, then you add in lots of Parmesan cheese and the Parmesan clusters together with the breadcrumbs to create cheesy clusters of hot crunchy bread and cheese. It's good on pasta dishes and great on green veggies! Give it a try on asparagus like I've done here, or on broccoli! It's delicious!

 Roasted Asparagus with Parmesan Breadcrumbs

Adapted from Food Network

by Giada De Laurentiis

Serves 4

1 pound asparagus, trimmed

1 tablespoon olive oil

salt and freshly cracked black pepper

1/2 cup fresh breadcrumbs

1/4 cup Parmesan cheese

1 tablespoon butter

1 tablespoon olive oil

For the Asparagus: Preheat the oven to 400F. Snap or cut the dry steam ends off each asparagus and place on a heavy baking sheet. Drizzle with olive oil, sprinkle with salt and pepper, and toss. Roast until the asparagus is tender, about 15 minutes. 

For the Parmesan Breadcrumbs: Add 1 tablespoon butter and 1 tablespoon olive oil to a medium skillet and allow butter to melt. Add breadcrumbs and cook, stirring, until golden brown, about 5-7 minutes. Add in Parmesan cheese, stirring, allowing the Parmesan to marry with the breadcrumbs and create clusters. 

Plate the asparagus and arrange the Parmesan Breadcrumbs over the asparagus. Enjoy!

Spring Brunch @ IHCC


Sunday, October 15, 2023

Ina Garten's Maple Roasted Honeynut Squash {The Best Autumn Side Dish}!


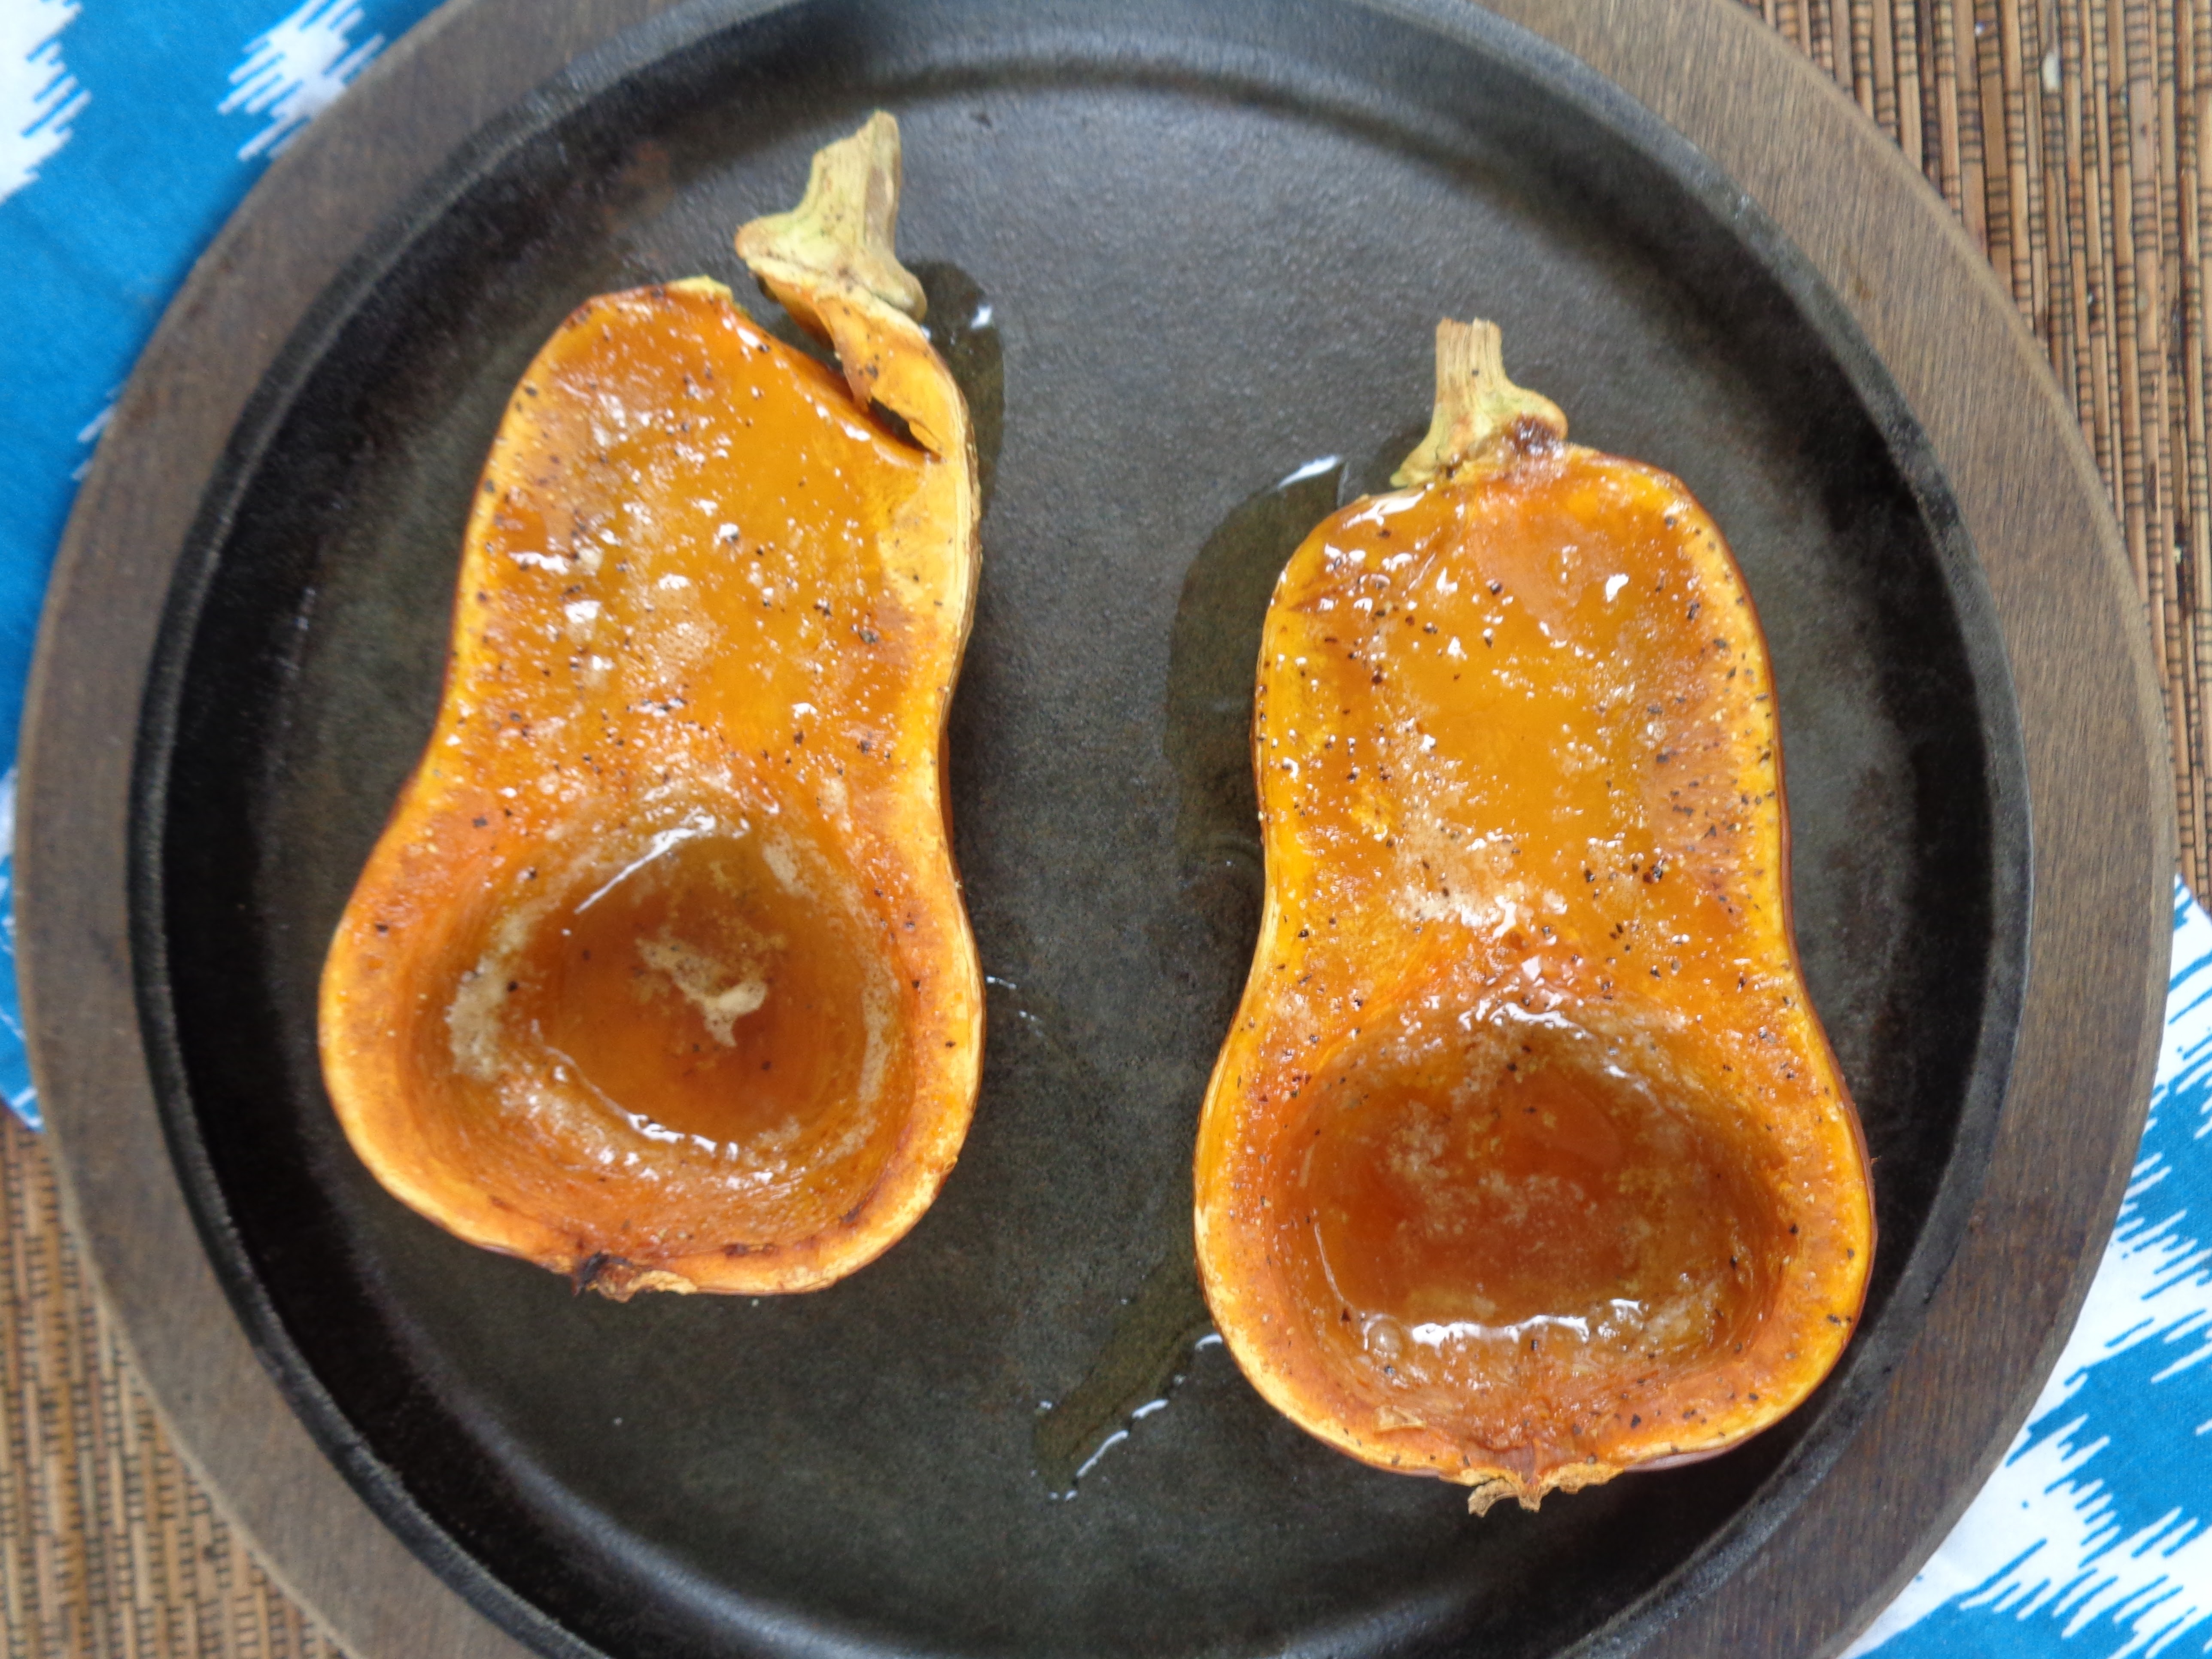
It turns out my new love is these precious baby honeynut squash. Wowza! They are so delicious...sweet and creamy and just so savory and comforting! I've been eyeing these little honeynut squash in cookbooks for awhile now, but I just saw them at Costco yesterday and I might've squealed. They're so little they fit in your hand and well, I knew instantly that I was making Ina's Maple Roasted Honeynut Squash!

Be careful cutting them in half lengthwise, because it is quite difficult and we don't want any accidents. That would just get in the the way of your complete and total enjoyment of these little precious gems!

 I've seen recipes where you can top these beauties with toasted nuts and/or seeds, cheeses, and all things spicy like chipotle or red pepper flakes. HOWEVER, I would urge you to try Ina's recipe, made simply with: the squash, butter, brown sugar, maple syrup, and salt and pepper. It simply can't be beat. These are just so dang good. They're like addictive good. Sweet and savory, creamy, and just oh so comforting. The little squash cavity holds all the buttery brown sugar goodness and you can just spoon bites and dunk it away. It is insanely delicious. Trust me, because I was meant to eat one half and I ended up eating two halves, or one whole baby squash. If you're a squash lover, please get your hands on these babies and try this recipe. It's heavenly!

Maple Roasted Honeynut Squash

Adapted from Food Network

by Ina Garten

Serves 6

3 honeynut squash (2-1/2 to 3 pounds total)

4 tablespoons (1/2 stick) butter, small diced

4 tablespoons light brown sugar

salt and freshly ground black pepper

pure maple syrup

Preheat the oven to 400F. Cut the squash in half lengthwise through the stems. Scoop out and discard the seeds. Place the squash halves on a sheet pan, cut-sides up, distribute the butter and brown sugar evenly among the cavities of each and sprinkle generously with salt and pepper. Roast for 30 to 40 minutes, until tender. Drizzle with maple syrup and serve hot. 


Pumpkin Party @ IHCC