Tuesday, March 31, 2009

Homemade Pizzas for BYOB: Buffalo Chicken and Spinach and Artichoke


I blame my newfound love of baking solely on Tyler Florence! Why, oh why do his baking recipes have to be so good that they inspire me to make my own creations? Ever since I made Tyler's parker house rolls, I have had an obsession with making yeast breads. I started making sandwich breads, soft pretzels, brioche, etc. After awhile, my husband requested homemade pizza dough. I'm sorry to say that I did not use Tyler's recipe. Instead, I used this recipe from the Food Network: http://www.foodnetwork.com/recipes/sara-moulton/pizza-dough-recipe3/index.html. I chose this recipe simply for its rating and it does not disapoint. I have wanted to try new recipes for pizza dough, but I just don't think you could improve on this recipe. It takes 1.5 hours in total and makes 2 - 14" pizzas or 4 small individual pizzas. This pizza dough rivals that of any fast food pizza and is better because you can make any topping you'd like, along with dipping sauces, and flavored crusts.
My husband loves the buffalo chicken pizza. We both love spicy food and thought it would make a great pizza. We always have leftover chicken in the fridge, so we just shredded it up and tossed it with some store bought buffalo sauce. This pizza can be topped with mozzarella or monterey jack or you could even put little bits of blue cheese on there.
The spinach and artichoke pizza was solely my idea. I had some spinach and artichoke dip in the fridge and kept wanting to eat it on a sandwich. Since this pizza dough recipe makes two pizzas, I decided to just slap it right on the pizza dough. It turned out fabulous and I was really proud. I had just cleaned out my fridge and made my own creation! If you love spinach and artichoke dip, try this recipe: http://allrecipes.com/Recipe/Hot-Artichoke-and-Spinach-Dip-II/Detail.aspx. It was all the rave this past Thanksgiving. Everyone agreed it was restaurant-worthy. I usually add a clove or two more garlic to this recipe and it is much better after it has sat in the fridge for a day and the flavors have mingled.
This pizza dough is getting such rave reviews that we are dreaming up new toppings all the time. The problem is that all the toppings we've made are so tasty that we can't get away from them! We want to make a taco pizza, a meatball pizza, and several others. We are having so much fun with this one. I'd love to hear what you all put on your pizza too. Please share!!

Sunday, March 29, 2009

Root Beer Bundt Cake - Bake Along #5

This is a delicious Root Beer Bundt Cake from the new cookbook, "Baked". I saw a post about this recipe on My Baking Adventures by Megan. She has a group of people who do informal bake alongs and was kind enough to share this recipe with me. I have been curious about the recipes from this new book, which has been featured on the Martha Stewart show. The people who wrote the book have a bakery in NYC and seem to have some unique combinations and flavors. After making this cake, I would love to buy the cookbook. I'm sold!

The base of this cake is root beer and dark chocolate. Overall, the cake has 2 cups of root beer (I used A&W). I think the dark chocolate compliments the root beer and helps to bring out the flavor. The frosting also consists of root beer, 2 oz. dark chocolate, powdered sugar, butter, salt, and dark unsweetened cocoa powder. My frosting was somewhat thick, so I added about another tablespoon of root beer to thin it out. This made the frosting capable of spreading. I have a small bundt pan, so I was also able to make 4 ramekins for individual servings later. I plan on taking the bundt cake to my in law's this afternoon. My father-in-law is a sucker for chocolate and has been known to keep Hershey miniatures in his t-shirt pocket to snack on throughout the day!

I thought this cake was fabulous and a great break from the norm. It was chocolately, but not too sweet and you could taste the root beer for sure. The frosting was also somewhat salty and I thought this was a great compliment to the cake. You have to have the vanilla ice cream with the cake because it really does taste a lot like a root beer float. I really liked this recipe and will probably make it again one day. For now, I am going to try and refrain from desserts for the next month. I'm getting ready to go on a cruise in a month and I need to fit in the bathing suit!!

Root Beer Bundt Cake

2 cups root beer (do not use diet root beer)
1 c. dark unsweetened cocoa powder
½ c. butter, cut into 1 inch pieces
1 ¼ c. granulated sugar
½ c. firmly packed dark brown sugar
2 c. all purpose flour
1 ¼ tsp. baking soda
1 tsp salt
2 large eggs

For the Root Beer Fudge Frosting
2 oz. dark chocolate, melted and cooled slightly
½ c. unsalted butter, softened
1 tsp salt
¼ c. root beer
2/3 c. dark unsweetened cocoa powder
2 ½ c. powdered sugar
To Serve:Vanilla Ice Cream

Preheat the oven to 325 degrees. Generously spray the inside of a 10” bundt pan with nonstick cooking spray.In a small saucepan, heat the root beer, cocoa powder and butter over medium heat until the butter is melted. Add the sugars and whisk until dissolved. Remove from the heat and let cool.In a large bowl, whisk the flour, baking soda and salt together.In a small bowl, whisk the eggs just until beaten, then whisk them into the cooled cocoa mixture until combined. Gently fold the flour mixture into the cocoa mixture. The batter will be slightly lumpy - do not overbeat it, as it will cause the cake to be tough. Pour the batter into the prepared pan, and bake for 35-40 minutes, rotating the pan halfway through the cooking time, until a small sharp knife inserted in the cake comes clean. Transfer the pan to a wire rack to cool completely. Gently loosen the sides of the cake from the pan and turn it out onto the rack.

Root Beer Fudge Frosting:Put all the ingredients in a food processor. Pulse in short bursts until the frosting is shiny and smooth.Use a spatula to spread the fudge frosting over the crown of the bundt in a thick layer. Let the frosting set before serving, with the ice cream on the side.

Please do yourself a favor and try this one!!

Thursday, March 26, 2009

Honey Pork Tenderloin and Homemade Applesauce

I woke up Monday and did the same thing I always do. Get the kids ready so I can take my daughter to school. Only this Monday I was in for quite a surprise! When we were ready to walk out the door, I couldn't find my keys. I remembered that my husband moved my car before he left for work on Sunday. I looked everywhere. Finally, I called my husband and found out that my car keys were in Charlotte, NC!! He put them in his pocket after he moved the car and forgot about them!! He drove all the way to Charlotte with my keys. Since we live in Georgetown, KY I knew I was going to have to wait at least one day, if not two to receive them again so I made last minute arrangements for my daughter and made do without a car for a day and a half.
I didn't have too much in my fridge or pantry. I had a pork tenderloin and some apples that I needed to use up. This meal came about while I was searching online for pork tenderloin recipes. I really like website http://porktenderloinrecipes.net/. If you haven't checked it out, you should. I found a recipe for Honey Pork Tenderloin and had all the ingredients so I went ahead with it. For every pound of pork tenderloin you make a paste of:

4 Tablespoons Honey
2 Tablespoons Cider Vinegar
2 Tablespoons Brown Sugar
1 Tablespoon Dijon Mustard
1/2 teaspoon Paprika
Rub about half of the paste onto the raw pork tenderloin and bake @ 375F for about 35-40 minutes, basting every so often with the leftover sauce. The basting is the key to getting that real sticky sauce. I really loved this recipe. The sauce was a lot like a barbecue sauce, but a little more sweet. The outside of the pork was crusty and sticky and just delicious sliced thinly and served on a homemade roll. I would make this one again and again, and again......I would make it and serve it on little rolls at a party or a baby shower, even a bridal shower. They were like little pork sliders!
I made a homemade applesauce to go with the pork. My 2 year old loves applesauce and we were out of it, so I figured why not?? I usually don't care for applesauce, but I have to say that this was very good when it was fresh off the stove and warm. There is a HUGE difference between jarred applesauce and homemade!! It is ridiculous how much I liked this applesauce! If you have never made homemade applesauce, you would be surprised at how quick and easy it really is. It doesn't take very long, only 20 minutes, and is great served warm. You can flavor it with cinnamon or any other spice you like. You can also add in other fruits if you wish.
Recipe - Homemade Applesauce:
4 apples, peeled, cored, and chopped
3/4 cup water or apple juice *I used water, apple juice would make it sweeter overall*
1/8 to 1/4 cup sugar
squirt of lemon juice
Put everything in a saucepan and cook, covered, over medium heat for 15-20 minutes until apples are softened. Remove from heat and mash with fork or potato masher. I used almost 1/4 cup sugar and it was pretty sweet, but not overly sweet. Next time, I would cut back a little to about 1/8 cup sugar. I think you could even use honey or other sweeteners.
The next afternoon I received a knock at the door and it was the Fed Ex man with a present for me......car keys!! You would never think car keys would make you so happy : )


Monday, March 23, 2009

Bourbon and Chocolate Pecan Pie *Recipe #32 - Page 196*


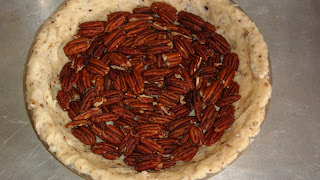
This chocolately pecan pie is rich, decadent, and sinfully delicious!! It is gooey, sticky, and creamy all in one pie! The crust includes finely ground pecans and has a very light, airy and nutty flavor. The filing is sweet, but not too sweet and the chocolate is just the right balance. I served the pie with some homemade whipped cream, but this would be even better with vanilla ice cream. This pie should come with a warning: Make sure you have people to share it with you......or you will eat the whole pie by yourself!!

Pastry:
1 cup all-pupose flour, plus more for dusting
1/4 cup finely ground pecans
1 tablespoon sugar
pinch kosher salt
1 stick cold unsalted butter, cut into cubes
2 tablespoons ice water, plus more if needed

Filling:
1/2 stick unsalted butter
2 ounces unsweetened chocolate
3 eggs
1 cup sugar
3/4 cup dark corn syrup or sugar cane syrup (such as Steen's)
1/2 teaspoon pure vanilla extract
3 tablespoons bourbon
1/4 teaspoon kosher salt
1- 1/2 cups pecan halves

1 pint heavy whipping cream, whipped - you can flavor with maple syrup, honey, sugar or bourbon. I used up some cool whip I found when cleaning out my freezer and then also made fresh whipped cream flavored with honey and both were great.
NOTE: I did not add bourbon to the pie. I had all other ingredients on hand except for the bourbon and did not have time to run to the county line to buy a little for this recipe. I also used 2/4 cup light corn syrup and 1/4 cup maple syrup. I am not fond of corn syrup because although "corn"' is natural the process of corn syrup is not. I am nowhere near overly obsessed with this, but try to make adjustments when I can. Additionally, I love real maple syrup and honey and they are all natural. I had read somewhere online that maple syrup and honey could be used as replacements for corn syrup.
To make the pastry, in a large bowl combine flour, ground pecans, the 1 tablespoon sugar, and the salt. Add the butter and mix with a pastry blender until the mixture resembles coarse bread crumbs. Sprinkle in the ice water, tossing the mixture with a fork until it is just combined. Squeeze a small amount of dough together; if it is too crumbly, add more ice water, 1 tbsp. at a time. (Do not allow dough to become too wet or sticky). When dough comes together in a ball, wrap tightly in plastic wrap and refrigerate at least 30 minutes.
On a lightly floured surface, roll dough into a 12-inch circle. Carefully roll circle of dough around rolling pin, then unroll it on top of the 9-inch pie plate, gently pressing it around the insides of the plate. Trim excess dough (I did not have excess, I was almost a little short) and leave a 1/4 inch overhang. Place the pie on a sturdy baking sheet.

Preheat the oven to 350F. To make the filling, melt the butter and chocolate in a double broiler; remove from heat and let cool. Beat the eggs with an electric mixer on high speed until frothy. Set the mixer on low speed and gradually add the sugar. Stir in the syrup, vanilla, bourbon, salt and the melted chocolate mixture. **make sure your chocolate is cool or you will scramble your eggs and that is not so tasty**
Arrange the pecans on the bottom of the pastry and carefully pour the egg mixture over them. Bake about 45 minutes, my oven took more like 55 minutes, until the filling is set and slightly puffed. Do the toothpick test to make sure the pie is done. It should come out clean. Transfer the pie to a rack and cool completely before cutting. Serve with whipped cream/ice cream.
NOTE: The pecan halves make the pie look pretty, but they are not necessary. In fact, it made the pie a little harder to cut and serve neatly. You could use any combination of pecans you had. Whatever floats your boat. Also, this pie was even more tasty fresh out of the refrigerator served cold with whipped cream. Maybe I'm wierd, but I love cold pies.
If you have a pecan pie lover in your life you should try this recipe. It was awesome!! Enjoy!

Friday, March 20, 2009

Lamb Shank Stew with Russet Potato Top *Recipe 31 - Page 118*

I have to say that this was the least favorite of the Tyler recipes so far. The picture in the book looked very tasty. I mean how can you go wrong with stew topped with potatoes, right? While the dish wasn't bad, it was something I would never make or serve again.

This recipe is mainly a braised dish cooked in the oven for about 3 and a half hours. You flour the lamb shanks and sear them on the stovetop. Once they are browned, you add garlic, carrots, onion, cloves, thyme, and a bay leaf. Cook this mix for 2-3 minutes, and then add a bottle of red wine and 1 quart of beef broth. Cover and braise 2 hours. After braising 2 hours, you peel 6 potatoes and halve them. You place them over the stew, cutting potatoes if necessary, and baste them with a garlic-parsley butter and cook, uncovered, for another one and a half hours.

I bought the lamb shanks at Whole Foods and they in turn bought the lamb from a local source here in Kentucky. The lamb was fresh and looked great. When the dish was complete, the lamb did fall off the bone, but it was somewhat fatty and you could still see a lot of connective tissue. Each lamb shank was mostly fat and connective tissue therefore it didn't net very much meat in the end. I spent quite a bit of time before serving trying to separate the meat and arrange it on a serving dish.

The barley had soaked up quite a bit of the red wine and was almost purple. Although it looked slightly strange, it was okay to eat. It did however taste a lot like drinking red wine, which was also strange. My husband made the comment that the whole dish tasted like barley and reminded him of drinking beer! I wouldnt' say this was a bad thing, but I think the barley was something we just weren't used to eating.

In addition to the lamb being so fatty, and the barley tasting so much of red wine, the potatoes were rather hard and never really got very soft. I followed Tyler's directions and basted them with quite a bit of butter and then even added more butter because I felt like it couldn't hurt anything.

We each had one serving and when we were done I knew that I should not save the leftovers. I was happy that I had halved the recipe and only bought 3 lamb shanks. I took the potatoes off the top and saved them for breakfast this morning and then we tossed the rest. I am not fond of throwing food away and probably only do this once or twice a year, but there was no point keeping it.

I only recommend this dish if you know that you love lamb shanks and barley. If you do decide to make this dish I would also recommend that you try baking your potatoes or cooking them in some other method to ensure they are soft when the dish is complete. The recipe is not included in this post, but I would be happy to email it to anyone if they wish to try this dish.


Wednesday, March 18, 2009

Tyler's Pulled Pork and Homemade Barbecue Sauce

Pulled pork is one of my favorite things to eat if it is done well. I first tried this recipe a couple months ago, but I only had a 2 pound pork shoulder and we didn't have that much pulled pork when it was all said and done. Ever since then I have had my eye out for a large pork shoulder/boston butt. I finally found a 4 pound pork shoulder at Whole Foods last week and I knew immediately that I wanted to make this recipe again.

This pulled pork begins by creating a simple and easy dry rub for the meat. It can marinate overnight, but can also marinate for as little as one hour. The dry rub are things that are typical pantry spices and nothing that I had to buy special. The meat cooks for 6 hours and is a dream to shred. In fact, I was able to shred it all in less than 5 minutes. The dry rub creates a wonderful flavor throughout the meat and carried over after shredding. It wouldn't be necessary to have any barbecue sauce with this pulled pork because it has a wonderful overall taste. However, I had all the ingredients on hand for Tyler's barbecue sauce, included in this recipe, so I decided to go all out. I am so glad that I did! I loved his barbecue sauce and again it is made from items that are usually in every pantry. It was easy to make and easily the best barbecue sauce around. It was sweet, tangy, and spicy and it is almost gone!! I'm wishing there was more of it because it would be nice on other things as well.

I attempted to make some sandwich buns from the King Arthur website and I am sad to report that they did not turn out. This was very upsetting to have pulled pork and no bread/buns. I have to say that I was very dissapointed with the King Arthur directions and recipe and probably will not use their website for future recipes. However, I must admit that their flour is the best and the only one you'll see in my pantry. The next day, I decided to use Tyler's recipe for Parker House Rolls, which was successful. I paired these sandwiches with the peach salad I had made the same day and the flavors were very complimentary.

Everything about this recipe makes it a total keeper! If you like barbecue foods and want to try pulled pork, please check this recipe out online at Food Network: http://www.foodnetwork.com/recipes/tylers-ultimate/pulled-pork-sandwich-recipe/index.html.

Monday, March 16, 2009

California Peach, Shaved Fennel, Mozzarella, and Crispy Prosciutto Salad *Recipe #30 - Page 238*

Let me start by saying that that this is a beautiful and delicious salad! Anyone who likes salad, will love this unique combination of peach, fennel, mozzarella, and prosciutto with a balsamic viniagrette. This salad will satisfy your sweet and salty palate. Tyler says that he put this salad together as one of his first dinner parties when he moved to California. He says it was a hit from get-go. I believe it. I will have no problem gobbling this salad up and I can't wait to share it with my mom. I have a group of picky eaters in my house and my Mom is the only one who eats my salad/veggie recipes.

RECIPE
8 thin slices prosciutto (about 1/2 lb) - cook more if you have it. I love good prosciutto!
4 peaches, firm but ripe, halved and pitted
1/2 fennel bulb
2 balls (8 ounces each) fresh buffalo mozzarella, cut into bite-sized pieces
2 cups fresh hydroponic watercress or other peppery green (I used arugula)
2 tablespoons balsamic vinegar
1/4 cup extra-virgin olive oil
kosher salt and freshly ground black pepper

Preheat oven to 350F. Lay prosciutto slices out flat in a single layer on a baking tray. Bake for 15-20 minutes, until crispy and golden. Remove from tray and drain on paper towels.

Cut peaches into thick wedges; set aside. Using a mandoline or sharp knife, shave fennel into paper-thin crescents. Drop fennel slices in a large bowl of ice water for 1 minutes to crisp; drain and dry on paper towels. Toss peaches, fennel, mozzarella, and watercress(or peppery green) together in a large salad bowl.

To prepare the dressing, put balsamic vinegar in a small bowl. Whisking constantly, slowly pour in oil until mixture emulsifies slightly. Season with salt and pepper. Drizzle individual servings of salad with dressing; top with crispy prosciutto.
NOTE: If you have Tyler's book you will notice that the dressing looks different in the book. I think he reduced some balsamic vinegar for the picture. The dressing in the picture is thick and brown and looks a lot like reduced balsamic. Mine is nowhere near as pretty, but it was very tasty.

I encourage everyone to try this recipe. It is the ultimate in spring/summer salad and I really enjoyed it and think anyone who is a salad lover will love it!

Buttermilk Pie with Whipped Honey Creme Fraiche *Recipe #29 - page 194*

If you love tangy food and desserts, than this is your recipe. Once again, Tyler does not dissapoint with this dessert recipe. The pie crust was the easiest and best pie crust I have ever made. Everything about this pie was easy. The only criticism that I have about it is that it did need to cook longer than the allotted time. I do find this to be true on his baking recipes. Maybe it's my oven, who knows. I made a full-sized pie and then also had enough crust and filling to make three small individual pies.
RECIPE
Pastry:
3 cups all-purpose flour
2 teaspoons sugar
1 teaspoon kosher salt
1 stick cold unsalted butter, cut into cubes
1/2 cup vegetable shortening
1/2 cup ice water

Filling:
1 stick unsalted butter, softened
1-1/2 cups sugar
3 large eggs, separated
2 cups buttermilk
1 tablespoon lemon juice
1/4 teaspoon freshly grated nutmeg
1/4 cup all-purpose flour

1 recipe honey creme fraiche - Using the whisk attachment on a kitchen stand mixer, beat 16 oz. creme fraiche on high for 45 seconds, until it tightens up slightly. Fold in 2 tablespoons honey with a spoon so it is just mixed but you can still see swirls of honey. (I halved this recipe because I could only find a 8 oz. container of creme fraiche). I do not like sour cream and creme fraiche reminded me a lot of this. Everyone else enjoyed the topping. I elected to use cool whip with honey drizzled on top. Try not to make fun of me....this is the only way that I could eat the pie because it was very tangy to me and I really do not like tangy at all.

For the pastry, combine flour, 2 tsp. sugar, and the salt in a food processor and pulse until combined. Add butter and shortening and continue to process until the mixture resembles coarse bread crumbs. Add cold water and process until dough comes together in a large ball. Turn onto floured surface and gently knead a few times until dough is smooth. Wrap tightly in plastic wrap and refrigerate for 20 mins.

Preheat oven to 350. On a floured surface, roll the dough into a 12-inch circle. Put on top of a 10" tart pan (or pie pan as I used) gently pressing it around the insides of the pan. Trim any overhang and discard. Cover with a piece of parchment paper and fill with pie weights. Bake in the middle of the oven about 20 minutes or until the crust is set and just firm. Remove weights and cool pie shell.

Reduce the oven temp to 325F. To make the filling, use the paddle attachment of your kitchen stand mixer. Beat the butter and the 1-1/2 cups sugar on medium speed until light and fluffy and pale in color. Add egg yolks, buttermilk, lemon juice and nutmeg. Mix until batter is smooth, occasionally scraping down the sides of the bowl with a rubber spatula. Add flour and continue to mix until combined. Transfer buttermilk mixture to a separate bowl. Thoroughly wash mixing bowl and attachment with soap and hot water; return to stand mixer. Using the whisk attachment, beat egg whites on high until stiff peaks form. Gently fold egg whites, half at a time, into buttermilk mixture. Pour filling into cooled pie shell. Bake for 35 to 40 minutes (or longer) until the pie is set (the pie should still be pale in color). Cool and serve with honey creme fraiche or cool whip and honey : )

Serves 6 to 8

Making Homemade Sorbet: Blueberry & Orange *Martha Stewart*

Lately I have become obsessed with making everything myself from scratch. Has anyone read the book Eat This, Not That? Well, if you have then you understand where I'm coming from. If you have not, and you care about what you put in your body, then you should read it. Now I am by no means a health junkie, but I really don't want to be eating pesticides, manmade chemicals, dyes, or preservatives if I don't have to. And I especially do not want my children to eat them. What does all that mean? Well, my kids love ice cream, sherbet, sorbets, and of course, popsicles. I bought an ice cream machine a couple years ago and I did make some homemade ice creams. Then I packed it up and put it away because we were eating too much ice cream. Last week I had an overabundance of fresh fruit, which I did not want to go to waste, and I was inspired to make several fresh and homemade sorbets. This was relatively simple and fun, thanks to Martha's new book, Cooking School.

I knew I wanted to make several different flavors of sorbet so I began by making some simple syrup. I consider myself "experienced" in the kitchen, however everytime I've tried simple syrup it has failed. I had just borrowed Martha's Cooking School from the library so I figured I'd give her simple syrup a try......and it was a HUGE SUCCESS!! This recipe is simply 3 cups of sugar and 3 cups of water. I used a big stockpot because I didn't want to risk a sugar burn. You just bring the mixture to a boil over medium-high heat and cook until sugar is dissolved for about 10 minutes. Then you need to let it cool. You can keep this in the refrigerator for up to 2 months. **You can also flavor the simple syrup with aromatics such as: mint, basil, ginger, citrus peel, cinnamon, vanilla and the list goes on and on. You would just get about 1/2 cup of any aromatic and pour the desired amount of simple syrup over it. Let it steep for about 2 hours and then remove the aromatics or strain to remove small pieces. This would allow you to create all kinds of wonderful flavor profiles.

Now that you have made the simple syrup, you are over halfway there. If you are lucky enough to have the syrup in your fridge, then making sorbets is a real cinch. A sorbet is simply a mixture of fruit juice and simple syrup. Here are Martha's guidelines for different types of fruit sorbet. I like to try and cut back the amount of syrup I add to the fruit juice, but you can compromise the final product. The correct amount of simple syrup helps the mixture to freeze and become more solid.

NOTE: Buying this much fresh fruit can be expensive. You can absolutely use frozen fruit that has been thawed. I have tried this with the same results and it is much more economical and just as healthy. I have also cut the recipe in half with great results. Each batch will make 2 cups of sorbet. For now on, I will refer to simple syrup as SS.

Blackberry - 4 cups of blackberries and 1/4 cup water pureed together and strained. Add 2 cups of SS.
Strawberry - 5 cups of chopped strawberries and 1/4 cup plus 2 tablespoons water pureed and strained. Add 1 and 1/4 c. SS.
Raspberry - 6 cups of raspberries and 1/2 cup plus 4 tablespoons water pureed and strained. Add 1 and 3/4 cups SS.
Blueberry - 5 cups blueberries and 1/4 cup plus 2 tablespoons water pureed and strained. Add 1 and 1/4 cups SS.
Lemon - Juice of 8 lemons and 1 and 1/2 cups SS.
Orange - Juice of 5 oranges and 1 and 1/4 cups SS.
Lime - Juice of 8 limes and 1 and 1/2 cups SS.
Grapefruit - Juice of 2 and a half grapefruit and 1 and 1/4 cups SS.
Mango - 6 cups chopped (3 mangoes) and 1/4 to 1/2 cup water - depending on juiciness. Puree and strain fruit mixture and add 1 and 1/4 cups SS.
Kiwi - 4 cups chopped (16 kiwi) and 1/2 cup water + 1 tablespoon fresh lime juice. Puree and strain mixture and add 1 and 1/4 cups SS.
Pineapple - 3 cups chopped (2/3 pineapple) + 1/4 cup water + 1 tablespoon fresh lime juice. Puree and strain and add 1 and 1/4 cups simple SS.

After you have made your mixture, pour into the ice cream maker and turn on. My ice cream machine took about 30 minutes for each sorbet.

As the warm weather comes upon us this is something that I will be making a lot!! I am getting ready to experiment with passion fruit, guava and also some chocolate sorbet.

Enjoy!!

Tuesday, March 10, 2009

Sauteed Baby Artichokes

One of my favorite things to do is to go to Whole Foods and do my grocery shopping. I know it, I'm crazy. Last week I got a lot of fun things to cook with in the kitchen. I got these baby artichokes, passion fruit, guava, blood oranges, duck breast, local lamb shanks and lamb loin chops, and a bunch of other fun stuff.

Back to the baby artichokes. Originally I wanted to stuff them, but I just didn't have time for that. So, I decided to go with sauteed baby artichokes. How can you go wrong with parmesan cheese on top? My mom was over visiting and together we ate the whole plate of them for lunch. They were very, very good!

Recipe
1 package baby artichokes
1/2 cup olive oil
1 tbs. lemon juice
1/2 tsp. salt
dash pepper

How to prepare artichokes: Cut stem off at base. Peel back and snanp off petals until cone of yellow petals remains. Cut off top 1/3 of each artichoke. Drop artichokes into bowl of water with 2 Tbsp. lemon juice at each step to prevent browning (they will brown a little anyway. Quarter or halve artichokes. Drain well before cooking.

Pat dry and heat olive oil in a large skillet over medium-high. Add baby artichokes and cook and stir until tender, about 5-8 minutes. Sprinkle with lemon juice, salt and pepper. Toss with hot cooked pasta and parmesan cheese or add to risotto or pizza.

We chose to eat them by themselves for a healthy lunch option! I can't wait to buy some more.

Piadina (Italian Flat Bread)

Let me just say that this is a recipe that every bread baker should make! It was easy, delicious and can be made fresh in minutes when needed. I needed some flatbreads for a recipe in Tyler's book so I located this recipe. This is a yeast dough that is rolled into rounds and cooked in a skillet in about 5 minutes. My recipe made 8 flat breads. I cooked half for lunch and left the remaining dough out for dinner so they could be made fresh. My cookbook on bread says that these flat breads were served in the Romagna region of Italy in bars where it is usually served warm and wrapped around a filling such as prosciutto and basil. I have used my for the Tyler recipe (posted below), to wrap around salad, and this morning I wrapped one around my scrambled eggs. This is by far one of my favorite bread recipes and I will be making them a lot.

Ingredients:
2 tsp. dry yeast
5 tbsp. water
3-1/4 cup bread flour
2 tsp salt
1 tbsp olive oil
1 cup carbonated water - I used club soda

1) Sprinkle the yeast into the water in a bowl and let stand 5 mins. Mix the flour and salt in a large bowl. Make a well in the center and pour in the dissolved yeast, the oil, and 2/3 cup of carbonated water
2) Mix in the flour. Stir in the reserved carbonated water as needed, to form a firm, moist dough.
3) Turn the dough out onto a lightly floured work surface. Knead until smooth, shiny, and elastic, about 10 minutes. ***I used my kitchenaid mixer to do this and it turned out wonderful*
4) Put the dough in a clean and oil bowl, then cover with a dish towel and let rise until doubled in size, about 1-1/2 hours. Punch down, then let rest for 10 minutes.
5) Divide dough into eight equal pieces. On a lightly floured work surface, roll out each piece to form a round, 6 inches across and 1/2 inch thick. If the dough resists rolling out, let it rest for 1-2 minutes, then continue.
6) Heat a heavy frying pan or griddle over medium-low heat until very hot, about 10 minutes. **Recipe does not say to oil or butter the pan each time, but I found that I needed to do this*
7) Place one of the dough rounds in the hot pan and prick all over with a fork to prevent air bubbles. Cook until golden brown on both sides, flipping it over frequently to avoid scorching and to aid even cooking, about 5 minutes.
8) Repeat with the remaining dough rounds as directed in step 7. Stack the rounds on top of one another and cover with a dish towel to keep soft and warm.

Enjoy!!

Grilled Flat Bread with Caramelized Onions, Gorgonzola Mascarpone, and Crunchy Red Grapes *Recipe #28 Page 168*

First of all, ignore the way the caramelized onions look in the picture. After I took the picture I ate the flat bread and then realized the onions look like worms! Not so appetizing. On to the recipe. Naturally I could not find flatbreads to make this recipe, so I had to make my own. This is not a bad thing because I am part of a group called BYOB (Bake your own breads). The flatbread recipe will be in my next post and I encourage anyone to make them. They are delicious and you cook them in a skillet so there is no long baking times.

In Tyler's description he says that this recipe is a truly unique flavor profile. I have to admit that I was skeptical to try this recipe and wanted to try it out for myself first just in case. The first few bites were a little strange, but the more I ate of it the more addicted to it I became. I ate the whole flatbread! This dish is hard to explain, but my flatbread was warm and soft like a pillow. It had the shape and shape of a pita bread, but the taste of a pizza dough. There were so many tastes and textures in this one because you have soft from the bread, creamy from the cheese, crunchy from the grapes and walnuts. The dish is sweet, nutty, tangy, cheesey and a little smoky from the grill. This is a must try and would be an easy dish for spring or summer. Tyler's flatbread was one large flatbread that would serve up to 6 people. I think this would make a good appetizer because it would be something unique that people would talk about. I'll stop babbling now, here is the recipe:

extra-virgin olive oil
3 large onions, sliced
1 large store-bought rustic-style flatbread
kosher salt and freshly ground black pepper
2 cups mascarpone
1 cup crumbled Gorgonzola
1 cup toasted walnuts, roughly chopped
2 cups firm red grapes, halved
2 tablespoons chopped fresh italian flat-leaf parsley

In a large saute pan heat a 2 count of olive oil over medium-heat. Add onions and slowly caramelize until brown and creamy. Set aside.

Preheat the grill to high. Quickly and carefully wipe the grate with oiled paper towels to create a nonstick surface. Brush the flat bread with oil and season with salt and pepper. Reduce grill heat to medium. Grill bread on both sides until warmed through and brown with grill marks.

Quickly transfer flat bread to a platter and smear with mascarpone while still warm. Sprinkle with Gorgonzola, caramelized onions, toasted walnuts, and grapes. Season with a few turns of freshly ground black pepper, drizzle lightly with some additional oil, and top with a shower of fresh parsley.

Add Image

Sunday, March 8, 2009

Arugula, Fennel, and Grape Salad *Recipe #27 - Page 237*

I made this salad last week sometime but have to confess that I have spent a couple days obsessed with facebook. If you haven't joined that, then you should. Anyway, this salad was very light and refreshing. I had never ate arugula before and I had never made a salad dressing either. Making the salad was so quick and easy that I was kind of mad that I hadn't tried this recipe earlier. I chilled my salad plates and made sure everything was good and cold. Then I tossed the salad in a separate bowl altogether. This really made a difference. I felt like I was eating a salad that had been ordered from a restaurant.

Vinaigrette: 2 tablespoons lemon juice, 1 teaspoon dijon mustard, 1/2 cup extra-virgin olive oil, 2 teaspoons sugar and salt and pepper to taste. Combine lemon juice and mustard in a large bowl. Slowly pour in the oil, whisking until the mixture has emulsified. Season with sugar, about 1/2 salt, and black pepper.

For the salad:
1 small fennel bulb
4 cups packed baby arugula
1 cup red seedless grapes
1/2 cup roasted cashews
Wash fennel bulb. Using a mandoline or sharp knife, shave the fennel lengthwise so each piece is still held together by the root. Drop shaved fennel pieces in a large bowl of ice water for 1 minute to crisp; drain and dry.

When ready to serve, toss fennel, arugula, grapes, and cashews together in a large salad. Toss salad with vinaigrette, to coat. Season to taste with salt and pepper.

Enjoy this salad as part of a healthy diet. I had this salad twice for lunch this week and lost another 2 pounds.

Wednesday, March 4, 2009

Chicken Breast with Orange, Olives, and New Potatoes *Recipe #26 - page 88*

This is a five star recipe!! I wasn't looking forward to cooking, but I ended up really enjoying my time in the kitchen with this dish. The smell was wonderful and for once I wasn't cooking with onions and garlic. Don't get me wrong, I love onions and garlic, but it is just a nice change of pace to have a dish with such nice clean and fresh flavors. I was patient to get a good sear on my chicken breasts and they ended up beautiful and were very crispy. The orange slices gave a nice subtle orange flavor and the olives added a little salty flavor to the overall dish. There are only 4 new potatoes sliced in the whole dish, so the potato is not too heavy. I think this is a beautiful dish to entertain with and would be gorgeous rounded out with a salad on the side. The chicken was juicy and just all around delicious. This is a healthy and delicious meal and I am dreaming up other combinations to imitate this meal. I am thinking about limes and some southwest flavors. Chili-Lime Chicken.... I must be feeling creative today.

Ingredients:
extra virgin olive oil
2 large chicken breast halves, skin on
kosher salt and freshly ground black pepper
4 new potatoes, sliced 1/4 inch thick
1 cup black olives, pitted
1/2 orange, sliced
fresh Italian flat-leaf parsley leaves, for garnish

Preheat oven to 350F. In a large ovenproof saute pan heat a 3-count of olive oil (3tbsps.) over medium heat. Season chicken breasts with salt and pepper; add them to the pan; skin sides down. Cook for 10 minutes until the skin is golden brown, then turn breasts over and add potatoes, olives, and orange slices. Cook for 5 minutes more, until the potatoes begin to brown. Season with salt and pepper. Transfer pan to oven and bake for 12 -15 minutes, until chicken is golden brown and juices run clear (180F). Garnish with fresh parsley leaves.

**My chicken breasts were pretty big and they cooked in the allotted time, about 15-17 minutes.
My meat thermometer broke again. I have a drawer full of new meat thermometers. They only last about 5-10 uses and then they break on me. Good thing they are relatively cheap. I have to replace them constantly.

Everyone please try this. It is healthy, fresh, light and refreshing. One of my Tyler fave's!!

Hump Day Burgers - Mediterrean Style -


I had some ground beef and chicken breast in my fridge that had to be cooked today. I really wasn't in the mood for cooking meat or eating meat. My husband is on the road, my daughter doesn't like ground beef, and my son is allergic to it. So, I am calling these burgers "hump day" because it was just one of those days in the middle of the week where I just felt "blah" about eating. I am also calling these "hump day" burgers for Donna of My Tasty Treasures. If you have not visited her blog, here is the link http://mytastytreasures.blogspot.com/ She posts her delicious looking food with naughty humor. I always get a chuckle out of her posts.

I looked in my fridge and was bored with propects of a plain cheeseburger with everyday cheese. I found some feta cheese and olives and had a great idea..... a feta cheese salad/topping. This was really tasty and very flavorful and I think if you are a fan of feta cheese you will love this idea:

Mediterrean Style Salad:
1 block of feta cheese, crumbled
2 - 3 sundried tomatoes. chopped
5-6 kalamata olives. chopped
handful of italian-leaf parsley, chopped
olive oil - just a drizzle
squeeze of fresh lemon juice
salt and pepper

I mixed all these ingredients together in a bowl and tested it out on a few crackers. It was really tasty on the crackers, so I went ahead and topped my burger with it. I thought it was really tasty and unique and decided to share it. This is a great feta salad for vegetables, crackers, burgers, chicken or lamb. I love salty food, so I really enjoyed it. This recipe would easily make enough to top off four burgers with a little leftover for the cook. You could even eat this alone on some fresh bread or serve it with hummus inside a pita. I could go on, but it's time to watch American Idol and I still have to cook that blasted chicken.

My Big Fat Chocolate Chip Cookies - Tyler Florence recipe -

These cookies have been very popular lately on Tyler Florence Fridays. I have been watching as the ladies bake thse cookies with outstanding results. I finally tried these cookies today and let me say that this is the best chocolate chip cookie recipe ever! Leave it to Tyler and his baking recipes. I think this is his biggest secret....I really think he was meant to be a pastry chef. Not only are his baking recipes good, they are outstanding and oftentimes the best version of that particular dish that I have ever had. Everyone should try these cookies at least once. I followed the recipe to the "T" and used the dark chocolate. I love dark chocolate, but kids love semi-sweet or milk. I am going to try these cookies aain (soon) and use semi-sweet.

My sole purpose for baking these cookies were to give them to a new family who moved in the neighborhood this weekend. I am painfully shy when meeting new people so the occasional "baked good" reallly makes it easier for me to get the courage to go over and knock on the door. They were really happy to have the cookies and I hope they enjoy them.

Thanks to everyone on Tyler Florence Fridays. This is such a great blog for people who love Tyler Florence and also love cooking. We have the freedom to choose any Tyler recipe and cook it over the week. It is so much fun to see what everyone else picks. I am so glad that this recipe has been made so many times. It finally sunk in that this was the cookie to make.