Sunday, November 24, 2024

Erin French's Glazed Butter Cake from The Lost Kitchen!

 Dear Ms. French,

Your Glazed Butter Cake has been on my mind since I binge watched your show, The Lost Kitchen, earlier this summer. The cake sounded like heaven and looked like something everyone would love. I knew instantly I needed to make it.

It took me a few months to acquire both of your cookbooks and now that it is officially "the holidays," I have a reason to make it.

Words cannot express how wonderful this cake is! A fluffy and buttery pound cake with a thick, sweet butter glaze scented with vanilla and almond extract...it truly is the quintessential dessert! I ate a slice warm with blueberries and whipped cream and it was like total bliss...the warm cake fragrant with almond and vanilla, the pops of the blueberries, and the clouds of fresh whipped cream. 

Then I had another slice all by itself and it was equally delicious, almost like stepping back in time and having the most wonderful homemade dessert made by mom or grandma. It is more than a dessert. It's comfort. It's a warm hug.

When my husband had a slice he said, "this is one of the best desserts you've ever made." Then he looked out the window and saw the neighbors raking leaves and he said "I kind of just want to go out with this cake and start giving it to everyone so they can taste how wonderful it is.

Then he went ahead and had a second slice.

Between my husband and I we ate half the cake.

This is now my new GO TO DESSERT. I'll be making it with different flavored glazes and serving it with different fruits. If I'm called on to make something to take somewhere, it will be this cake. 

I will be singing praises for this cake for days and weeks to come. It will go down as one of my top recipes of 2024, but I will be making it for many years to come.

I am thankful for this recipe and I am thankful for you!

A Truly Devoted Cake Eater in Kentucky

P.S. I felt like this cake called for blueberries. An ode to Maine. 


Glazed Butter Cake

Adapted from Big Heart Little Stove

Recipe by Erin French

Serves 8-10

For The Cake

8 tablespoons (1 stick) butter, at room temperature, plus more for pan

1-1/2 cups all-purpose flour, plus more for the pan

1 cup granulated sugar

2 large eggs

1/2 teaspoon baking powder

1/2 teaspoon baking soda

1/2 teaspoon kosher salt

1/2 cup buttermilk (well shaken before measuring)

1 teaspoon vanilla extract

For The Glaze

1 cup granulated sugar

8 tablespoons (1 stick) butter

2 teaspoons vanilla extract

1 teaspoon almond extract

Make The Cake: Preheat the oven to 350F. Butter and flour a 9-inch loaf pan, line with parchment paper, and set aside.

In the bowl of a stand mixer fitted with the paddle attachment, beat the butter and sugar on high speeds until light and fluffy, about 5 minutes. Add the eggs one at a time, incorporating the first egg before adding the second one.

In a medium bowl, whisk together the flour, baking powder, baking soda, and salt. 

With the mixer on low, one large spoonful at a time, alternate adding the dry mixture and the buttermilk, mixing until well combined. Add the vanilla and mix just briefly to combine.

Pour the batter into the prepared loaf pan and bake until the cake is golden and a cake tester inserted in the center comes out clean, 20 to 25 minutes.

Make The Glaze: In a small saucepan, combine the sugar, butter, and 1/4 cup water and bring the mixture to a boil over medium-high heat, whisking occasionally. Remove the pan from the heat and let the glaze cool slightly; then whisk in the vanilla and almond extracts. The glaze will cool and thicken a bit as it sits.

For a quick and rustic finish, brush the glaze over the top of the loaf in the pan. Allow the cake to cool completely, remove from the pan and slice. Or, to really allow the cake to soak up all the delicious glaze, let the cake cool in the pan until it's comfortable to handle. Remove the cake and transfer to a cooling rack set over a baking sheet, to catch the drips of glaze. Brush the glaze over the entire cake; top, bottom, and, sides. You will need to work gently and carefully, but it's worth it to get every inch of this cake covered in glaze. Repeat until all of the glaze has been used.

Let the cake cool completely, then wrap tightly and store on the counter for up to 3 days. 

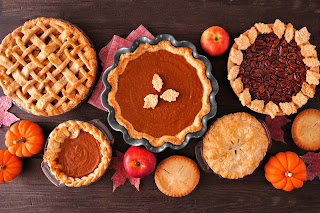
Desserts To Be Thankful For @ IHCC!


Sunday, November 17, 2024

Thanksgiving Sides: How Sweet Eat's Mom's Cheesy Potatoes


If you're a potato lover you can't go wrong here.

Cheesy potatoes topped with crisp salty potato chips! A comforting holiday or winter side dish that is family-friendly.

Mom's Cheesy Potatoes

Adapted from How Sweet Eats

by Jessica Merchant 

Serves 6-8

2 pounds frozen diced potatoes, like Ore Ida, thawed

8 tablespoons salted butter

16 ounces sour cream

1 (10.5 oz) can cream of chicken soup

salt and pepper, to taste

1 teaspoon dried parsley

8 ounces sharp cheddar cheese, freshly grated

2 cups crushed potato chips, I like to use kettle cooked chips

Preheat the oven to 350F. Spray a 9x13 baking dish with nonstick spray. To thaw the potatoes, I just stick the bag in the fridge overnight. Be sure to drain any liquid from thawing.

Melt the butter in a large bowl - you can do this in the microwave or on the stovetop. Let it cool slightly.

Whisk the sour cream and the soup into the melted butter until combined. Add a big pinch of salt and pepper. You can also add a sprinkle of dried parsley if you wish.

Fold in the thawed potatoes. Fold and stir until the potatoes are completely incorporated and evenly distributed.

Spread the mixture in the baking dish. Top with the grated cheddar. At this point, you can stick the dish (covered) in the fridge until you're ready to bake, or you can bake right away.

If baking right away, sprinkle the top with the crushed potato chips.

Bake for 60 minutes. Let stand for 10 to 15 minutes before serving. Scoop to serve!

This freezes great! Once you spread the mixture in the baking dish, seal it tightly with plastic wrap and foil, then freeze. To bake, let it thaw completely, then top with the cheddar and potato chips.

Leftovers of this are also delicious - maybe even better than when it's freshly made!

The Best Holiday Side Dishes @ IHCC!


Sunday, November 10, 2024

Erin French's Pecorino Puffs

Life, at least for me, has been ALL ABOUT THE CHEESE lately! I have been craving cheese every.single.day!

And bread. Sometimes I just want cheese and bread.

So, when I saw these Pecorino Puffs in Erin French's Big Heart Little Stove cookbook I had to make them!

So quick. So easy. You simply bring the butter, milk, salt, pepper, and nutmeg o a boil, then add the flour and stir for about 30 seconds. Transfer mixture to a food processor, or just a mixing bowl, and stir in the eggs one at a time. Add the cheese and you're all set!

Easy peasy. I used a cookie scoop to measure them out and scooped the batter onto the parchment paper. The recipe was perfect and they baked up warm and cheesy in 12 minutes!

We loved them. They are light, airy, cheesy, fluffy and such a good snack with pepperoni and/or salami. I will be making them again! 

Pecorino Puffs

Adapted from Big Heart Little Stove

by Erin French

Makes 24

1 cup whole milk

8 tablespoons (1 stick) butter

1 teaspoon salt

freshly ground black pepper

a few grates of fresh nutmeg

1 cup all-purpose flour

4 large eggs

1/2 cup grated Pecorino cheese

Note: I cannot usually be bothered to bring out big kitchen appliances like blenders and food processors, so I skipped that part of the recipe. I simply put my batter into a bowl and stirred the eggs in one at a time, followed by the cheese and it was perfectly fine!

Preheat the oven to 400F. Line two baking sheets with parchment paper and set aside.

In a medium saucepan, combine the milk, butter, salt, a few grinds of pepper, and the nutmeg and bring to a slow boil over medium heat. Give the pan a stir and continue stirring as you add the flour. Stir vigorously for about 20 seconds, until the dough comes together. Increase the heat to high and stir just long enough to cook off the raw flour, about another 10 seconds. Remove the pan from the heat.

Transfer the dough to the bowl of a food processor. With the processor running, add the eggs one at a time, waiting until each egg is ewll incorporated before adding the next. Add the cheese and pulse until combined.

Transfer the batter to a piping bag fitted with a plain round tip. Pipe dollops of the batter about 1 inch tall and 1 inch wide onto the prepared baking sheets, spacing them about 2 inches apart.

Bake until puffed and golden about 12 minutes. Serve immediately. 

Appetizers You Crave @ I Heart Cooking Clubs


Sunday, November 3, 2024

How Sweet Eat's Cheeseburger Soup

 It is officially soup season when the nights get cold and dark and we turn the clocks back!

I made Cheeseburger Soup for the first time years ago and I remember it being a big hit! When I saw How Sweet Eat's share her family's favorite version, I knew I had to give it a try.

You start with browned ground beef, then add all the classic soup veggies like onion, carrot, celery, and garlic. You cook the cubed potatoes in broth with the veggies and meat, until tender and then you add in the roux, milk, and cheese.

In the soup world, I feel like there are two kinds of people: those who like thick soups and those who like brothy soups. This version is differently on the brothy side. We are not brothy soup lovers, but we did enjoy this with some pretzel garlic bread. It was cheesy and comforting and we loved dipping the bread in the soup.


Cheeseburger Soup

Adapted from How Sweet Eats

by Jessica Merchant

Serves 4-6

1 pound ground beef

salt and pepper, to taste

1 tablespoon olive oil

1 sweet onion, diced

1 cup freshly grated carrots

1 cup diced celery

4 garlic cloves, minced

1/2 teaspoon dried oregano

1 pound petite gold potatoes, quartered

4 to 5 cups chicken stock*

2 tablespoons butter

3 tablespoons flour

1 cup milk

16 ounces freshly grated sharp cheddar cheese

1/2 cup sour cream

freshly chopped parsley or chives, for serving

*Note: If you are a brothy soup person, go ahead and use the 4 cups of chicken broth in this recipe. If you're into thicker soups, maybe start with 3 cups of broth and add more if you feel like it needs it.

Season the ground beef all over with salt and pepper. Heat a large stock pot over medium heat and add beef. Brown the beef, using a meat chopped or wooden spoon to break it into small crumbles.

Once browned, remove the beef with a slotted spoon and transfer it to a plate.

Add the olive oil to the same skillet. Add in the onions, carrots, celery and garlic with a big pinch of salt and pepper. Add the oregano. Stir. Cook, stirring often, until the veggies soften, about 5 to 6 minutes.

Add in the potatoes and 4 cups of chicken stock. Return the beef to the pot. Bring the mixture to a boil, then reduce to a simmer and cover. Cook until the potatoes are tender, about 10 to 15 minutes.

Heat the butter in a separate skillet. Once melted, whisk in the flour to create a roux. Whisk and cook for 2 to 3 minutes, until the color is golden and the mixture is fragrant.

Use a spatula to scrape the roux right into the soup pot. Bring the mixture back to a boil. Boil for 1 to 2 minutes. Add in the milk and cook for another 1 to 2 minutes.

Reduce the heat to low and stir in the cheese. Stir until it is all melted. At this point, you can add in the additional cup of chicken stock or not. Sometimes I like to add it before I pack the soup up for the fridge since it thickens more as it sits. Taste and season the soup with more salt and pepper if necessary. Stir in the sour cream. Once melted, serve! Top with fresh chives or parsley to serve. 


 October Potluck @ I Heart Cooking Clubs!