Sunday, August 29, 2021

Herby Bread Frittata {Inspired by the Farmer's Market}


The farmer's market is a wealth of inspiration. One week it's the fresh ripe peaches, another week it's fresh corn on the cob, and yet another week it's a batch of spicy dill pickles. I think that's the fun of it. You just never know what's going to call to you.

This weekend I went to my local farmer's market and nothing was speaking to me. Our local market is very nice, but only about 10 small stalls, and I was feeling the whole been there, done that vibe. So, I got in the car and drove to Lexington. Their market is MUCH bigger and I hadn't been there in a few years. 

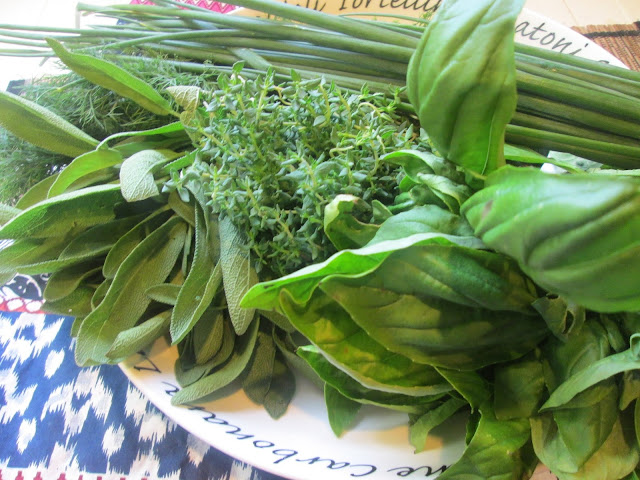
In a market of at least 40 stalls, with everything imaginable, I focused in on one booth full of the most amazing looking organic produce and THE MOST BEAUTIFUL HERBS I had ever seen! I starting grabbing up bundles of herbs: chives, sage, dill, basil, and thyme. I bought one of each! Inspiration had struck.

On the way home I was thinking of my favorite "base" ingredients that are my "go-to's" for all the things I bought at the market. What lends itself well to herbs, and onions, and peppers? 

Some things are just standby's for me, like: eggs, chicken, potatoes, any type of bread or stuffing, and homemade butters or even pesto. I started creating a menu to use up my bounty.

To start with I turned to Mark Bittman. I really wanted to make a quiche, but a frittata is much healthier. I found that he had a variety of fritatta options in his book: pasta, grains, potato, and bread. I had some wonderful sourdough bread that needing using up, so I went with the bread frittata.

The next task was to chose the herbs. I went with dill, chives, and basil. Lots of them, anywhere from 1/4 - 1/2 cup. I wanted the frittata to sing with herbaceous flavor!

Let me go ahead and say...this frittata was one of my all-time favorites! I AM SO GLAD I WENT WITH THE BREAD FRITATTA! The sourdough cubes held up to the egg but also absorbed the egg much better than potatoes and the texture was heavenly! I will be ALL ABOUT a bread frittata from now on, it is just superior in texture to a potato frittata. Plus, I always really want my potatoes fried crispy and served on the side, and this allows for that. 

The herbs were a perfect combination and I really, really loved the tang of the fresh dill with the eggs. Dill and eggs are just a perfect pairing, every bit as good together as peanut butter and jelly! I can't tell you how much I enjoyed this breakfast. I will be trying more bread frittatas in the future with various herbs and veggies and cheeses. I think this is a fabulous base recipe to play around with and highly suggest it!


Herby Bread Frittata

Adapted from How To Cook Everything Vegetarian

by Mark Bittman

Serves 4-6

1-1/2 cups cubed bread

 salt and pepper

4 tablespoons butter

5 eggs

1/2 cup Parmesan cheese

1/4 cup feta cheese*

1/4-1/2 cup fresh herbs*

Notes: You can use any herbs here. I used a combination of chives, dill, and basil. You can also use any type of cheese, but be mindful that it goes with the variety of herbs you're using. I used Parmesan and a sprinkle of feta on top, which pairs lovely with the dill.

Preheat the oven to 400F. Get out a 10" skillet that is ovenproof (I use my cast iron skillet for all frittatas). Put the butter in the skillet over low heat.

Beat the eggs with some salt and pepper in a large bowl, then stir in the bread cubes, the Parmesan, and the herbs. Mix to incorporate evenly. Pour the egg mixture into the skillet, using a spoon or spatula to distribute the ingredients evenly, and cook over low for about 10 minutes. I think the secret is cooking this real low and slow for around 10 minutes. You want the egg mixture to be firm around the sides before placing the frittata in the oven. This is also the point where I sprinkled on little bits of feta cheese! Once it looks like it is cooked around the edges, you can place the frittata into the oven. Note: You are really only placing this frittata in the oven long enough to firm up and cook the middle of the frittata. This should take only a few minutes. Keep checking the frittata so that it does not overcook, and keep in mind that this will continue to cook once removed from the oven. Best to pull it out when it still looks slightly liquidy in the center. Remove and serve hot.



Sunday, August 22, 2021

Corn & Potato Chowder


The first week of school was incredibly intense and that's putting things mildly. 

Right out of the gate we had staff and students sick and absent with Covid. On day 2 of school we had SIX staff members out sick with Covid and on quarantine. We didn't have enough substitutes to cover the absences so I volunteered to go down to Kindergarten. 

In case you're wondering, the first few weeks of Kindergarten in a normal year are super tough. They are so little and there is SO MUCH to learn before they can even start learning!

 The first few weeks of Kindergarten during a pandemic...unimaginable! Imagine kids who have essentially spent extremely formative years largely at home. Some of these kids have parents who tried and those kids are doing ok. A lot of the kids have parents who were maybe struggling themselves. Either way, there has been no preschool. No real going out in public and learning how to behave. These kids have spent so much time inside, more than likely on electronics of some kind.

I'm not sure I have ever worked as hard as I did last week. It was all we could do to keep everyone safe, accounted for, and to the right place at the right time. It was absolutely exhausting and then at the same time...it became extremely clear to me that there is really no way we will be able to be in school all year. The virus is just too contagious and we just don't have enough staff and substitutes to keep it all running. The very thought of not being able to be in school again is so heartbreaking. I can't even go there right now.

I promised myself  I would do one thing for myself this week and make a trip to the farmer's market on Saturday morning. I'm so glad I dragged myself out of bed and went down there. I got some flowers, my favorite pickles, some fresh peaches, and some wonderful Peaches and Cream corn on the cob.

I knew straight away I wanted to make a comforting corn chowder that would just feel like a hug in a bowl. I didn't wanna spend forever looking for a recipe so I went straight to Mark Bittman's How To Cook Everything Vegetarian and found a great Corn Chowder recipe with a lot of variations. 

Bittman starts his corn chowder off by making a quick corn stock with the corn cobs. I have made corn cob stock once before and I really love it. It really adds that extra kick of corn flavor! Bittman's recipe was really basic and you can certainly keep things that way, but I wanted to use up some potatoes, jalapeno, tomatoes, scallions, and bell pepper so I went ahead and added all that in.

The end result was delicious! I am really going to look forward to taking my leftover Corn and Potato Chowder for lunch tomorrow. I have a feeling I'm going to need some soothing.

Corn & Potato Chowder

Adapted from How To Cook Everything Vegetarian

by Mark Bittman

Serves 4-6

Kernels from 6 ears fresh corn, cobs reserved

salt and pepper

4 tablespoons butter or oil

1/2 cup chopped scallion

2 roma tomatoes, chopped*

1 jalapeno pepper, chopped*

1 bell pepper, chopped*

1/2 teaspoon sugar

1/4 cup flour

1 or 2 potatoes, chopped 1/2" dice*

1 quart milk or half and half

Optional: Bacon, chips, herbs, cheese for garnish

Put the corn cobs and 2 cups water in a pan with a tight-fitting lid over medium-high heat. Sprinkle with salt and pepper. Bring to a boil, then lower heat so the water bubbles gently, cover, and cook, checking occasionally, for about 30 minutes. Leave the cobs in the pot until you're ready to make the soup, then remove them and save the broth (I only got about 1 cup of broth from this process, you may wish to add more water and get more broth). 

Put the butter or oil in a deep skillet or medium saucepan over medium-high heat. When the bugter is melted or the oil is hot, add the scallion, sugar, tomato, and peppers and cook until soft and tender. Turn the heat down to medium and stir in the flour. Cook, stirring constantly with a whisk or a wooden spoon, until the mixture starts to turn golden and the flour no longer smells raw, 5 to 10 minutes. Add the milk and the reserved broth and turn the heat up to medium-high. Stir or whisk constantly until the flour is dissolved and the soup starts to thicken, about 2 minutes.

Stir in the corn kernels and potatoes, if using, and bring to a boil, then lower the heat so that the soup bubbles gently. Cook, stirring occasionally, until the corn and potatoes are tender and the soup has thickened, 10 to 15 minutes. Taste, adjust the seasoning, garnish and serve.


Every Sunday @ Kahakai Kitchen

Sunday, August 15, 2021

Skillet-Roasted Lemon Chicken


 I've been ordering organic produce from Imperfect Foods and I noticed they had pasture raised and slow raised chicken that had already been spatchcocked. I was thrilled. Spatchcocking is when the backbone of the chicken is removed and the chicken therefore lays flat, making it much quicker to cook. Spatchcocked chickens roast in about 45 minutes, making them a perfect weeknight meal.

I already knew which recipe I wanted to make. You guessed it...Ina Garten's Skillet-Roasted Lemon Chicken. This is so incredibly easy and quick. All you need to do is get out your cast iron skillet and slice up some lemon, onion, and garlic. Then you make an oil rub with olive oil, salt, pepper, thyme, and ground fennel. This rub gets brushed on both sides of the chicken and then you just stick it in the oven for 30 minutes. After 30 minutes you simply take it out and pour a half cup of Pinot Grigio around the chicken and roast for another 15 minutes. When you remove the chicken from the oven you squeeze an entire lemon over it, and it is ready for the table. That's it! You have a really nice roast chicken dinner in no time at all!

This chicken was cooked perfectly. It was a wonderful golden brown on the outside and fall off the  bone tender. I didn't even have to try to cut it apart. I loved the combination of flavors from the oil rub and I really loved those cooked onions and lemons in the bottom of the pan. Everything was so delicious and succulent. Highly recommend this dish, especially for a quick weeknight meal this fall!


Skillet-Roasted Lemon Chicken

Adapted from Cooking for Jeffrey

by Ina Garten

Serves 4-6

2 teaspoons fresh thyme leaves

1 teaspoon whole fennel seeds

salt and ground black pepper

1/3 cup olive oil

1 lemon, halved and sliced 1/4" thick

1 yellow onion, halved and sliced 1/4" thick

2 large garlic cloves, thinly sliced

1 (4-pound) chicken, backbone removed and butterflied

1/2 cup dry white wine, such as Pinot Grigio

Juice of 1 lemon

Preheat the oven to 450F. Place the thyme, fennel seeds, 1 tablespoon salt, and 1 teaspoon pepper in a mini food processor and process until ground. Pour the olive oil into a small glass measuring cup, stir in the herb mixture, and set aside.

Distribute the lemon slices in a 12-inch cast-iron skillet and distribute the onion and garlic on top. Place the chicken, skin side down, on top of the onion and brush with about half the oil and herb mixture. Turn the chicken skin side up, pat it dry with paper towels (very important!), and brush it all over with the rest of the oil and herb mixture.

Roast the chicken for 30 minutes. Pour the wine into the pan (not on the chicken!) and roast for another 10 to 15 minutes, until a meat thermometer inserted into the thickest part of the breast registers 155 to 160 degrees.

Remove the chicken from the oven, sprinkle it with the lemon juice, cover the skillet tightly with aluminum foil, and allow to rest for 10 to 15 minutes. Cut the chicken into quarters or eights, sprinkle with salt, and serve hot with the pan juices, cooked lemon, and onion.

Tropical Delights @ IHCC

Wednesday, August 11, 2021

Joy The Baker's Brown Butter Peach Cobbler Muffins


To say I've wanted to make these muffins for a long time is a total understatement. I received Joy The Baker's first cookbook right before my son started Kindergarten. I participated in The Joy The Baker Cook-off and made all sorts of delicious recipes. However, the one I wanted to make THE MOST were her Peach Cobbler Muffins made with brown butter. The reason...peaches are my absolute favorite!  Alas, no one else in the house cares for them much, so I'm always on my own when it comes to peaches, which is why I never made the muffins way back in 2012. No one needs to eat a dozen peach muffins all on their own. 

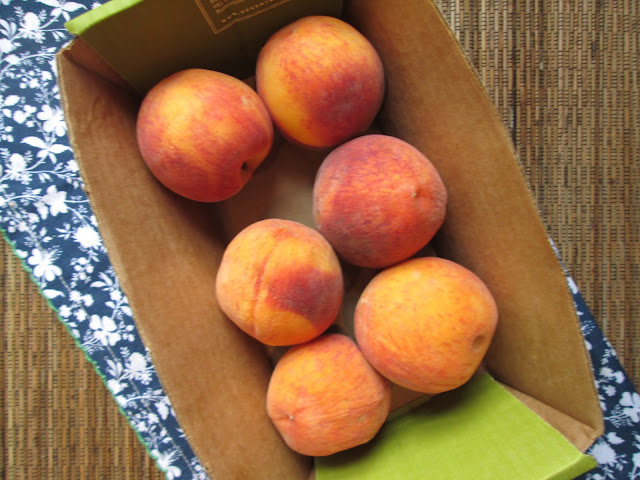
I NEVER forgot about those muffins. I thought about them every summer, especially in peach season, but I never made them because again, I'd have to eat them all on my own. Then a few weekends ago I went to Peachapalooza at a local orchard and bought some beautiful fresh peaches. Of course they all ripened at the same time and there I was trying to eat all 15 peaches in the span of a few days. On day three of making peaches my sole diet,  I surrendered and decided that I was using the rest of the peaches to FINALLY make Joy The Baker's Peach Cobbler Muffins with Brown Butter!

Here's where the whole story comes together. My son was still my little buddy about ready to go into Kindergarten when I put these muffins on my TO MAKE list. In fact, I can remember him standing in the kitchen with me holding his blanket and helping me make Joy's Chocolate Fudge Brownies with Chocolate Buttercream Frosting. Fast forward almost 10 years and now he is still my buddy, but he is no longer little, he's taller than I am (heck, he's taller than my husband) and on Monday I took him to his freshman open house for HIGH SCHOOL! Say what????

So yes, I waited an incredibly long time to make these muffins, pretty much 10 years. Once I tasted them I knew that I had been missing out all those years! There are three wonderful highlights about these muffins: first of all, the brown butter! That brown butter adds the most wonderful flavor to the muffins. It almost like a touch of caramel or butterscotch flavor. Then you have that crumb topping. Oh Joy! I like A LOT of crumb topping and there is a lot on these muffins. Last but not least, these muffins are full of ripe juicy peaches. And guess what? I didn't have to eat them on my own because my husband (who doesn't care about muffins or peaches) wanted to know what smelled so glorious downstairs and before you know it he was eating them and declaring them the best muffins I ever made (his favorite part was the touch of cinnamon in the muffins).

These are simply the best! If peaches are your thing, don't sleep on these muffins like I did for 10 years. In fact, go ahead and make them now while it's still peach season!


Brown Butter Peach Cobbler Muffins

Recipe Adapted from Joy The Baker

via Joy The Baker Cookbook

Makes 12 muffins 

For The Muffins

1-1/2 cups all-purpose flour

1/2 cup granulated sugar

1/4 cup packed brown sugar

1-1/2 teaspoons baking powder

1/4 teaspoon salt

1/2 teaspoon ground cinnamon

1/2 teaspoon ground nutmeg

7 tablespoons butter

1 large egg

1 large egg yolk

1/3 cup milk

2 teaspoons pure vanilla extract

1-1/4 cups diced peaches

For The Topping

3 tablespoons butter, cold

1/2 cup all-purpose flour

1/4 cup packed brown sugar

pinch of salt

pinch of ground nutmeg

1/4 teaspoon ground cinnamon

Place a rack in the upper third of the oven and preheat to 350 degrees F. Butter and flour a 12-cup muffin pan and set aside. You can also use cupcake papers for this recipe.

To make the muffins: In a medium bowl, whisk together flour, sugars, baking powder, salt, cinnamon, and nutmeg. In a medium bowl. wish together egg, yolk, milk, and vanilla. While whisking, slowly drizzle in the warm butter, making sure to scrape any brown bits into the egg mixture as well. Whisk until well incorporated.

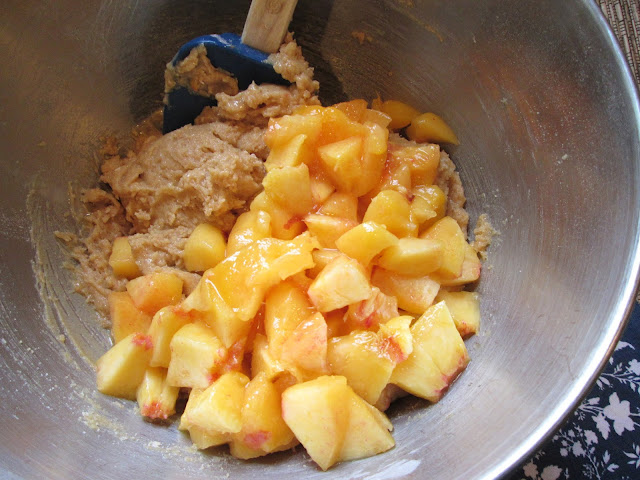
Add the milk mixture to the flour mixture all at once. Fold together with a spatula. Once no flour bits remain, fold in the diced peaches. Divide the batter between the muffin cups.

To make the topping: Combine all the ingredients in a small bowl and blend together with your fingers until crumbly. Butter will be the size of oats and small pebbles. Divide the topping among the muffin cups on top of the batter.

Bake muffins for 15 to 18 minutes, or until a skewer inserted into the center of one of the muffins comes out clean. Remove from the oven and cool in the pan 20 minutes before removing. To remove, run a butter knife along the edges of the muffin pan and gently scoop out.

Muffins will last, well wrapped, at room temperature for up to 3 days. 


Sunday, August 8, 2021

Jamie Oliver's Peanut Butter & Jelly Brownies {A Perfect Treat For Back To School}!

I've been bit by the baking bug pretty hard lately. I wanna make all the baked goods right now, but I'm especially craving anything with peanut butter. When I saw Jamie's Peanut Butter & Jelly Brownies I fell in love at first sight. Not only does it look like the dessert of my dreams, but I also love the peanut butter and jelly theme because....IT'S BACK TO SCHOOL TIME!

We are going back to school the middle of next week and I can hardly believe it. The summer has  flown by. Seeing as how this is the tail end of summer, I thought a decadent treat like this was perfect!

Can I just tell you right now...these fudgy ooey-gooey brownies have a decadent peanut butter custard swirled into them? Yes, you heard me right. A creamy, dreamy, obsession-worthy peanut butter custard. Then you tuck pockets of raspberry jam into the peanut butter custard before garnishing with some beautiful fresh raspberries. It is a thing of beauty. It is dessert perfection. 

And it is a sad, sad story when you can only have one, because you're gonna want another, and another. In fact, I ate one. My husband ate two. We each saved one. Then I packed the rest up and delivered them to a friend to get them out of my sight because I knew I'd be tempted! 

YOU NEED THESE IN YOUR LIFE!!

Peanut Butter & Jelly Brownies

Adapted from Comfort Food

by Jamie Oliver

Serves 15

Custard

1 cup milk

1 vanilla bean OR 2 teaspoons vanilla extract

2 large egg yolks

1/4 cup sugar

1 heaping tablespoon cornstarch

1-1/2 tablespoons butter (at room temperature)

2 heaping tablespoons smooth peanut butter

Brownies

1 cup butter, plus extra for greasing

8 ounces quality dark chocolate (I used semisweet)*

1 cup, plus 2 tablespoons sugar

4 large eggs

1 cup all-purpose flour

2 tablespoons raspberry jam

2-1/2 ounces fresh raspberries

Notes: I used semisweet chocolate because we like it better than dark chocolate, but the recipe calls for 70% dark chocolate. I also used two kinds of jam, strawberry and grape because we wanted to try some of each and because it's what I had on hand. My brownies had to bake for about 30 minutes, 5 minutes over the suggested time.

 To make the custard, put the milk into a saucepan, halve the vanilla bean lengthwise, and scrape out the seeds, then add both bean and seeds to the pan and lightly simmer on the stove (or use vanilla extract), stirring occasionally. Meanwhile, in a bowl, use a balloon whisk to combine the egg yolks, sugar, cornstarch, and soft butter. Whisking constantly, gradually pour the hot milk into the bowl, until combined. Return the custard mixture to the pan, place over a low heat, and stir gently for 2 to 3 minutes, or until thickened. Stir in the peanut butter, then leave the custard to cool completely.

Preheat the oven to 350F. For the brownies, grease and line (use parchment) a deep baking pan (8x12 inches). Melt the butter in a non-stick saucepan on a very low heat, the snap up and add the chocolate. Stir regularly with a spatula until melted and combined, then remove from the heat and stir in the sugar. Leave to cool slightly, then whisk in the eggs, one at a time, until silky. Sift in the flour and mix well.

Pour the brownie mix into the prepared baking pan, then swirl through the chilled nutty custard (discarding the vanilla bean, if using). Erratically distribute little spoonfuls of jam over the surface, then poke in the fresh raspberries (or any other fresh seasonal berries that correspond with the jam you're using). Bake for around 25 minutes, or until cooked on the outside but still a bit gooey in the middle. Leave to cool for 1 hour if you can bear it, then cut into portions and serve.


Peanut Butter & Jelly Week @ IHCC

Wednesday, August 4, 2021

Spicy Salmon Poke Bowls {Summer Slim Down Series #10}

This is my last recipe in the Summer Slim Down Series. When I started this series I thought I would have the entire summer to myself. I wanted to put a lot of effort into these meals. Then I got a call that the school needed help and I worked most of my summer away, and wow...what an incredibly busy summer it was. I think I ran harder than I do throughout the school year. Now summer is drawing to a close and I want to go out with a bang, so I chose Spicy Salmon Poke Bowls

This dish speaks to me on so many levels. Fish and seafood were always something I loved, but now they have become a huge part of my new lifestyle, shrimp and salmon especially. I have built many meals around these two proteins with wonderful success. Mostly I pair them with vegetables for a really beautiful and colorful meal that is hugely satisfying. Every once in awhile I throw in a healthy gluten-free grain, such as rice or potatoes. This meal is a representation of all those winning go-to ingredients. I love the spicy mayo-Sriracha drizzle to give things a little extra flavor. A little bit of sauce and/or drizzle goes a long way in building flavor and making things extra-special!

I absolutely loved this recipe! In fact, it is probably my favorite Summer Slim Down recipe and I highly recommend it. There is flavor from the spicy sriracha mayo and loads of crunch and texture from all the veggies. I love spicy food, but I found the chunks of avocado were essential in cooling everything down and adding some creaminess. The whole dish is served room temperature or cold and it eats like a really fancy but more substantial salad. I can definitely foresee myself making this many times in the future and even packing it in my lunch as it would keep very well!

I'm so happy I finally got around to making this delicious recipe and I'm also really happy to end the Summer Slim Down Series with something that is so tasty!  

Spicy Salmon Poke Bowls

Adapted from Skinnytaste Meal Prep

by Gina Homolka

Serves 4

Spicy Mayo

1/4 cup light mayo

1-1/2 tablespoons Sriracha sauce

Salmon

Previous cooked salmon

4 tablespoons soy sauce or tamari

1 teaspoon Sriracha sauce

Bowls

2 cups cooked rice 

4 Persian cucumbers, diced into 1/2" cubes

1 medium Hass avocado, sliced

1/2 cup shredded red cabbage

Jarred pickled ginger (optional)

2 scallions, green parts only, sliced for garnish

1 tablespoon furikake or black sesame seeds

soy sauce or tamari, for serving

Sriracha sauce, for serving

In a small bowl, combine the mayonnaise and Sriracha and thin with 1 tablespoon water to drizzle.

Flake or cut the cold salmon into large chunks. Drizzle with the soy sauce, sesame oil, and Sriracha and gently toss to combine. Set aside while you prepare the bowls.

Place 1/2 cup rice in each of 4 shallow bowl. In each bowl, arrange 6 ounces of salmon, one-fourth of the diced cucumber and avocado, 2 tablespoons of the red cabbage, some pickled ginger (if using), and one-fourth of the scallion greens.

Drizzle with the spicy mayo, then top with the furikake and serve with extra soy sauce and Sriracha on the side (if using). 


Sunday, August 1, 2021

Ina Garten's Rigatoni with Sausage and Fennel {One Of My Favorite Recipes Of All-Time!!}


I'm taking a break from the healthy recipe posts to celebrate and bring you an absolutely amazing pasta dish, Ina Garten's Rigatoni with Sausage and Fennel

You see, ever since January, I have completely overhauled my lifestyle. I completely changed my diet, cutting out almost all starchy foods in favor of lean meats, eggs, and vegetables. I do allow some fruits (no more than 2 per day) and some dairy (I could never give up cheese). I also try to move my body as much as possible (walks in the mornings, parking as far away as I can, always taking the stairs, making it a point to get up and move every hour, stretching, cleaning, etc). I never drank anything else besides water before, but I also seriously upped my water intake. I did this faithfully for seven months. It was hard. So very hard. There were weeks I stepped on the scale and didn't lose a pound. Sometimes I would go two weeks without losing any weight at all. Those weeks were devastating. I told myself it didn't matter how fast I lost the weight. It wasn't a race. The important thing was that I felt SO MUCH better. I stuck with it.

Folks, IT TOOK ME SEVEN MONTHS TO LOSE 25 POUNDS! It was not easy! I still have about 25 additional pounds I would like to lose, but I am allowing myself to take a break for a week or two to celebrate, maintain the weight loss, and recharge.

Ina's Rigatoni with Sausage and Fennel was a recipe I kept seeing pop up on a Barefoot Contessa Facebook group. Folks were making it almost daily and so in love with it! I watched for a month or so while people hailed this dish as one of the VERY BEST PASTA DISHES THEY'VE EVER EATEN! I simply could not wait to try it! I knew it was going to be worth the splurge, so I decided that this was going to be my celebration meal.

I was skeptical because guess what? I have NEVER liked fennel. However, I decided I was going to give it a go and I am so glad I did! I can vouch for this dish y'all! It has what every other pasta dish is missing. Maybe it's the fennel? Maybe it's the crushed fennel seeds? Maybe it's the cream? Nevertheless, this is THE PASTA DISH to make right now. I have literally told everyone I know about it, and I am telling you now, this is hands down one of the top 5 recipes I've ever made on my blog... and I've logged over 1000 recipes on this blog!

Do not skimp on the fennel. Do not leave anything out! If you have a hard time finding fresh fennel, then keep searching. If you have a hard time finding fennel seeds as I did, keep searching. You have to follow this recipe to a T. Do not leave out the wine or try to be healthy and skimp on the cream. However, if you are vegetarian, then know that you should still try this. Use any sausage or meat substitute. Trust me on this one! This pasta dish begs to be made!   


Rigatoni with Sausage and Fennel

Adapted from Food Network

by Ina Garten

Serves 4-6

3 tablespoons good olive oil

3 cups chopped fennel (1 large bulb)*

1-1/2 cups chopped yellow onion

1-1/4 pounds sweet Italian sausages, casings removed

2 teaspoons minced garlic (2 cloves)*

1/2 teaspoon whole fennel seeds, crushed with a mortar and pestle

1/2 teaspoon crushed red pepper flakes

salt and black pepper

1 cup dry white wine

1 cup heavy cream

2/3 cup half-and-half

2 tablespoons tomato paste

1 pound rigatoni

1/2 cup chopped fresh parsley leaves

1 cup freshly grated Italian Parmesan cheese, divided

*Notes: Sometimes fennel can be hard to find. Keep searching. Do not leave out any ingredient in this dish as it is perfect the way it's written. Go ahead and buy a little extra fennel to make sure you have enough. I had to buy 3 bulbs of fennel to equal 3 cups chopped! Two cloves of garlic could be a small amount. Best to make sure they're big cloves and/or add a little extra to be sure you have enough garlic.

Heat the olive oil in a large heavy pot or Dutch oven, such as Le Creuset, over medium heat. Add the fennel and onion and saute for 7 minutes, stirring occasionally, until tender. Add the sausage and cook for 7 to 8 minutes, crumbling it with a fork, until nicely browned. Add the garlic, crushed fennel seeds, red pepper flakes, 2 teaspoons salt, and 1 teaspoon black pepper and cook for one minute. Pour in the wine, bring to a boil, and add the heavy cream, half-and-half, and tomato paste. Bring back to a boil, lower the heat, and simmer for 20 minutes, until the sauce has thickened.

Meanwhile, bring a large pot of water to a boil, add 2 tablespoons salt, and cook the rigatoni according to the directions on the package. Drain and add to the sauce, stirring to coat the pasta. Cook over low heat for 5 minutes to allow the pasta to absorb the sauce. Off the heat, stir in the parsley and 1/2 cup of the Parmesan. Serve hot in shallow bowls with the remaining 1/2 cup Parmesan on the side.