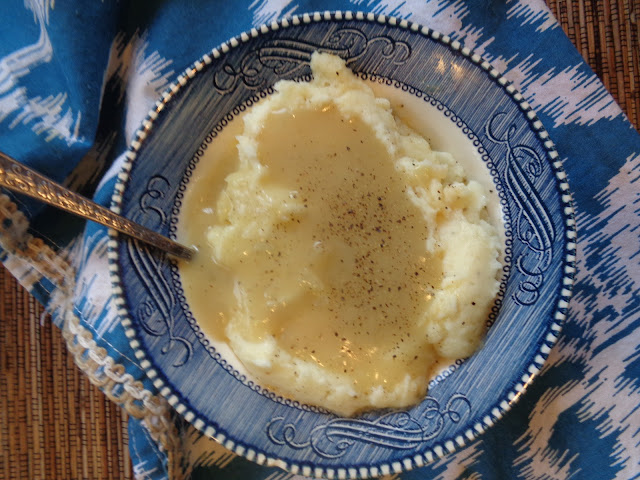
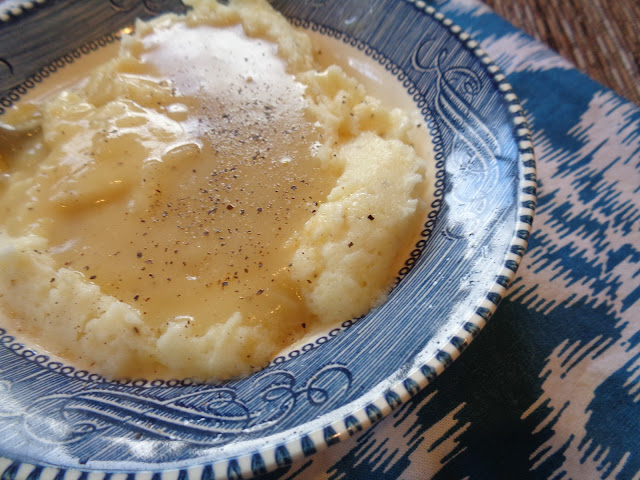
Showing posts with label side dish. Show all posts

Wednesday, July 16, 2025

Southern Summer Series: Just A Few Miles South: #8 {Down Home Buttermilk Biscuits with Country Ham & Sorghum Butter}!


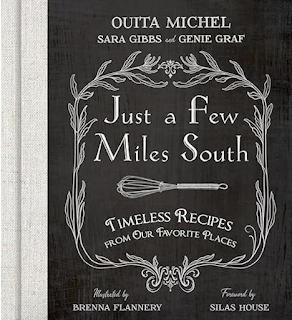
Every summer I like to chose a cookbook or a special focus and do a summer cooking series. Some of the summer series that I've done in the past are: popsicles; ice creams; cookies; salads; and healthy recipes. One series I've always wanted to do is a series of southern summer recipes. So, this summer I chose a local cookbook from James Beard Nominee, Ouita Michel. Each week I will be cooking recipes from Ouita's Just A Few Miles South Cookbook.

Well, we're on our 8th week of the summer series and nearing the end of summer. I have a couple more weeks until I'm back at school and I'm gonna try and live it up tthe best of my ability! 

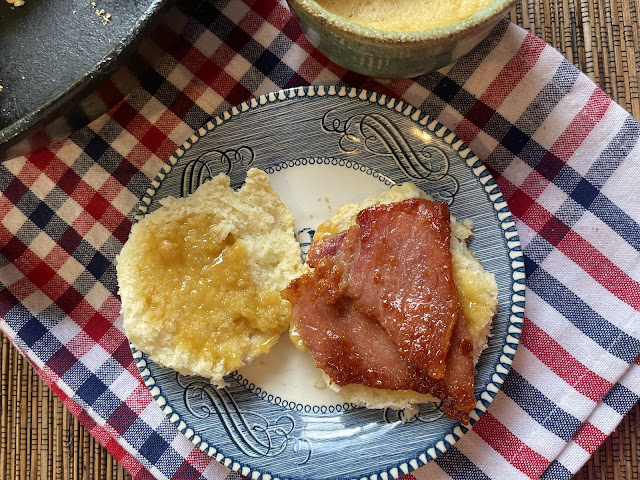
This week we have a really good few recipes to share: Buttermilk Biscuits with Country Ham & Sorghum Butter. We're talking real down home Kentucky food now.

If you're not familiar with Sorghum, let me learn ya a few things. Sorghum is an ancient and gluten free grain that came from Asia and Africa and is grown and enjoyed in Kentucky. It's not a major crop, but Kentucky farmers still cultivate it and it's a popular ingredients in local cuisine. The sap is extracted from the stalks and boiled down to create a syrup. Sorghum is used on biscuits and pancakes and in dressings and tastes like a cross between maple syrup, brown sugar,  and molasses. It is thick and dark with a mild earthy and somewhat nutty flavor. 

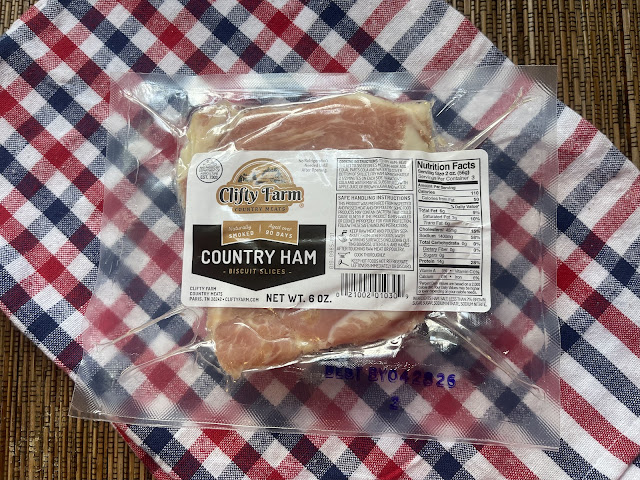
Country ham is a type of dry-cured ham produced in the Southern United States and it is known for its intense, salty flavor and dry texture. It's made by rubbing the ham with salt and other ingredients and then aging it for several months, often with smoking. Sometimes it is in the refrigerated section of the supermarket and sometimes it is shelf stable, which would work well if you wanted to have it shipped. All you need to do is griddle it up in a cast iron pan with a little butter until it gets a little color or becomes golden brown, as pictured above and below.

What makes a Buttermilk Biscuit with Country Ham and Sorghum Butter so dang good? Well, you've got the whole sweet and salty combo going on. The fluffy, flaky biscuit with the sweet Sorghum butter and the salty and savory Country Ham. It's truly a heavenly combination. Anyone would love to wake up to this one!  

Buttermilk Biscuits

Recipe adapted from Just A Few Miles South

by Ouita Michel

Makes 14 small or 8 large biscuits

2 cups all-purpose flour, sifted

2 teaspoons baking powder

1/2 teaspoon baking soda

1/2 teaspoon iodized salt

1 teaspoon sugar

1/2 cup (1 stick) butter, frozen

2/3 cup buttermilk

Preheat oven to 375F. In a large bowl, whisk together flour, baking powder, baking soda, salt, and sugar. Grate frozen butter directly into the flour mixture. Stir in buttermilk and form a dough. Turn out dough onto a floured surface and knead once or twice. Roll out the dough on a floured surface to 1/2" thick and cut into rounds. Use a 2" cutter for cocktail biscuits and a 2-1/2 to 3" cutter for large biscuits. Bake 11-12 minutes for cocktail biscuits and 13-14 minutes for larger biscuits. 

 Sorghum Butter

Adapted from Just A Few Miles South

by Ouita Michel

Makes a generous 1/2 cup butter

1/2 cup (1 stick) butter, softened

1/4 cup sorghum

Blend butter and sorghum in a food processor until well blended and creamy. You can also mix this by hand, if you wish. Just make sure everything is blended well.

Southern Summer Series: Just A Few Miles South


Friday, July 4, 2025

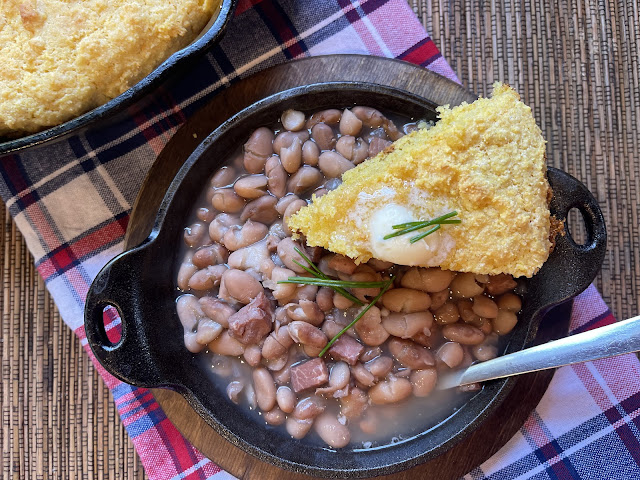
Southern Summer Series: Just A Few Miles South #6: Whitesburg Soup Beans and Buttermilk Cornbread!

Every summer I like to chose a cookbook or a special focus and do a summer cooking series. Some of the summer series that I've done in the past are: popsicles; ice creams; cookies; salads; and healthy recipes. One series I've always wanted to do is a series of southern summer recipes. So, this summer I chose a local cookbook from James Beard Nominee, Ouita Michel. Each week I will be cooking recipes from Ouita's Just A Few Miles South Cookbook

We're over halfway through with our Southern Summer Series, which is kinda sad because that means that summer is a little over halfway over. But, things are still delicious so that's good. This week we have a Kentucky staple from the hills of Appalachia, Whitesburg Soup Beans and Buttermilk Cornbread.

This is complete and total comfort food and it's really not all that unhealthy either. 

The beans take about 7 hours, four to five hours to soak and then another two hours to cook, so plan accordingly. The cornbread only takes about 20-30 minutes, and you should serve it as hot as can be straight from the skillet so have the beans hot and ready to go!

The soup beans are mild but flavorful and comforting and they pair so dang well with the Buttermilk Cornbread. 

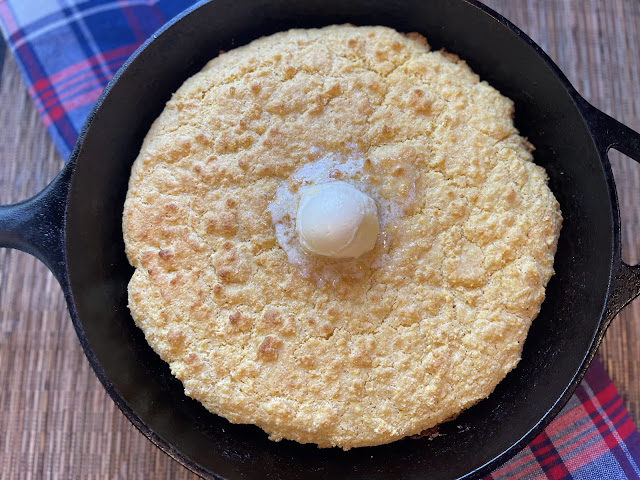
When it comes to the cornbread, try to save yourself some bacon fat to season the bottom of the cast iron pan before adding the cornbread batter in. The cast iron pan and the bacon fat heat up in the pan and the pan should be really hot when you pour the cornbread batter in. You should hear a sizzle. This ensures a really nice crust on the bottom. The skillet cornbread bakes up fast, 15 minutes or so and you wanna serve it straight away with a nice ice cream size scoop of butter on top.

Now you're ready for total comfort food. Ladle some soup beans in a bowl and cut yourself a wedge or two of cornbread and get to dippin'!  


Whitesburg Soup Beans

Adapted from Just A Few Miles South

by Ouita Michel

Makes 2 quarts

1 pound dried pinto beans

1 cup chopped white onion

5-6 ounces boneless country ham, diced

1-1/2 tablespoons minced garlic

2 teaspoons Worcestershire sauce

2 teaspoons hot sauce

2 teaspoons kosher salt

 1 teaspoon freshly ground black pepper

Pick pinto beans for pebbles, rinse until clean, and place in a 4-quart Dutch oven. Cover with cold water and soak 5-6 hours. Drain. Return to the pot, cover beans with about 3 quarts of water, and bring to a boil over medium-high heat. Add remaining ingredients. Cover and bring to a boil, stirring occasionally. Turn down to a slow simmer and continue to cook until the beans change color and are slightly softened but not mushy, about 2 hours. Taste for seasoning. Serve with Buttermilk Cornbread or Hoecakes.


Buttermilk Cornbread

Adapted from Just A Few Miles South

by Ouita Michel

Makes 1 large skillet bread or 12 wedges

1-1/3 cups white or yellow cornmeal

1/2 cup all-purpose flour

1/2 teaspoon baking soda

1 teaspoon baking powder

1/2 teaspoon salt

1 large egg, beaten

1-1/3 cups buttermilk

2 tablespoons butter, melted

1 tablespoon butter or bacon drippings

Place a 9-inch cast-iron skillet in the oven and preheat to 400F. In a medium bowl, mix together cornmeal, flour, baking soda, baking powder, and salt. Add egg, buttermilk, and melted butter and mix well with a whisk. Carefully remove the hot cast-iron skillet from the oven and drop in 1 tablespoon butter or bacon drippings, swirl quickly to coat the pan, and return to the oven for another 2-3 minutes, until the butter bubbles and turns dark golden brown. Remove the skillet from the oven again and pour in the batter. Return immediately to the oven and bake 18-23 minutes, until the edges are brown and the center is firm to the touch. Cut into 12 wedges. Serve immediately with butter and/or Whitesburg Soup Beans. 


 Southern Summer Series: Just A Few Miles South


Wednesday, June 4, 2025

Southern Summer Series: Just A Few Miles South #2: {Inside Out Hot Brown - So Delicious}!
Every summer I like to chose a cookbook or a special focus and do a summer cooking series. Some of the summer series that I've done in the past are: popsicles; ice creams; cookies; salads; and healthy recipes. One series I've always wanted to do is a series of southern summer recipes. So, this summer I chose a local cookbook from James Beard Nominee, Ouita Michel. Each week I will be cooking recipes from Ouita's Just A Few Miles South Cookbook

This week we're delving further into Kentucky cuisine by featuring the quintessential Kentucky dish, the Hot Brown. A traditional Hot Brown is a hot, open-faced sandwich originating from the Brown Hotel in Louisville, Kentucky. It's a sandwich made with a slice of white bread, turkey, (and sometimes ham). The bread and meats are covered in a rich cheesy Mornay sauce that gets all broiled and bubbly, and then topped with slices of tomato and crispy bacon. The Hot Brown is decadent and usually comes out broiled and bubbling in a casserole dish of some sort. It is an indulgent dish, very comforting, best eaten with a knife and fork. You might find a traditional Hot Brown at both fine dining establishments and your typical hole-in-the-wall.

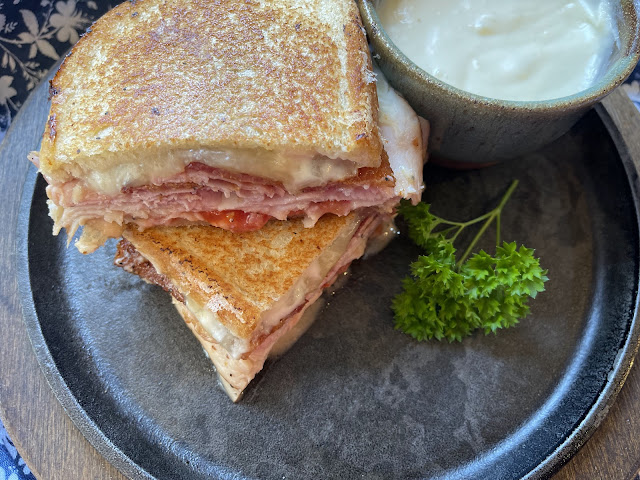
Chef Ouita Michel has taken a new approach to the traditional Hot Brown and created an Inside Out Hot Brown that is much easier to eat! In the video below, the chef at Wallace Station makes an Inside Out Hot Brown using two slices of bread, covering the interior of the bread with cheesy Mornay Sauce and sliced tomato, before warming the sliced turkey, city ham, and crispy bacon and placing it inside the sandwich. The sandwich gets griddled and can be eaten with your hands! This is a huge departure from the traditional Hot Brown and personally I would consider it a huge improvement. 

When I made my Inside Out Hot Brown it was all about the cheese! I grated a block of white cheddar for the Mornay Sauce and I had leftover white cheddar so I decided to use it in the sandwich. I buttered the outside of my bread, spread Mornay on both insides of bread, then covered one side of the interior in grated White Cheddar before placing some thinly sliced tomato on top of the cheese. I warmed the sliced turkey, shaved city ham, and bacon in the skillet and added it to the sandwich. I then grilled the sandwich, cut it in half, and served it with a side of delicious cheesy Mornay sauce for dipping and dunking.

Look...this is not as indulgent as the traditional version, but it is still straight up comfort food and very decadent. You've got a loaded sandwich full of meat and you're dunking and dipping away in a thick cheese sauce. It is delicious, albeit a little sinful and it's so savory and delicious. We absolutely loved this and had no trouble using up all the fixings throughout the week in sandwiches. My son liked his without tomato, but I think the tomato is absolutely necessary as it adds a little bit of acidity and freshness to an otherwise heavy sandwich. Try as I might, I could only eat one half, and I would highly suggest sharing a sandwich with someone.

This sandwich has received some of the highest ratings at my house and I know full well we will be making it again in the future. I highly suggest giving it a try!

Inside Out Hot Brown

Adapted from Just A Few Miles South

by Ouita Michel

Serves 4

For each sandwich

8 slices white bread

1 cup White Cheddar Mornay Sauce (recipe follows)

8 tomato slices

1 pound thinly sliced roasted turkey

8 ounces thinly sliced city ham*

12 slices bacon, cooked until crisp

butter/oil for grilling (equal parts melted butter and canola oil)

extra grated White Cheddar, for sandwiches (If desired)*

White Cheddar Mornay Sauce

3 ounces butter

1/2 cup all-purpose flour

2 cups whole milk, slightly warm

1 cup shredded white Cheddar cheese

1 teaspoon salt

cayenne pepper to taste

*Note: Chef Ouita calls for city ham in this recipe and even if you're located in Kentucky you'll have trouble sourcing this. I went to one store in Lexington that was known to have it and it took about 45 minutes for them to find it in the store and slice it for me. I didn't notice a great difference with the city ham, so use any sliced ham and it will be fine. Also I had extra White Cheddar cheese after making the Mornay Sauce so I added grated White Cheddar to one side of the bread prior to grilling.

White Cheddar Mornay Sauce: In a heavy-bottomed saucepan, melt butter over medium heat, then whisk in flour until smooth. Cook 2 minutes, stirring periodically. Whisk in milk, stirring constantly to make sure ingredients are well mixed. Reduce heat to medium-low and bring to a simmer, stirring often, until mixture begins to thicken and bubble. Stir in shredded cheese, salt, and cayenne pepper. Remove from heat and continue to whisk until smooth.

For each sandwich: Warm turkey, city ham, and bacon in a grill pan or dry skillet. Lay out 2 slices of bread. Cover both slices with 2 tablespoons White Cheddar Mornay Sauce, then cover one with 2 slices of tomato and one-quarter of the warmed meats. Close the sandwich. Grill in butter/oil over medium heat until golden brown on both sides. Serve warm. Repeat with remaining ingredients.


 Southern Summer Series: Just A Few Miles South 


Wednesday, May 28, 2025

Southern Summer Series: Just A Few Miles South #1 {Ale-8-One Sloppy Joes and Wallace Station Red Bliss Potato Salad}


Every summer I like to chose a cookbook or a special focus and do a summer cooking series. Some of the summer series that I've done in the past are: popsicles; ice creams; cookies; salads; and healthy recipes. One series I've always wanted to do is a series of southern summer recipes. So, this summer I chose a local cookbook from James Beard Nominee, Ouita Michel. Each week I will be cooking recipes from Ouita's Just A Few Miles South Cookbook


Chef Ouita has six restaurants in the Lexington, Kentucky area where I happen to live. The restaurants range from upscale to down home and locals simply love everything she does. Ouita uses local ingredients, something I am passionate about. Recipes focus on old vintage southern recipes, as well as modern twists on new southern favorites. All of the recipes have a Bluegrass Kentucky vibe.

First up we have an Ale-8-One Sloppy Joe served alongside some Wallace Station Red Bliss Potato Salad. Now, if you're native to central Kentucky you know that Ale-8-One is a ginger ale type soda created in Winchester, Kentucky back in the 1920's. The soda was an entry in the Clark County Fair in 1926 and the name Ale-8-One was chosen through a naming contest at the fair. In the 1920's a slang term for "the latest thing" was simply "A Late One." If you're familiar with the Kentucky drawl, you know how easy "A Late One" can be Ale-8-One. This soda is still made and bottled in Winchester, Kentucky and it has quite a following. If you don't have Ale-8-One in your area you can always use ginger ale.

Back in the 1980's Sloppy Joes were everywhere. If you found yourself at a cookout, a potluck, or a backyard birthday party the chances were you'd be eating some Sloppy Joe! Back in those days a lot of people bought a can of Manwich and called it a day. For these Ale-8-One Sloppy Joes Chef Ouita crafts a careful combination of several ingredients: Kentucky beef; onion; garlic; flour; ketchup; Ale-8-One; tomato paste; tomato sauce; apple cider vinegar; Worcestershire sauce; honey; dry mustard; chili powder; and finally, salt and pepper. All of this gets cooked together to make one very delicious and quite classic Ale-8-One Sloppy Joe. Do you taste the Ale-8-One? Not necessarily, but it does provide a liquid base to help cook down all the other ingredients and meld the flavors together. On a toasted bun, this Ale-8-Sloppy Joe was milder than the Manwich all of us old-timers know and love. Ouita's Sloppy Joe is definitely a step above and we really enjoyed it with some Ale-8-One on the side.

Next up, is Ouita's Wallace Station Red Bliss Potato Salad (image of her Wallace Station restaurant above located in beautiful horse country). You simply cannot go wrong here. This is a classic potato salad made with red potatoes. The potatoes boil until tender then get doused with a dressing of mayo, Dijon mustard, celery, red onion, a splash of water, and salt and pepper. This is a really great classic potato salad and we loved it very much, especially on the first day. I would recommend making this and eating it on the day of. On the second day, the red onion flavor was more pronounced and it was still good, but it did get a very pronounced oniony flavor.

It was a great first roundup of Just A Few Miles South recipes. Next week is sure to bring another Bluegrass favorite! Over the summer I hope to get some in person pictures of her restaurants and food and maybe do a few side-by-side shots of her dishes in the dishes versus my dishes at home!

 See ya'll next week!

Ale-8-One Sloppy Joes

Adapted from Just A Few Miles South

by Ouita Michel

Serves 6-8

1-1/2 pounds ground beef

1 medium onion, finely diced (about 1 cup)

1 clove garlic, minced

1-1/2 tablespoons flour

2/3 cup ketchup

1/2 cup 

Ale-8-One

2 tablespoons tomato paste

1 (8-ounce) can tomato sauce

1 tablespoon apple cider vinegar

1 tablespoon Worcestershire sauce

1-1/2 teaspoons honey

1 teaspoon dry mustard

1 tablespoon chili powder

1/2 teaspoon freshly ground black pepper

salt to taste

6-8 sturdy burger buns

Note: This makes about 1 quart of sloppy joe mixture.

Brown ground beef, onion, and garlic in a deep skillet over medium-high heat. Remove from the stove and carefully drain excess fat. Return pan to medium heat and stir in flour. Cook about 2 minutes, then stir in remaining ingredients. Cover, reduce heat to medium-low, and simmer 15 minutes. To make the mixture extra sloppy, add more Ale-8-One. Taste for seasoning. Remove from heat and allow the sloppy joe mixture to rest about 5 minutes before serving, which helps it tighten up. Serve warm on buns.  

Wallace Station Red Bliss Potato Salad

Adapted from Just A Few Miles South

by Ouita Michel

Makes 2 quarts 

Serves 12-16

3 pounds small red-skinned potatoes, scrubbed and eyes removed

1-1/2 teaspoons kosher salt

1 cup finely chopped celery

1 cup finely chopped red onion

3 tablespoons Dijon mustard

2 cups mayonnaise

1 tablespoon water

salt and freshly ground black pepper, to taste

Place potatoes in a small stockpot and cover with cold water. Bring to a boil. Simmer about 13 minutes, or until potatoes are tender when pierced with a knife. Drain and cool slightly. Cut potatoes in a medium dice, add remaining ingredients, and mix thoroughly. Taste for seasoning. Chill at least 30 minutes before serving. 

Summer Series: Just A Few Miles South #1


Sunday, November 17, 2024

Thanksgiving Sides: How Sweet Eat's Mom's Cheesy Potatoes


If you're a potato lover you can't go wrong here.

Cheesy potatoes topped with crisp salty potato chips! A comforting holiday or winter side dish that is family-friendly.

Mom's Cheesy Potatoes

Adapted from How Sweet Eats

by Jessica Merchant 

Serves 6-8

2 pounds frozen diced potatoes, like Ore Ida, thawed

8 tablespoons salted butter

16 ounces sour cream

1 (10.5 oz) can cream of chicken soup

salt and pepper, to taste

1 teaspoon dried parsley

8 ounces sharp cheddar cheese, freshly grated

2 cups crushed potato chips, I like to use kettle cooked chips

Preheat the oven to 350F. Spray a 9x13 baking dish with nonstick spray. To thaw the potatoes, I just stick the bag in the fridge overnight. Be sure to drain any liquid from thawing.

Melt the butter in a large bowl - you can do this in the microwave or on the stovetop. Let it cool slightly.

Whisk the sour cream and the soup into the melted butter until combined. Add a big pinch of salt and pepper. You can also add a sprinkle of dried parsley if you wish.

Fold in the thawed potatoes. Fold and stir until the potatoes are completely incorporated and evenly distributed.

Spread the mixture in the baking dish. Top with the grated cheddar. At this point, you can stick the dish (covered) in the fridge until you're ready to bake, or you can bake right away.

If baking right away, sprinkle the top with the crushed potato chips.

Bake for 60 minutes. Let stand for 10 to 15 minutes before serving. Scoop to serve!

This freezes great! Once you spread the mixture in the baking dish, seal it tightly with plastic wrap and foil, then freeze. To bake, let it thaw completely, then top with the cheddar and potato chips.

Leftovers of this are also delicious - maybe even better than when it's freshly made!

The Best Holiday Side Dishes @ IHCC!


Sunday, September 22, 2024

Celebrating Fall Equinox: One Pot Fall Vegetable Orzo and Chickpeas!

People tend to assume that I spend a lot of money on groceries. I always laugh at that, because they couldn't be more wrong! 

If anything I spend less since nearly EVERYTHING I make is from scratch! I think people who cook a lot tend to spend less on the average for that reason. Frozen foods and packaged foods are convenience foods and those will cost you big time.

Let's take this dish, for example, One Pot Fall Vegetable Orzo and Chickpeas. It calls for orzo pasta, spinach or kale, butternut squash, Parmesan cheese, broth, onion, garlic, and fresh herbs.

I could go to the store and buy pre-washed and packaged greens, packages of cubed up butternut squash, canned or boxed broth, and two kinds of herbs. All of that adds up, you're talking $15-20 just on those ingredients alone. However, I bought spinach from the produce section that I wash, dry, and chop myself. A container of already pre-washed spinach costs $3.99, mine was $1.69. A package of cubed up butternut squash yields about 2 cups for $4.99, but I bought an entire butternut squash for $4.19 and got 6 cups of squash when it was all said and done. Broth costs anywhere from $2-3 boxed up in the store, but I make mine with leftover chicken bones and vegetable peels, pretty much for free. I have chives, basil, oregano, thyme, sage, and parsley growing in abundance in my backyard that I grew from seeds for minimal costs and they save me money every week.

Moral of the story: Grow your own and also, do it yourself! Stay away from the pre-packaged stuff that you think saves you time because in the end it costs more and you get less. Plus, it's not that hard to just do it yourself! 

This was a fun dish to make. I enjoyed washing, cutting, and prepping all the veggies. I love the orange and green pops of color in the orzo and the ease of a one pot dish. Plus, this makes a ton of orzo! We had it for dinner and then I had enough for four lunches throughout the week! It was cheesy and comforting and so pretty and satisfying. I can definitely see myself making it again this fall!


One Pot Fall Vegetable Orzo and Chickpeas

Adapted from How Sweet Eats

by Jessica Merchant

Serves 4

1 tablespoon olive oil

1 sweet onion, diced

4 garlic cloves, minced

2 cups cubed butternut squash, 1/2" to 1" cubes

8 ounces cremini mushrooms, chopped*

2 cups kale or spinach*

salt and pepper, to taste

1/4 teaspoon freshly grated nutmeg

1 cup orzo

1 (14 oz) can chickpeas, drained and rinsed

2-1/2 cups vegetable stock

1/3 cup Parmesan cheese

fresh herbs, such as parsley, chives, sage, thyme, etc. for topping

Note: I left out the cremini mushrooms because we aren't big mushroom fans. I used spinach instead of kale because the spinach just looked better.

Heat the olive oil in a large skillet or dutch oven over medium heat. Stir in the onions and garlic with a pinch of salt and pepper. Stir in the butternut squash with another pinch of salt and pepper. Cook for 5 to 6 minutes, until the squash is beginning to get tender.

Stir in the mushrooms. Cook for 5 minutes, until soft. Stir in the kale or spinach, cooking for another few minutes until it wilts. Stir in the nutmeg and if you think it needs it, another pinch or two of salt and pepper.

Stir in the dry orzo pasta. Stir in the chickpeas. Pour in the vegetable stock and let the mixture come to a boil. Reduce it to a simmer, cover the pot, and cook for 15 minutes, until the orzo absorbs the stock and is plumped up. If the orzo isn't finished, cook for a few minutes more. The mixture still might be wet. If it seems too wet and the orzo is fully cooked, cook it for 5 minutes, stirring often, with the lid off.

Stir in the Parmesan cheese. Top with fresh herbs and serve! 

Fall Equinox @ I Heart Cooking Clubs!


Sunday, May 12, 2024

Bittman's Baked Macaroni and Cheese

 
For the past few weeks I've been steadily working on shopping my pantry and using everything up. Today I'm using up some pasta and a loaf of bread to make Mark Bittman's Baked Macaroni and Cheese. 

I always buy way too many boxes of pasta and they quickly take over my pantry if I'm not careful. I also had half a loaf of rosemary garlic bread so I decided to make baked macaroni and cheese with a fresh rosemary garlic breadcrumb topping. It was a hit!

Mark Bittman calls for sharp cheddar and Parmesan, which are some of my favorite cheeses to use for baked macaroni and cheese. We enjoyed this dish today for our Mother's Day dinner. The sauce was very creamy and the flavors were on point.

The rosemary garlic breadcrumb topping added some good texture and flavor. I would definitely make this Baked Macaroni and Cheese again. It's a real go to recipe!


Baked Macaroni and Cheese

Adapted from How To Cook Everything

 by Mark Bittman

Serves 4-6

2-1/2 cups milk

2 bay leaves

1 pound elbow pasta

4 tablespoons butter

3 tablespoons flour

1-1/2 cups grated cheese, such as sharp Cheddar or Emmenthal

1/2 cup freshly grated Parmesan cheese

salt and black pepper

1/2 cup or more plain breadcrumbs, preferably fresh

1/2 cup butter, melted

Preheat the oven to 400F. Bring a large pot of water to a boil.

Cook the milk with the bay leaves in a small saucepan over medium-low heat. When small bubbles appear along the sides, about 5 minutes later, turn off the heat and let stand. Salt the boiling water and cook the pasta to the point where it still needs another minute or two to become tender. Drain it, rinse it quickly to stop cooking, and place it in a large bowl.

In a small saucepan over medium-low heat, melt 3 tablespoons of the butter; when it is foamy, add the flour and cook, stirring, until the mixture browns, about 5 minutes. Remove the bay leaves from the milk and add about 1/4 cup of the milk to the hot flour mixture, stirring with a wire whisk all the while. As soon as the mixture becomes smooth, add a little more milk, and continue to do so until all th emilk is used up and the mixture is thick and smooth. Add the Cheddar and Emmenthal and stir. 

Pour the sauce over the noodles, toss in the Parmesan, and season with salt and pepper. Use the remaining butter to grease a 9 x 13-inch or like-sized baking pan and turn the noodle mixture into it. Top liberally with bread crumbs and bake until the crumbs turn brown, about 15 minutes. Serve hot. 


Shop Your Pantry @ IHCC


Sunday, March 3, 2024

How Sweet Eat's Favorite Baked Cheesy Rice

 This recipe is so easy a tired mom can do it after working all day! Hooray.

We all need easy side dishes for the weekdays. Or weekends. Or any days, because life is well...as complicated as can be nearly all the time, right?

So, measure some rice, rinse it, dump it in a baking dish. Pour on some chicken broth, season with salt and pepper, top with some cheese and butter and foil and throw in the oven for 30 minutes. Remove the foil and put it back in the oven for 20-25 minutes and you have a side dish the whole family will love!

I can see this as a repeat recipe in my house. In fact, I am adding jasmine rice to my grocery order as we speak.

I also see many different possibilities for switching up the flavors: different cheeses, different spices, adding veggies, and so on. Don't be afraid to add what you like because you're the one eating it and you know what you like!

I loved how this rice turned out with the different cheesy textures. The cheese around the edge of the baking pan gets all crispy and provides some texture to the dish, while the cheese in the middle is more melty and ooey gooey.

I sincerely recommend this dish if you are trying to find a kid-friendly side dish, or if you're looking for something tasty and quick, or maybe even something for meal prep. This is a new fave for us!


Our Favorite Baked Cheesy Rice

Adapted from How Sweet Eats

by Jessica Merchant

Serves 4-6

1-1/2 cups dry jasmine rice, rinsed

24 ounces chicken stock

salt and pepper

6 ounces sharp white cheddar cheese, freshly grated

4 tablespoons butter, thinly sliced

Preheat the oven to 425F. Butter a 9x9 baking dish. 

Rinse the rice in a strainer until the water runs clear. Place the rice in the baking dish. Pour in the stock. Add a pinch of salt and pepper. Sprinkle the cheese in and give it a quick stir.

Add the butter slices all over the top of the rice. Cover the dish tightly with foil.

Bake for 30 minutes. After 30 minutes, remove the foil. Bake for 20 to 30 minutes more, until the rice is fluffy and the top is slightly golden. Serve! 

Potluck Week @ IHCC


Sunday, November 26, 2023

Mark Bittman's Make Ahead Gravy

 Make ahead gravy is an essential part of my Thanksgiving dinner. I make a turkey stock weeks in advance, saving some drippings, so that I can make the gravy a day or two before Thanksgiving.

Once you've got the homemade stock, then the gravy is easy as can be. A stick of butter and an onion, some flour to thicken, and just whisk the gravy in until you have the consistency you desire!

The pack up the gravy, saving a little extra stock so that you can thin the gravy on the big day, and you're all set! On Thanksgiving, simply heat up the gravy in a pan, adding the saved stock to thin if necessary and you're all set.

An essential and delicious part of the Thanksgiving feast that can be made relatively fuss-free and easy as can be! I love this recipe!


Mark Bittman's Make Ahead Gravy
Adapted from The New York Times
Serves 6-8

 1 stick butter

1 chopped onion

1/2 cup flour

salt and pepper, to taste

4 to 5 cups warm chicken or turkey stock

chicken or turkey drippings

Melt butter in a medium saucepan over medium heat, then add the onions. Cook, stirring occasionally, until onions are translucent, about 5 minutes. Sprinkle the flour on the onions, stirring constantly, and cook until flour is golden to brown. Adjust heat so mixture does not burn.

Gradually whisk in 4 cups of stock until mixture thickens and is smooth. If it is too thick, add more stock. Cool. Cover and chill.

When ready to serve, reheat mixture over low heat, stirring. Scrape bottom of chicken or turkey pan and add drippings to gravy. Taste and adjust seasoning, then serve, adding more stock if necessary to thin.


 Pilgrim Plates @ I Heart Cooking Clubs


Sunday, November 19, 2023

Maple Brown Sugar Applesauce

 
If you're spending a lazy day at home, there is nothing like the smell of homemade applesauce bubbling away on the stove. The scent of fresh apple mingling with the caramel notes of brown sugar and maple syrup is so comforting.

This is an autumn-spiced applesauce with a good dose of cinnamon, clove, ginger, and nutmeg. It's perfect for enjoying all on it's own, with oatmeal, or even with vanilla ice cream and/or yogurt for dessert! 


Maple Brown Sugar Applesauce

Adapted from How Sweet Eats

Serves 4-6

4-6 apples, chopped

1 teaspoon lemon zest

1/8 - 1/4 cup maple syrup*

2 tablespoons brown sugar

1 teaspoon cinnamon

1/2 teaspoon vanilla extract

pinch of ground cloves

pinch of ground ginger

pinch of nutmeg

vanilla ice cream, if you wish

Notes: I used 6 mini Honeycrisp apples for this, but feel free to use any apple you like. I also decreased the amount of maple syrup by half, but feel free to use the whole 1/4 cup, if you like!

Add chopped apples to a pot and just cover with water. Add sugar, syrup, lemon zest, vanilla and spices and bring to a boil, then simmer uncovered until apples are mushy, about 45-60 minutes. Add more water if needed. Turn off heat and mash apples. Serve as is or with vanilla ice cream.

 Comfort Food @ IHCC


Sunday, September 24, 2023

Ina Garten's Baked Sweet Potato Fries with The Best Sweet Potato Dipping Sauce


 Dear Ina,

Thank you for your excellent recipe for Baked Sweet Potato Fries. I will be eating them regularly from now until Kingdom Come. It is an excellent recipe that is seasoned well and I LOVE THEM big time!

The reason for my letter is to ask if you've ever dipped your sweet potato fries in this amazing sweet potato dipping sauce. The sauce is a creamy, smoky, and spicy combination of three simple ingredients: mayonnaise, paprika, and Sriracha. The sauce is simply heavenly and pairs perfectly well with your sweet potato fries. Your fries and this sauce = perfection!

Trust me, I should know because I ate the entire batch of sweet potatoes all by myself, dipping and dunking away in complete bliss. Then I turned around and made another batch! Yes, your sweet potato fries with the dipping sauce is that good!

If you don't like things too spicy Ina, then cut back a little on the Sriracha, but do try the sauce. It really is ALL THAT and more. Who knows...this sauce could be all the rage at your next party in the Hamptons! It certainly was a big hit here in Georgetown, Kentucky!

Love and Gratitude,

Kim


Baked Sweet Potato Fries

Recipe via Food Network

by Ina Garten

 Serves 3-4

2 medium sweet potatoes, peeled

2 tablespoons good olive oil

1 tablespoon light brown sugar

1/2 teaspoon kosher salt, plus extra for sprinkling

1/2 teaspoon freshly ground black pepper

Preheat the oven to 450F. Halve the sweet potatoes lengthwise and cut each half into 3 long spears. Place them on a sheet pan and toss with the olive oil. Spread the potatoes in one layer. Combine the brown sugar, salt, and pepper and sprinkle on the potatoes. Bake for 15 minutes and then turn with a spatula. Bake for another 5 to 10 minutes, until light browned. Sprinkle lightly with salt and serve  hot. Note: You may wish to bake these on a parchment as the sugar turns dark and sticky and is a little difficult to clean. 

THE BEST SWEET POTATO FRY DIPPING SAUCE:

1/2 CUP MAYONNAISE

2 TABLESPOONS SRIRACHA

1/2 TEASPOON SMOKED PAPRIKA

Add everything into a mixing bowl and whisk together until combined.

*Dipping sauce recipe courtesy of The Big Man's World


 Fall Flavors @ IHCC