Showing posts with label kid friendly. Show all posts

Sunday, September 15, 2024

Game Day Eats: Savory Bacon, Sage & Pumpkin Puff Pastry Pizza

 It's no secret that I'm a big fan of How Sweet Eat's Puff Pastry Pizzas! I've made the Zucchini, Lemon, and Goat Cheese Puff Pastry Pizza; the Chicken and Bacon Ranch Puff Pastry Pizza; the Pepperoni Puff Pastry Pizza; the Puff Pastry Breakfast Pizza; and...The Savory Bacon, Sage, and Pumpkin Puff Pastry Pizza.

I love the ease of them and the way the puff pastry puffs up in the oven. These are perfect for weekdays and busy nights and they are also perfect for game nights! I highly recommend them!

This Savory Bacon, Sage and Pumpkin Puff Pastry gets a mixture of ricotta and pumpkin smeared on the base of the puff pastry.

Then the ricotta-pumpkin mixture is topped with mozzarella, apple cider caramelized onions, and sage. I have never topped a pizza like this before, so it was a fun recipe to try! And so pretty! I was able to use the sage from my garden. Woohoo!

 When the pizza comes out of the oven you top it with Parmesan and tuck in! The pumpkin isn't overly pronounced, but you can taste a hint of it. The pizza is very cheesy and you can taste the sweetness of the caramelized onions. It gives the pizza a bit of a sweet and savory taste. The bacon provides a good amount of saltiness and crunch, but I couldn't help but feel like the pizza was missing some garlic and if I made it again, I'd add a little garlic somewhere along the line. Good overall, but not our favorite.

If we had to pick some our top puff pastry pizzas it would be as follows: Zucchini, Lemon & Goat Cheese Puff Pastry Pizza (the best in my opinion); Pepperoni Puff Pastry Pizza; Chicken & Bacon Ranch Puff Pastry Pizza; and also the Puff Pastry Breakfast Pizza.


Savory Bacon, Sage & Pumpkin Puff Pastry Pizza

Adapted from How Sweet Eats

by Jessica Merchant

Serves 2-4

 3 slices bacon, chopped

2 sweet onions, thinly sliced

salt and pepper

1/4 cup apple cider

1 sheet frozen puff pastry, thawed

3/4 cup pumpkin puree

1 cup freshly grated mozzarella cheese

1 handful fresh sage leaves

1 large egg, for egg wash

Parmesan cheese, for topping

 Heat a skillet over medium heat and add the bacon. Cook, stirring often, just until the fat is rendered - you do not want to cook it until crispy, because it will crisp up more in the oven. Remove the bacon with a slotted spoon and place it on a paper towel to remove excess grease.

Throw the onions into the skillet with the rendered bacon fat. Add a pinch of salt and pepper. Cook, stirring often, for 10 minutes until the onions begin to soften. Reduce the heat to low. Stir in the apple cider. Cook for another 15 to 20 minutes stirring often, until the onions are slightly caramelized. This will start to happen quicker after you add the apple cider.

Preheat the oven to 425F. Place the sheet of puff pastry on a baking sheet lined with parchment paper. Poke it all over with a fork.

Stir the ricotta and pumpkin together in a bowl until combined. Spread it all over the sheet of puff pastry, leaving a one inch border.

Top with the mozzarella, caramelized onions, bacon and fresh sage. Brush the edges of the pastry with the egg wash.

Bake for 20 to 25 minutes, until the crust is golden and crisp on the edges. Sprinkle with Parmesan. Let cool slightly before serving. 

Game Day Eats @IHCC!


Sunday, June 2, 2024

Salted Peanut Butter Rice Krispy Treats


These Salted Peanut Butter Rice Krispy Treats are ooey-gooey perfection! The addition of the extra butter, extra marshmallows, and peanut butter make them a crispy, crunchy, ooey-gooey delight! I love them so much!


If you're looking for a fun new twist on the traditional Rice Krispy Treat, please give these a try! They are peanut buttery goodness and oh so addictive!


 Salted Peanut Butter Rice Krispy Treats

Adapted from How Sweet Eats

by Jessica Merchant

Makes 12

1/2 cup butter (1 stick)

20 ounces mini marshmallows, (usually 2 bags)

3/4 cup creamy peanut butter

1 teaspoon vanilla extract

8 cups crisped rice cereal

flaky salt, for topping*

Note: I didn't have flaky salt, so I added salt to the mixture instead.

Spray a 9x13 inch baking dish with nonstick baking spray. Melt the butter in a large pot over medium heat. Continue to cook it without stirring, watching it constantly, until brown bits begin to form on the bottom. Reduce the heat to low and stir in 15 ounces of the marshmallows, reserving some for later. Then stir in the peanut butter. 

Stir the mixture with a spatula continuously until the marshmallows and peanut butter melt completely. Stir in the vanilla extract.

Pour in the cereal. Stir until it's about halfway mixed, then stir in the remaining marshmallows. Mix until the marshmallows are evenly distributed.

Place the mixture into the 9x13 dish. Sprinkle the top with flaky salt. Let the bars set and cool for 30 minutes before cutting. Slice them as small or as large as you'd like.


 May IHCC Potluck!


Saturday, March 30, 2024

Broccoli Shells and Cheese

 We love a pasta with broccoli dish, so I tend to make different variations of them often. When I saw this one on the How Sweet Eats blog I knew right away I needed to try it.

I changed the original directions up a bit. How Sweet Eats cooks the broccoli for 2 minutes, before adding the pasta. I like to start cooking the pasta first and then add the broccoli to the pasta in the last few minutes and drain them together, so my directions below reflect that.

The pasta was extremely creamy - as in the creamiest around, but next time I'd like to spice up the cheese sauce a little with some garlic and onion and maybe some red pepper flakes. The unctuous creaminess is there, it just needs a little more flavor.

Broccoli Shells and Cheese

Adapted from How Sweet Eats

by Jessica Merchant

Serves 4-6

1-1/2 cups broccoli florets (about 2 heads, cut smallish)

16 ounces pasta shells

1-1/2 tablespoons butter

1-1/2 tablespoons all purpose flour

1 cup whole milk

1 cup heavy cream

2 tablespoons cream cheese

16 ounces grated sharp cheddar cheese 

salt and pepper, to taste

Bring a large pot of salted water to a boil. Add the pasta and cook to package directions. Depending on how soft you'd like your broccoli, add the broccoli in the last few minutes that the pasta is cooking. If you'd like your broccoli more firm, add it for the last 2-3 minutes. If you'd like your broccoli a little softer then 4-5 minutes will do. When pasta and broccoli are done to your liking, drain.

While the pasta (and broccoli) are boiling away, make your cheese sauce in a medium size pan. Melt the butter in a saucepan over medium heat. Once melted, whisk in the flour to create a roux. Whisk and cook until it's golden and smelling nutty, about 2 minutes. Add the cream and milk slowly, allowing it to steam and thicken up a bit. Stir in the cream cheese until it melts. Turn off the heat and add the shredded cheese in handfuls, mixing until completely melted.

Mix the cheese sauce into the pasta and broccoli and stir until combined. Enjoy!

Potluck Week @ IHCC


Sunday, March 3, 2024

How Sweet Eat's Favorite Baked Cheesy Rice

 This recipe is so easy a tired mom can do it after working all day! Hooray.

We all need easy side dishes for the weekdays. Or weekends. Or any days, because life is well...as complicated as can be nearly all the time, right?

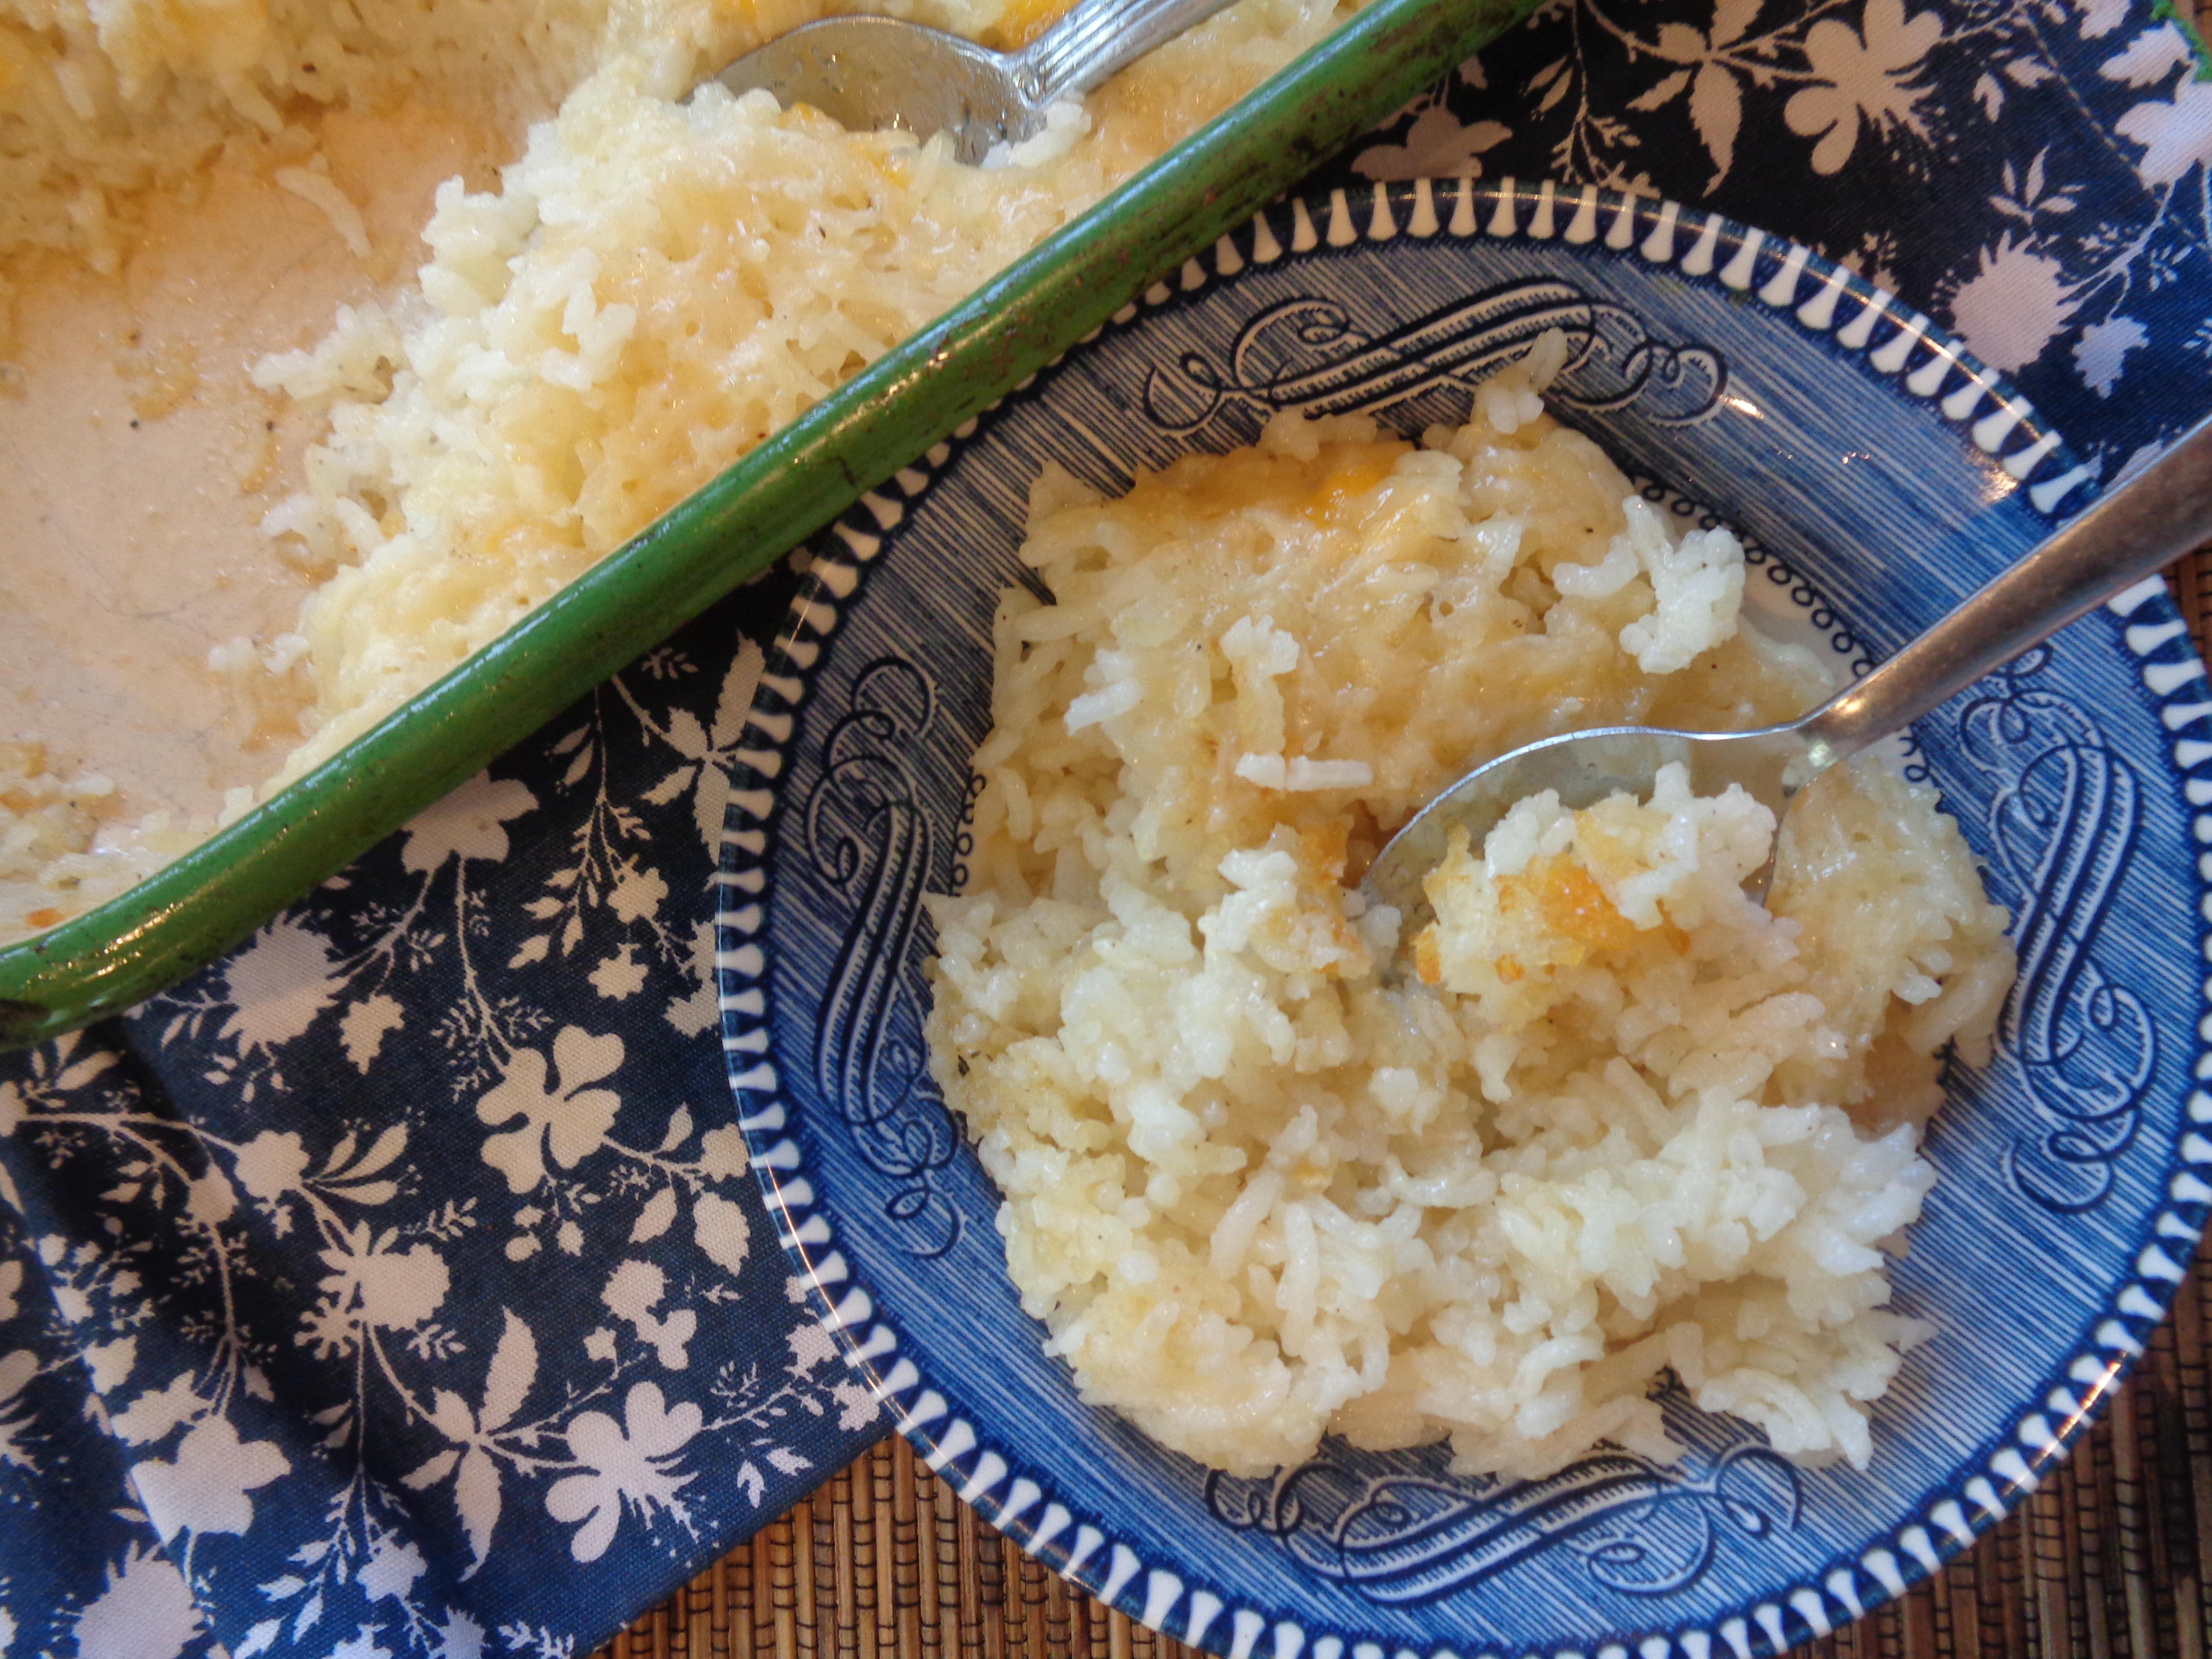
So, measure some rice, rinse it, dump it in a baking dish. Pour on some chicken broth, season with salt and pepper, top with some cheese and butter and foil and throw in the oven for 30 minutes. Remove the foil and put it back in the oven for 20-25 minutes and you have a side dish the whole family will love!

I can see this as a repeat recipe in my house. In fact, I am adding jasmine rice to my grocery order as we speak.

I also see many different possibilities for switching up the flavors: different cheeses, different spices, adding veggies, and so on. Don't be afraid to add what you like because you're the one eating it and you know what you like!

I loved how this rice turned out with the different cheesy textures. The cheese around the edge of the baking pan gets all crispy and provides some texture to the dish, while the cheese in the middle is more melty and ooey gooey.

I sincerely recommend this dish if you are trying to find a kid-friendly side dish, or if you're looking for something tasty and quick, or maybe even something for meal prep. This is a new fave for us!


Our Favorite Baked Cheesy Rice

Adapted from How Sweet Eats

by Jessica Merchant

Serves 4-6

1-1/2 cups dry jasmine rice, rinsed

24 ounces chicken stock

salt and pepper

6 ounces sharp white cheddar cheese, freshly grated

4 tablespoons butter, thinly sliced

Preheat the oven to 425F. Butter a 9x9 baking dish. 

Rinse the rice in a strainer until the water runs clear. Place the rice in the baking dish. Pour in the stock. Add a pinch of salt and pepper. Sprinkle the cheese in and give it a quick stir.

Add the butter slices all over the top of the rice. Cover the dish tightly with foil.

Bake for 30 minutes. After 30 minutes, remove the foil. Bake for 20 to 30 minutes more, until the rice is fluffy and the top is slightly golden. Serve! 

Potluck Week @ IHCC


Sunday, April 30, 2023

Tessa Kiros' Beef and Potato Croquettes

 Back in 2007, I was looking through the cookbooks at Williams-Sonoma and happened upon Apples For Jam by Tessa Kiros. I hadn't heard of Tessa at the time, but the cookbook was beautiful and the recipes were organized by color and it really caught my attention. I scooped up Tessa's cookbook that day, bought every other cookbook she wrote, and have been happily making her recipes ever since.

Tessa's Beef and Potato Croquettes from her Gold chapter have been on my "to-make" list ever since. They caught my attention because they are simple and seem like the perfect family-friendly type dish to make. A handful of ingredients: potatoes, ground beef, Parmesan cheese, 1 egg, salt, breadcrumbs, and oil. Then I read Tessa's blurb and it says "these are very popular and seem to just disappear when there are kids around," and I'm sold. If a dish is kid-friendly then it likely means that it'll be a dish everyone loves. 

If you have leftover mashed potatoes laying around (and someone didn't eat them prior to your plans to make this dish) then these will come together so easy and quick it would make your head spin! However, if you had just enough mashed potatoes left over to make this dish and a certain ravenous 16 year old boy ate them, then you'll have to make another batch of mashed potatoes. Such is life!

Either way, this dish is easy, economical, family-friendly, savory, crispy, tender, and oh so flavorful. I will definitely be making them again.


 Beef and Potato Croquettes

Adapted from Apples For Jam

by Tessa Kiros

Makes about 40 small croquettes

about 4 potatoes, scrubbed

3/4 pound good quality ground beef

1/2 cup grated Parmesan cheese

1 egg

1 teaspoon salt

about 1 cup dry bread crumbs

about 5 tablespoons olive oil

Put a pan of salted water on to boil. Add the unpeeled potatoes and boil, covered, for about 20 minutes, or until they are soft and completely cooked through. (My potatoes were not the same size so I did peel them and cut them into same-size pieces and then cook them). 

Preheat the oven to 350F. Drain the potatoes and, when they are cool enough, peel them. Mash them well in a wide bowl. Add the beef, parmesan, egg, and salt, and mix thoroughly with your hands.

Roll into balls about the size of small walnuts and then flatten them a bit into little ovals. Put the bread crumbs on a plate and pat the croquettes in them to coat both sides. Drizzle about 2-1/2 tablespoons of oil over the bottom of a large baking pan, spreading it around with the back of a spoon. Pack the croquettes like tight soldiers on the pan and drizzle lightly with another couple of tablespoons of oil.

Put the pan in the oven and bake the croquettes for about 30 minutes, or until the undersides are nicely golden and a bit crisp. Turn them over gently and bake for another 10 minutes, or longer if necessary, until the new undersides become nicely golden (even a little crisp here and there - but not dried out).

Serve warm or a room temperature with a small scattering of salt, if you think they need it. 


Sunday, October 24, 2021

Potato Chip Chicken {Family-Friendly and Gluten-Free}

My son and I have been binge watching the latest season of Locke & Key on Netflix. We have literally been waiting years to catch season 2, thanks to the pandemic. Let me just say, if you have older teens, this does not disappoint. 

I wanted to make something quick, but also something we could watch while binging episodes. Half-Baked Harvest's Potato Chip Chicken fits the bill. It couldn't be any easier, it's kid-friendly, it's delicious, and it's perfect for dipping and dunking while you watch TV.

All you need to do is dip chicken tenders in melted butter, then coat them in a finely crushed combo of cornflakes and potato chips and bake! I love the idea of using various kinds of chips: tortilla chips, BBQ chips, sour cream n' onion chips...you name it! 

We loved these potato chip chicken tenders served with some steamed broccoli and some super cheesy and comforting au gratin potatoes. The potato chips give the chicken a light and flaky crispety-crunchety delicious flavor. They are SO GOOD! This is one of those meals that will go on repeat! 

Potato Chip Chicken

Adapted from Half-Baked Harvest Cookbook

by Tieghan Gerard

Serves 6

1/2 cup (1 stick) salted butter, melted

2 cups finely crushed potato chips

1 cup finely crushed cornflakes

2 pounds boneless, skinless chicken tenders

1/2 teaspoon seasoned salt

freshly ground pepper

Preheat the oven to 375F. Put the melted butter in a shallow medium bowl. Put the potato chip and cornflake crumbs in a separate shallow medium bowl and stir to combine.

Working with one piece at a time, dip the chicken in the butter, allowing the excess to drip off, then dredge through the potato chip-cornflake crumbs, pressing gently to adhere. Place the coated chicken on a baking sheet as you work. Season with seasoned salt and pepper.

Bake for 25 to 30 minutes, or until the crumbs are golden and the chicken is cooked through. Serve warm. 


Sunday, January 26, 2020

Pasta with a Creamy Smoked Bacon and Pea Sauce {Recipe Redux}


This recipe, Baby Farfalle with a Creamy Smoked Bacon and Pea Sauce, is a dish I made back in 2011 and it is AN ALL-TIME FAVE! My daughter, who was only 10 at the time, fell in love with this recipe and requests it often.

Over the years, I've made a few changes to this recipe and thought I would document them below for safekeeping. I will confess that my changes DO NOT make this recipe any healthier. In fact, my changes are to add more cream and cheese, but the result is nonetheless an improvement on the original, making the final product a creamy cheesy delight.

This dish is part of my regular rotation for three very simple reasons: it's delicious, it's done in the time it takes to boil pasta, and it's made with pantry ingredients. Everyone should always have the ingredients on hand to make this dish. Pasta, bacon, cream, frozen peas (or even any other green veggie, such as spinach and/or kale) Parmesan and/or Mascarpone.

This dish is highly adaptable. Don't have bacon? Use pancetta or bits of leftover ham. Don't have frozen peas? Use kale or spinach. Don't have the Mascarpone? Use cream cheese. I find that I always have a version of the ingredients on hand to make this dish work.
 
 Now, it's my opinion that the bacon or pancetta is essential here, but I suppose you could go ahead and make a veggie version. If that's the case I'd add a few more green veggies to amp things up a bit.

I'm now on my 11th year of food blogging and this is one of my family's all-time favorite dishes from my blog. I think that probably says it all.


Pasta with a Creamy Smoked Bacon and Pea Sauce
Adapted from Jamie Oliver's Food Revolution
by Jamie Oliver
Serves 4-6

8 -10 slices bacon or equivalent in pancetta
salt and black pepper, to taste
1 pound baby farfalle or small pasta
olive oil
pat of butter
2 cups frozen peas
1/4 - 1/2 cup heavy cream
4 ounces (1/2 cup) Mascarpone
4-6 ounces Parmesan cheese
Optional: herbs for garnish: mint, basil, sage, or parsley work well here

Notes: The ingredients in bold are the ones I've changed over the years. Originally the recipe called for 10 slices of bacon. I usually use around 8 slices but have been known to add more or less. The original recipe called for only 2 tablespoons of cream and it simply just wasn't enough to form a sauce so I find that I add anywhere from 1/4 -1/2, depending on the consistency. And finally, the original recipe didn't call for Mascarpone, but one time I had it on hand and wanted to use it up so I tossed it into the sauce and we found that it made the sauce even creamier and silkier.

Bring a large pan of salted water to a boil. Add the mini pasta and cook according to the package instructions. Slice the bacon. Get a large frying pan over medium heat and a good lug of olive oil and the butter (I've found this necessary as bacon is usually nowhere near as fatty as it used to be). Add the bacon to the pan, sprinkling with a little pepper and fry until golden crisp.

 Meanwhile finely chop any herb garnishes. As soon as the bacon is golden, add your frozen peas (and or any other veg) and give the pan a good shake. After a minute or so, add about 1/4 cup heavy cream and the Mascarpone to the bacon and peas. Before draining your pasta, save some of the pasta cooking water, about 1 cup to be sure. 

Now drain your pasta in a colander. Add the pasta to the frying pan. Incorporate the pasta with the sauce, watching as it comes together to see if it needs more cream. Now toss in the Parmesan cheese and stir to incorporate. Be sure to do all this over low heat. It's really important that the sauce is creamy, silky, and delicious but if it's too thick for you, add a splash of the reserved cooking water to thin it out a bit. Place into a large pasta platter and garnish with more cheese and/or herbs, if using. Serve immediately. This is lovely with a simple green salad.


Sunday, February 23, 2014

Cheesy Muffin Pizzas

I buy a rotissiere chicken every week and I'm always looking for fun new ways to use up the leftover meat.  I happened to catch an episode of Giada at Home where she made these cute little Cheesy Muffin Pizzas with a ball of pizza dough, one leftover chicken breast, and lots of cheese. They caught my attention right away and I thought they'd be a perfect after school snack for the kids.  I was right.  It's always a sure bet that everyone loves anything miniature sized, especially kids.    

These cute little mini pizzas are a savory combination of diced chicken breast, tomato sauce, mozzarella cheese, mascarpone cheese, parmesan cheese, Italian seasoning, and chopped spinach.  The cheese gets all bubbly in the oven and they bake up to the beautiful golden brown.  All twelve of these mini pizzas were devoured in record time.


Cheesy Muffin Pizzas
Recipe adapted from Giada De Laurentiis
Serves 3-4

one chicken breast cut into 1/4 inch cubes
1 cup grated mozzarella cheese
3/4 cup chopped baby spinach
1/2 cup mascarpone cheese
1/3 cup finely grated Parmesan
1/3 cup purchased tomato-basil sauce
2 tablespoons chopped fresh basil
2 teaspoons fresh lemon juice
1/2 - 1 teaspoon Italian seasoning
salt and pepper to taste
olive oil, for coating muffin tins
all-purpose flour, for dusting
1 pound ball fresh pizza dough
 
 In a large bowl, combine the chicken, mozzarella, spinach, mascarpone, Parmesan, tomato-basil sauce, basil, lemon juice, Italian seasoning, and salt and pepper.

Position an oven rack in the center of the oven and preheat to 425 degrees F. Brush a standard 12-cup muffin pan with olive oil.

Lightly flour a work surface. Roll out the pizza dough to a thin large round, about 1/8-inch thick. Using a 3 1/2- to 4-inch-diameter round cutter, cut out 12 rounds for pizza crusts. Working with 1 crust at a time, settle 1 dough round into the prepared muffin pan. Press and pull the dough up the sides of the cup. Rotate the pan and repeat until the dough covers the bottom and sides. Pack in 2 to 3 tablespoons of filling. Repeat with the remaining dough rounds and filling.

Bake the pizzas until the crusts are golden brown and the filling is bubbling, 16 to 18 minutes. Let stand 5-6 minutes. Then use a small knife to loosen the pizzas. Arrange on a platter and serve.
 

Thursday, June 28, 2012

Easy Peasy Chicken Legs {A New Family Favorite}

This is going to sound ridiculous, but this simple recipe for chicken legs is easily my favorite recipe of the year so far!  I know.  It's sounds crazy.  They're just chicken legs after all, but they are absolutely fantastic and everyone goes crazy for them, especially the kids. 

I found this recipe because my son begged me to buy a package of chicken legs.  It's kinda funny...I've made and shared hundreds of different recipes on my site, but I've never actually made a plain old chicken leg before.  I had no idea what to do with them so I did a quick recipe search online and found this recipe.  The recipe had wonderful ratings so I decided to go with it and boy am I happy that I did!

This is now the fifth time I've made this recipe!!  Yep, you heard me right.  We've made these chicken legs once every week for the past five weeks.  The kids gobble them up like crazy and me and my husband love them as well.  The outer coating of the chicken gets nice and crisp while the inside stays nice and tender.  Most importantly, the flavor of the chicken is insane.  I was actually blown away the first time I made them.  There are only five ingredients in this recipe (chicken, olive oil, salt, pepper, and a seasoning of your choice), but those ingredients come together to work some great magic. 

I've learned a few things since I first started making these.  I've noticed that the organic chicken legs in my market always look a bit bigger, and a little nicer, so I try to source them out. I like the results from using organic chicken legs the best.  If I can't find them, I don't sweat it.  Regular chicken legs are very tasty too (just a little smaller).  Also, the chicken has a tendency to stick to the baking sheet,  causing the skin to tear, so I make sure to add enough olive oil to prevent that (a silpat would be a great tool to help prevent sticking).  At first I was unsure about how much seasoning to use.  I was afraid to add too much seasoning because of the kids.  They didn't complain.  Now I lay the seasoning on pretty good.  Of course, you could season them half and half.  Leave half somewhat mild for the kids.  Go heavy on the seasoning for the adults. 

Either way, you can't go wrong with these.  They are succulent, crispy, juicy, tender, flavorful morsels of goodness.  Totally worth turning your oven on!
Easy Peasy Chicken Legs

2 packages of chicken legs (about 11-12)
olive oil (enough to cover generously)
salt and pepper (give them a good coating)
seasoning of your choice*

*Note: Use your favorite seasoning blend.  We've tried them with garlic powder, like suggested in the original recipe, but we like them best sprinkled with seasoned salt, such as Lowry's.

Preheat oven to 400F.  Place chicken legs on baking sheet.  Drizzle the olive oil generously over the chicken, sprinkle with salt, pepper, and seasoning (Lowry's, etc.).  Rub the oil and seasoning into the chicken.

Place in the oven for 30 minutes, then remove and flip the legs over.  Place back in the oven for another 30 minutes and enjoy!

**You can cook as many chicken legs as you can fit on your baking sheet, but you will most likely need to increase the time.  I always make 11-12 chicken legs each time and they are always done in 60 minutes.  However, the original recipe calls for 14 legs and states to cook them for 90 minutes. 
Leave the silverware in the drawer and eat with your hands!