Showing posts with label Tessa Kiros. Show all posts

Sunday, February 4, 2024

My Top Ten Recipes of 2023


I made a lot of delicious food in 2023 and I didn't want to continue on without showcasing my Top Ten Favorite Recipes of 2023! The recipes below are in order of my top favorites, starting with my most favorite of all! If you click on the recipe title you will be directed back to the original post and recipe!

How Sweet Eats Pepperoni Puff Pastry Pizza I am obsessed with this puff pastry pizza! I highly encourage everyone to go over to the How Sweet Eats blog and search all the options for puff pastry pizza! This is a great way to get something quick and delicious on the dinner table during the week! All you need to do is set out the puff pastry the morning of, then come home and spread the pastry out, top it, and bake it in the oven. It is a crispy flaky delight and you can do pretty much any toppings you'd like. My family loved this pepperoni pizza option best, but I liked How Sweet Eats Zucchini, Lemon, and Goat Cheese Puff Pastry Pizza best of all because it's light and fresh and zingy. I ate it on repeat all summer long! Other puff pastry pizza options are Pesto Caprese, Pickle Lovers', and Bacon, Sage, and Pumpkin. Check them out if you need a quick delicious weeknight recipe that everyone will love!

Ina Garten's Spicy Pimento Cheese Dip  Look, there are three recipes I made on repeat in my kitchen and this recipe is one of them. Ina's Spicy Pimento Cheese Dip is THE ONLY DIP recipe you need. I made this so many times, in fact I made it anytime we went anywhere. It is insanely delicious. The first time I made this I made half a batch and I quickly learned never to do that again. We are whole batch people for this recipe. You eat it on crackers and celery and really anything else. You will be slathering it on everything from baked potatoes to burgers to grilled cheese to any sandwich, soft pretzels, even a breakfast sandwich. I took it to the 4th of July party and it was the first thing gone within a half hour. Make this and put it on everything. It is the perfect hint of spicy, without being too spicy and it just goes with everything. People go nuts over it!

Mark Bittman's Sichaun-Style Cucumber Salad The second thing I made on repeat all summer long was Mark Bittman's Sichaun-Style Cucumber Salad. My friend Linda kept growing the most delicious cucumbers and bringing them to me left and right. I made this refreshingly delicious and flavorful cucumber salad several times a week and ate the whole bowl myself. It was so zesty and zingy and just popped with flavor. I craved it on repeat and took it with me to every family gathering where it was a big hit! 

Donna Hay's Smoky Halloumi and Couscous Salad I must have ate this salad at least once a week all throughout the summer! I love halloumi cheese and having it on a salad gives you a good excuse to eat it and call it healthy. Coat the cheese in some herbs and fry it in a pan until it gets all squeaky and chewy. Serve that over pearl couscous that pops in the mouth with some fresh spinach and tomatoes and a smoky paprika dressing...it's heaven!

Ina Garten's Hot Dogs In Puff Pastry  Poor Ina got a lot of flack on social media about adding a recipe for hot dogs in her cookbook. I'm not sure why because I think most people do love them and they're definitely family friendly. Plus, Ina has said over and over again that she loves to mix high end ingredients like puff pastry with low end ingredients like hot dogs. And listen, when Ina creates a recipe for hot dogs you make it because she is pretty much the Queen of recipes and let me tell you...this recipe is so good! Just buy enough to double the recipe because your family will inhale these. We especially loved these with a little sprinkle of the Everything But the Bagel seasoning on top and then we loved to dunk them in a mixture of mayo and mustard. You could even make these and cut them into minis for a party. They are so savory and juicy and delicious!

Half-Baked Harvest's Creamy Roasted Cherry Tomato Ricotta Pasta I had my eye on this pasta recipe for awhile and over the summer I grew the most delicious cherry tomatoes and I paired them with a fresh basket ricotta from the Murray's cheese department of my Kroger store. If you haven't tried the fresh basket ricotta then you should! The cherry tomatoes roast in the oven with herbs and garlic and then get mixed with the fresh ricotta, Parmesan, and butter before getting mixed into the pasta. It is so creamy and dreamy and flavorful. It was my favorite pasta dish of the year, a creamy garden fresh explosion of flavor.

Ina Garten's Blueberry Breakfast Ricotta CakeI've made a lot of cakes in my day, but none like Ina's Blueberry Breakfast Ricotta Cake. I can honestly declare it THE BEST CAKE I've ever made. It is utter perfection. In fact, I follow the Barefoot Contessa Fan Page on Facebook and this cake cycled on repeat on that page as person after person made it, shared it, and declared it amazing. The crumb is so tender and moist and ratio of blueberries to cake batter is just right. There is a hint of lemon and it is just oh so good served warm. If you find yourself in need of a cake for any reason just do yourself a favor and make this one.

Ruth Reichl's Oatmeal Chocolate Chip Cookies If you're a big oatmeal chocolate chip cookie fan, then Ruth Reichl's recipe for Oatmeal Chocolate Chip Cookies is for you. Oatmeal chocolate chip is probably my all-time favorite cookie and I think this recipe is the best, hands down. Ruth calls for a lot of oatmeal, making these cookies thick and chewy and more substantial than a regular old oatmeal cookie. These babies are thick! You can use chocolate chips in this recipe, but I prefer chocolate chunks so I buy bars of Ghiradelli chocolate and cut them into big chunks. Give them a try!

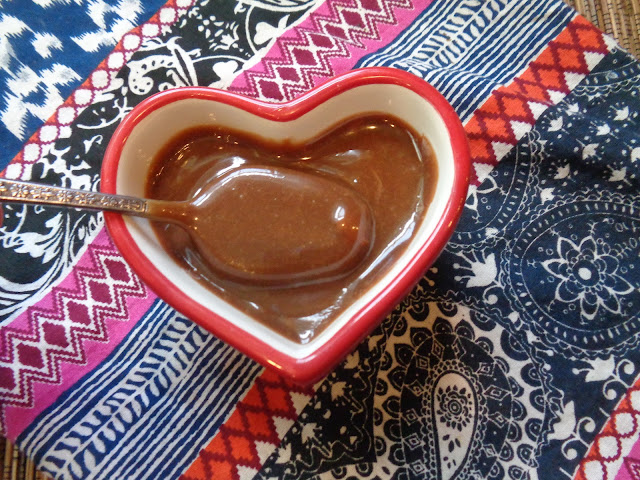
Tessa Kiros' Milky Way Ice Cream Sundae This was my husband's favorite dessert of the year and I can see why. Not only is this dessert delicious, but it's so easy a kid could do it. All you need is three ingredients: milky war bars, cream, and vanilla cream. You simply cut up the milky way bars and throw them in a pan, add some cream and melt. The milky way bars melt down with the cream to create a thick fudge-like sauce that is delicious poured over vanilla ice cream. Buy some extra milky war bars to cut and garnish on top of the sundae and you have a big hit for the whole family!

Ina Garten's Baked Sweet Potato Fries with the Best Sweet Potato Fry Dipping Sauce I crave these thick wedges of sweet potato fries dunked in the creamiest sweet potato fry dipping sauce. In fact, I could eat them daily and never tire of them. Ina's sweet potato fries are cut into thick wedges and coated in olive oil, brown sugar, salt and pepper then baked in the oven. I like these better cooked in the air fryer, but either way works. What makes the fries so delicious is the sweet potato fry dipping sauce made from mayo, Sriracha, and smoked paprika. It is so savory, and creamy, and spicy, and addictive. I literally cannot stop eating them!


January Potluck @ I Heart Cooking Clubs

photo credit 


Sunday, August 13, 2023

Tessa Kiros' Milky Way Ice Cream Sundae {5 Minutes or Less}

Three ingredients and five minutes and you can have the ice cream sundae of your dreams! It's as close to instant gratification you can get in the dessert world.

All you need is Milky Way bars, cream, and vanilla ice cream. You are halfway to bliss!

All you need to do is melt the Milky Way with some cream in a pan and pour it over the vanilla ice cream. It's as simple as can be, but the resulting sauce is rather complex. It's kind of a cross between a hot fudge and a caramel sauce and when you pour the warm sauce over the cold vanilla ice cream the caramel sets up lightly and all those chewy bits are just the best!

My husband was so impressed with this one and declared it one of his new favorites. I highly suggest it if you're a Milky Way lover, or an ice cream lover, or just someone in need of a quick dessert. It is a winner!

Milky Way Bar Sauce

Adapted from Apples for Jam

by Tessa Kiros

Makes 2 cups

1 cup heavy whipping cream

5 (2 ounce) Milky Way Midnight Bars*

Notes: The only difference between a regular Milky Way bar and a Milky Way Midnight bar is that a Milky Way is made with milk chocolate and a Midnight bar is made with dark chocolate. I used regular Milky Way because we are milk chocolate lovers, but you do you! I also think a Snickers would work just as well, or maybe even better if Snickers is your jam. *I didn't need 2 cups of Milky Way Sauce so I made about 1/4 of the recipe, using a King Size Milky Way bar and about 1/4 cups of heavy cream.

Pour half the cream into a heavy-bottomed pan and heat gently. Coarsely chop the Milky Way bars and add to the pan, stirring all the time with a wooden spoon, until they are completely melted. Make sure that the cream is not too hot and that they are completely melted. Make sure that the cream is not too hot and that nothing gets stuck on the bottom of the pan, which would ruin your chocolate. When everything is nearly all melted together, add the rest of the cream, and whisk to break up the soft lumps. Remove from the heat and carry on whisking until the sauce is completely smooth. Cover when it has cooled a bit. Serve warm or even at room temperature, but store in the fridge if you don't finish it all. Even a teaspoon of it cold or at room temperature is great for lifting the spirits.

Ovens Off @ IHCC


Sunday, April 30, 2023

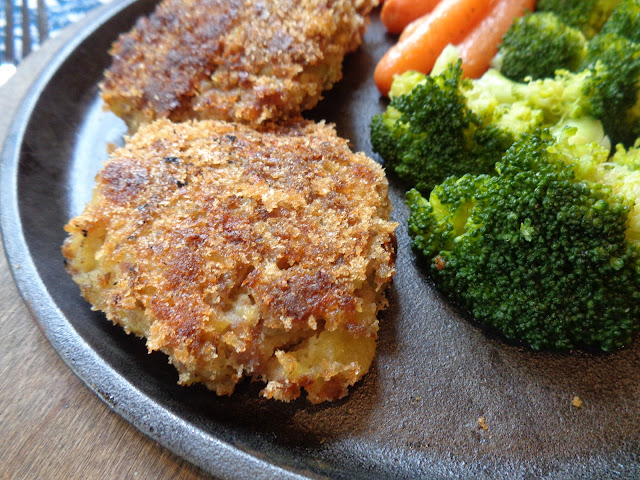
Tessa Kiros' Beef and Potato Croquettes

 Back in 2007, I was looking through the cookbooks at Williams-Sonoma and happened upon Apples For Jam by Tessa Kiros. I hadn't heard of Tessa at the time, but the cookbook was beautiful and the recipes were organized by color and it really caught my attention. I scooped up Tessa's cookbook that day, bought every other cookbook she wrote, and have been happily making her recipes ever since.

Tessa's Beef and Potato Croquettes from her Gold chapter have been on my "to-make" list ever since. They caught my attention because they are simple and seem like the perfect family-friendly type dish to make. A handful of ingredients: potatoes, ground beef, Parmesan cheese, 1 egg, salt, breadcrumbs, and oil. Then I read Tessa's blurb and it says "these are very popular and seem to just disappear when there are kids around," and I'm sold. If a dish is kid-friendly then it likely means that it'll be a dish everyone loves. 

If you have leftover mashed potatoes laying around (and someone didn't eat them prior to your plans to make this dish) then these will come together so easy and quick it would make your head spin! However, if you had just enough mashed potatoes left over to make this dish and a certain ravenous 16 year old boy ate them, then you'll have to make another batch of mashed potatoes. Such is life!

Either way, this dish is easy, economical, family-friendly, savory, crispy, tender, and oh so flavorful. I will definitely be making them again.


 Beef and Potato Croquettes

Adapted from Apples For Jam

by Tessa Kiros

Makes about 40 small croquettes

about 4 potatoes, scrubbed

3/4 pound good quality ground beef

1/2 cup grated Parmesan cheese

1 egg

1 teaspoon salt

about 1 cup dry bread crumbs

about 5 tablespoons olive oil

Put a pan of salted water on to boil. Add the unpeeled potatoes and boil, covered, for about 20 minutes, or until they are soft and completely cooked through. (My potatoes were not the same size so I did peel them and cut them into same-size pieces and then cook them). 

Preheat the oven to 350F. Drain the potatoes and, when they are cool enough, peel them. Mash them well in a wide bowl. Add the beef, parmesan, egg, and salt, and mix thoroughly with your hands.

Roll into balls about the size of small walnuts and then flatten them a bit into little ovals. Put the bread crumbs on a plate and pat the croquettes in them to coat both sides. Drizzle about 2-1/2 tablespoons of oil over the bottom of a large baking pan, spreading it around with the back of a spoon. Pack the croquettes like tight soldiers on the pan and drizzle lightly with another couple of tablespoons of oil.

Put the pan in the oven and bake the croquettes for about 30 minutes, or until the undersides are nicely golden and a bit crisp. Turn them over gently and bake for another 10 minutes, or longer if necessary, until the new undersides become nicely golden (even a little crisp here and there - but not dried out).

Serve warm or a room temperature with a small scattering of salt, if you think they need it. 


Sunday, April 16, 2023

Five Favorite Mediterranean Dishes!

Mediterranean food is my all time favorite and most of this blog probably consists of some form of Mediterranean-based dish. 

I thought it would be fun to look back on some of my favorite Mediterranean dishes, namely my top Greek and Italian recipes. I chose a good mix of main dishes, one appetizer, and a dessert! As always, if you click on the recipe title it will direct you back to my original post with the recipe!

                                                    Ina Garten Sausage and Fennel Rigatoni

This is one of the MOST DELICIOUS FIVE STAR pasta dishes I've ever made or eaten anywhere, both in my kitchen and in a restaurant. Many others say the same, so I feel like it is a must make if you're a pasta lover. Don't let the fennel worry you if it's not your favorite. I felt that way and it turned out just fine. The fennel just gives this dish a delicate background flavor that really gives the dish the boost it needs to be something special. It is an outstanding dish!

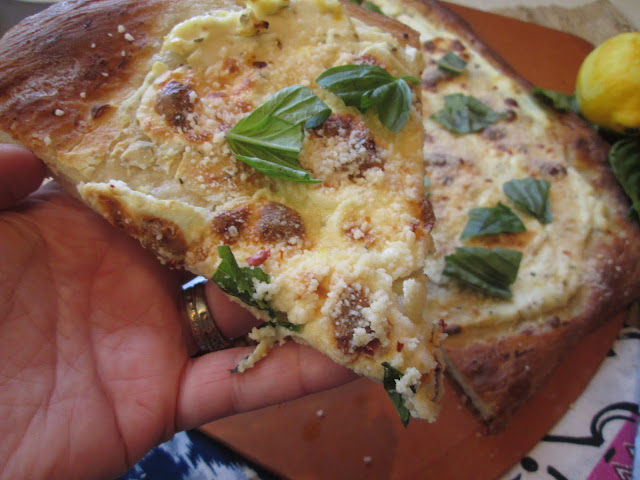
White pizza is a real favorite of mine and this version with three cheeses: ricotta, mozzarella, and Parmesan is just a stunning dish! This pizza turns out perfectly for me every single time and to this day it is THE SINGLE MOST delicious pizza I've ever made at home! I always imagine myself eating a slice at an outdoor restaurant over the cliffs of the Amalfi Coast.
 
I love all things shrimp and feta cheese, feta is one of my favorite cheeses, so this dish was meant for me! It's flavorful and light and feels so special. One day when I get over to Greece I plan to eat my weight in all things feta and shrimp, and probably baklava, but that's for another post.
 
Again, feta cheese! I am ALWAYS looking for ways to eat feta cheese so this recipe makes me feel better about eating so much cheese because I'm also eating vitamin rich pepper as well! It's a win-win situation!
As I mentioned several times over the years, the Amalfi Coast of Italy is rife with lemons and in my spare time I watch travel vlogs on Youtube and everyone is dining al fresco on the cliffs of the Amalfi Coast doing shooters of Limoncello, eating fresh fruit, pasta, etc. This dessert reminds me of the Mediterranean because it's fruity and light, spiked with Limoncello, and just a little bit creamy with a lemon yogurt dressing. It just seems like the fruity desserts you find all over Italy and I'm going to declare it Mediterranean! 

A Taste of The Mediterranean!


Sunday, January 1, 2023

My Top Five Dishes of 2022!

 It's time for my favorite post of the year...My Top Five Dishes of 2022! 

 
Here at Stirring the Pot, it was the year of Julia Child! I have two rather mind-blowing dishes of Julia's to start off our countdown.

Here are my TOP FIVE FAVORITES OF 2022, starting with Number One! Please click on the recipe title to be redirected to the original post and recipe!

Hitting the list at NUMBER ONE is Julia Child's Supremes de Volaille a l'Ecossaise, otherwise known as Chicken Breasts with Diced Aromatic Vegetables and Cream. I mean holy cow folks, or should I say holy chicken...this dish will knock your socks off. The chicken is so tender and that sauce....well, it was so velvety and flavorful...it kind of reminds me of the flavors in a chicken pot pie. It's visually stunning, and so comforting and delicious.

Julia's Biftek Hache a la Lyonnaise or rather her Ground Beef Burgers with Onions and Herbs, is not only crazy delicious...but economical and rather easy. Listen, DO NOT sleep on this dish. It is simply not just a beef burger with sauce. It's buttery and flavorful from the addition of butter and herbs and the burgers get dunked in flour before being fried so they form a little crust for texture. It looks simple, but I can assure you that it's delectable. This is a very close SECOND to Julia's chicken recipe above, simply depends on the day!

I also cooked a lot with Ina Garten this year and her newest cookbook, Go-To Dinners, is full of gems. I've made quite a few recipes from her new book and by far the best was her Ravioli En Brodo. This is a light brothy soup with complex flavors. We were blown away by the flavors and really enjoyed the addition of fennel. It's hard to beat fluffy pillowy ravioli in a flavorful broth. So comforting and delicious!

 You might think I've lost my mind, but WOW, Ina's Parmesan Chipotle Popcorn was something else! Cheesy, spicy, buttery, crunchy, and hot...it is ONE OF THE BEST SNACKS ever! I just loved it! Make it for yourself. Make it for a get together. Make it for your family. You can't go wrong!


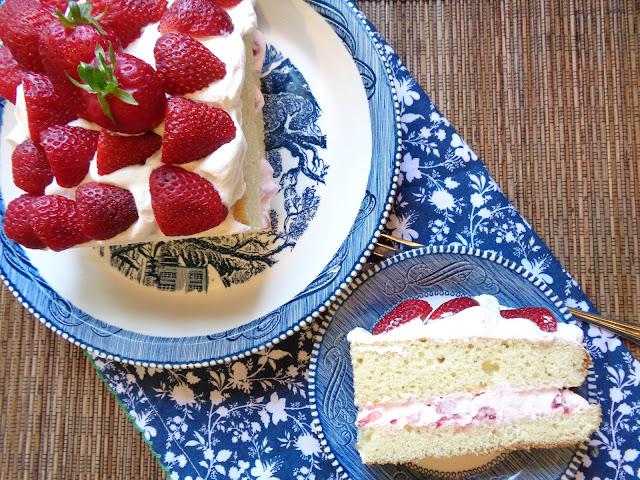
Coming in at Number Five is dessert!  It was really tough to chose a favorite dessert for this roundup. I had three that I was considering: Dorie Greenspan's Salted Chocolate Hot Fudge Sundaes, Ina Garten's Milk Chocolate Oreo Ice Cream, and this one, Tessa Kiros' Sipi's Strawberry Cake. I chose Sipi's Strawberry Cake because it was made with local and seasonal strawberries from the farmer's market and they were the most delicious strawberries I've had in years. Not to mention, the cake was a stunner and what's not to love about fresh berries and cream? 

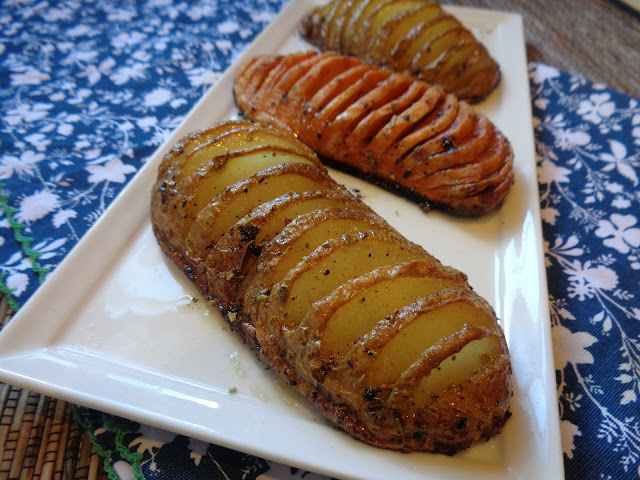
Bonus: Tessa's Hasselback Potatoes deserve a big Honorable Mention for two reasons: first, they are a new family favorite. Everyone loves the golden brown crunch on the bottom of the potato, the crispy slices on the top of the potato, and also the rather fluffy interior. They are indeed THE NEW BAKED POTATO in my house! And also, the post I wrote for Tessa's Hasselback Potatoes was pretty much my favorite to write all year. This recipe should come with a warning: Delicious, but quite the hassle!


HAVE A DELICIOUS NEW YEAR!!

Sunday, October 2, 2022

Eggs with Bread and Butter

 Dear Reader,

Sometimes the ugliest of foods are the most memorable. Think of this dish as a big hug. Something that mom would have made for you. In fact, in her cookbook Apples For Jam, Tessa states, "This is what my mom gave us so often - it is one of my earliest food memories. I have only to smell it and it takes me sailing back in time and fills me with wonderful memories. It is amazing how an egg and slice of bread can do that."

Tessa's words echoed back to me each and every time I picked up this cookbook. I had leftover Hawaiian rolls so I decided to make the dish and decide whether it was blog worthy.

Three simple ingredients, but let's be real. These are pretty much three of everyone's favorite all-time ingredients. How can one go wrong? 

Butter the bread, tear it into bits, place it into a cup or bowl. Then boil the egg for about 2-4 minutes (closer to 4 minutes for me) and mix the soft-boiled egg into the bread and butter mixture. Serve with a spoon.

THIS MAKES THE CUT FOLKS! It is so comforting. So easy. So delicious. Like a giant hug from mom. I made it once. Then I made it again. Then I made it every morning until I ran out of the ingredients. Sometimes I added salt and pepper. Sometimes I added Everything But The Bagel seasoning. Another time I added cheese. Last time, I added a little dash of poultry seasoning and it gave the whole mixture a stuffing vibe.

So, dear reader, you really can't go wrong. If you want a quick breakfast. If you're feeling under the weather. If you have small children or even grown children. If you're missing mom. If you're in need of a hug...make this dish. Use whatever bread you have (ideally it will be a soft bread). Use whatever seasonings you like. Add cheese or herbs. Make it your own, but definitely make it.

Do take note, it would be just as delicious served in a bowl, but it is really special served in a small glass with a spoon. There is just something so special, fun, and youthful about eating this out of a glass with a spoon. It really ups the fun factor!

Take comfort,
Kim


Eggs with Bread and Butter

Adapted from Apples For Jam

by Tessa Kiros

Serves 1

1 egg

1 to 2 teaspoons soft butter

1 slice fresh soft white or brown bread or roll

Put the egg in a pan of cold water and bring to a boil. Cook for 2-1/2 minutes from when the water comes to a boil (the white should have just set and the yolk will still be soft and runny). Lift out the egg with a slotted spoon. Meanwhile, butter the bread, break it into small bits, and put in a little bowl or cup. Hold the egg over the bowl, give it a sharp crack through the middle with a knife, and scoop out the egg with a teaspoon. Add a little salt and mash together well with a fork. Serve immediately.

Notes: After I made this the first time I made some changes. Namely, you can literally use any bread for this. I had leftover Hawaiian rolls and those were perfect for this recipe. The biggest change I made was in buttering the bread prior to breaking it into small bits. That is quite messy on one's fingers. Instead, I simply broke the bread into bits and set a teaspoon or so of butter on top of the bread. I would place the egg on top of the bread and butter and the heat of the egg would melt the butter into the mixture just fine.  


Sunday, September 25, 2022

Tessa's Hassleback Potatoes


 Dear Tessa, 

On a lazy Sunday afternoon I like easy and quick recipes. When I first spotted your hassleback potatoes I thoutht they seemed quite simple. 

The ingredients were few. The directions were short. How hard could it really be to cut some slits in a few potatoes and throw them in the oven?

A quick trip to my pantry to grab some potatoes. I grab some russets and a sweet potato. These will be in the oven in no time I think to myself.

Then I realize you want me to peel the potatoes. I rewrite the recipe. No, I will not peel the russets, Tessa. I will, however, peel the sweet potato.

Then I read as you say, "Peel the potatoes and cut them in half lengthwise. Sit them, flat side, on a chopping board. Using a small, sharp knife, start at one end of the potato and cut down through the top, about a third of the way through. Make another tiny cut away from the first, slightly on the diagonal toward the first cut, and break away the little piece of potato to make a slit. Continue along the potato, making slits about 1/4 inch apart.

I'm puzzled right from the start because most people hassleback an entire potato and you want me to only hassle the back of half a potato? I do some quick research online and find that yes, I am not crazy, and yes, most recipe do hassle the entire back of an entire potato. 

Fine, Tessa. I will play your games and cut my potatoes in half lengthwise. I am only doing this because as I mentioned before; I am about easy and quick, and half a potato cooks faster than a whole potato.

However, I then realize that I will have to hassleback even more potato than if I had just hassled a whole potato? Do you understand where I'm going with this, Tessa?

So there I am rereading your directions about how to hassleback my potatoes when I realize that this recipe is quite a hassle! I wanted to blame it all on you, Tessa. However you did name them Hassleback Potatoes so I suppose it's my fault. 

How did I miss this? 

Let me tell you, Tessa. I didn't have very kind words to say as I was cutting quarter inch slits in all my potatoes, Tessa. When you call for large potatoes did you realize how many slits one would have to cut? It was rather tedious when it came to the russet potatoes and then it was damn near impossible when it came to the sweet potato, but cut away I did.

I put those hassles on the sheet pan and covered them in your mixture of butter, oil, salt, pepper, and sage and stuck them in the oven. I wanted to be done with them, but then I had to baste them with the butter/oil mixture about every 15 minutes.

These potatoes really are hassle, Tessa. A hassle right in the ol' back.

During the baking, I stopped to read reviews on hassleback and I found a lot of complaints, Tessa. People said they were overcooked and dry and too hard, etc. I started to get kinda angry, Tessa. After all that work....my potatoes better be delicious.

The time had come and I took my potatoes out and placed them on a plate. I noticed the potato bottoms (which you had me cut in half) were crusted over with a glorious golden brown crust. I noticed the tops of the potatoes were perfectly seasoned, with just the right amount of crispness. I also noticed the potato itself was still fluffy.

My son took a bite and was like, "This is way better than a normal baked potato. It has way more flavor and texture and I just love it. Do you have more?" Of course, I had more. I had hassled my way through 3 potatoes after all. I had 6 hassleback halves.

All that hassle, Tessa, and my potatoes were gone in a flash. Everyone ate them up quicker than I hassled them! Imagine that!

Anyway, they are now a family favorite, so thanks a lot. Looks like I will be hassling with potatoes a lot more in the future.

Thanks,

Kim

Hassleback Potatoes

Adapted from Falling Cloudberries

by Tessa Kiros

Serves 6

6 fairly large potatoes

3-1/2 tablespoons butter

2 tablespoons olive oil

a small handful of fresh sage

 Preheat your oven to 425F. Peel the potatoes and cut them in half lengthwise. Sit them, flat side side, on a chopping board. Using a small, sharp knife, start at one end of the potato and cut down through the top, about a third of the way through. Make another tiny cut away from the first, slightly on the diagonal toward the first cut, and break away the little piece of potato to make a slit. Continue along the potato, making slits about 1/4 inch apart.

Handling the potatoes carefully so that they don't break, arrange them in a baking pan. Add the butter and oil and season with salt and pepper. Scatter the sage leaves around and bake for 45 minutes to 1 hour, or until the potatoes are golden and crispy. Spoon a little of the butter pan juices over the top from time to time and gently toss them so they don't stick (but don't touch them for the first 15 minutes or so, or they will simply break). Serve immediately.


The Great Potato @ IHCC

Sunday, September 11, 2022

Tessa's Vanilla Cake

 On September 11, 2001 my daughter, Olivia, was 6 months old. I had waited and waited for the day to arrive because that afternoon Olivia had her 6 month check up. If everything looked good, the doctor was going to give me the okay to start feeding her baby food.

As a new mom I was so excited. I had a special outfit all planned out. There was even a bonnet involved. This was a big deal to me because I was a foodie even back then.

I read all the articles and books about feeding babies for the first time. I had planned to start with green beans because it was recommended to start with veggies at the time. All the information said DO NOT start with sweet fruit or your baby will develop a sweet tooth.

On the morning of 9/11, I was so excited because I had taken a half day from work and was leaving at noon to take Olivia to the doctor. I laid out the green beans, her outfit, and her bonnet.

I had no idea a tragedy would occur that day. When the attacks began my husband came to find me at my cubicle (we worked together back then). We were in utter shock as attack after attack unfolded. I remember my mom calling me terrified as the plane flew into the Pentagon and then the field in Pennsylvania. At the time, it seemed the attacks would go on and and on and were getting closer and closer. No one really knew if or when the attacks would stop.

At the time I lived in a small town right outside Cleveland, Ohio and I will never forget when an announcement came over our loudspeaker at work stating that "there was a plan flying over Cleveland airspace with a suspected bomb on it." They let us leave work early. Everyone wanted to be reunited with their family and be together.

I called my mom to tell her that I was leaving work to get Olivia and my mom begged and begged me to just go home and stay safe. However, I was bound and determined to take Olivia to her doctor's appointment.

I can remember what a beautiful day it was outside. The sky was so blue and it seemed at such odds with what was happening in the world. Everyone was out and people were waving the American flag. I passed lines and lines of people waiting at the American Red Cross building to donate blood. I have never seen such a show of patriotism and unity as I did that day.

I hugged Olivia tight. I dressed her up in her cute little outfit with a bonnet. I turned the news on. In my excitement I grabbed a jar of peas instead of the green beans and I fed her food for the first time.

Olivia was happy and giggling and I was so thankful for her. I felt so sad for everyone who had lost a loved one that day and I remember feeling helpless and thinking that I had to do a better job of being thankful. I had to soak up all the good times and enjoy my family as much as I possibly could in my life. This was something I could do and would do.

Years later I would remember the vow I made that day. To be thankful and not take anything for granted. I started to get everyone to gather together as a family on that day. We would always tell Olivia how that was the day she first started eating real food. Over time it morphed into a tradition to celebrate that fact that it was Olivia's food anniversary. We started making dishes with peas in honor of her first food every year.

Over time we found the perfect pea dish, Jamie Oliver's Pasta with a Creamy Smoked Bacon and Pea Sauce and we serve it every year. All these years later and we are still gathering together. Olivia has now been eating real food for 21 years now.

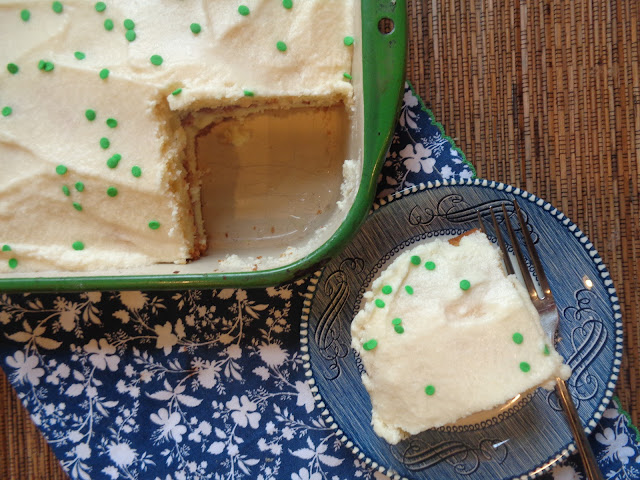
This year I even made a cake. Tessa's Vanilla Cake with a layer of Strawberry Jam and Vanilla Frosting and also with green circle sprinkles to imitate peas!

It has been 21 years since the 9/11 attacks, but I will never forget. Both of my kids are almost grown, but I'd like to think that one day my kids will carry on this tradition without me. I like to think of them gathering together and cherishing one another on this day every year, smiling and laughing as they eat peas and celebrate Olivia eating real food for hopefully many, many years.

Vanilla Cake

Adapted from Apples For Jam

by Tessa Kiros

Makes 10-12 slices

 Cake:

1/2 pound, plus 2 tablespoons (2-1/4 sticks) butter, softened

1 cup plus 1 tablespoon sugar

3 eggs

1 teaspoon vanilla extract

2-1/4 cups all-purpose flour

1-1/2 teaspoons baking powder

3/4 cup half and half or milk

Frosting:

7 tablespoons butter, softened

1-2/3 cups confectioners' sugar

1 teaspoon vanilla extract 

about 4 tablespoons milk

Preheat the oven to 350F and grease a 9-1/2" springform cake pan. Beat the butter and sugar together very well in a large bowl. Add the eggs one at a time, beating well after each one goes in. Add the vanilla and then sift in the flour and baking powder. Beat well, adding the half and half or milk a little at a time. You will have a thick and creamy batter. Scrape it out into the cake pan and bake for about 45 minutes, or until a skewer poked into the center comes out clean. Leave to cool completely before filling and frosting.

For the frosting, put the butter into a bowl and gradually beat in the confectioners' sugar. Add the vanilla and 3 tablespoons of milk and beat well, then slowly beat in the rest of the milk, stopping when you have a smooth but fairly stiff frosting. Gently spread it all over the cake - it doesn't have to be perfect! 


Casual Cookout @ IHCC