We went wild last week making popsicles, choosing three popsicle recipes and loving each and every one of them! The Zoku Quick Pop Maker is one of our favorite new kitchen gadgets and we've been having lots of fun breaking it in.
I was really excited to find mangoes on sale in my market for 50 cents a piece, so I chose these
Mango-Ginger Popsicles.
 Mango-Ginger
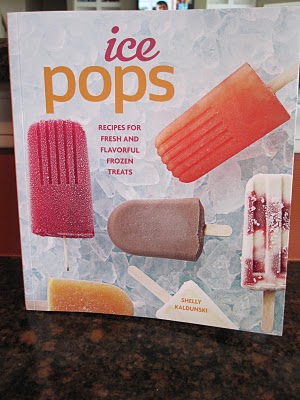
 Adapted from Ice Pops by Shelly Kaldunski
Makes 8-10 Ice Pops
1/3 cup sugar
1/2 teaspoon grated peeled fresh ginger
2 ripe mangoes, about 1-3/4 pound (875g) total weight
2 tbsp freshly squeezed lime juice
pinch of salt
1/2 cup water
In a small saucepan, combine the sugar, ginger, and 1/2 cup water. Bring to a boil over medium-high heat, stirring occasionally until the sugar has completely dissolved and syrup has formed. Remove from the heat and let cool to room temperature.
Peel each mango and cut the flesh from the pits, discarding the pits. Chop the flesh and place in a blender or food processor. Add the lime juice, salt, and the cooled ginger syrup and process until very smooth.
If using conventional ice pop molds, divide the mixture among the molds. Cover and freeze until solid, at least 4 hours or up to 3 days.
Notes/Results: I knew that I was going to love these popsicles, but I wasn't sure about my husband and the kids. My husband and daughter don't like mangoes and wouldn't try them, but my son and I both loved them. The taste of the ginger was subtle and provided an extra dimension of flavor. The popsicles were more of a creamy consistency, which made them extra yummy. If I can find more mangoes, I will definitely make more of these.
Our second choice, or kids choice, were these
Grape Pops. These grape pops are so easy; you really don't need a recipe. The basic idea is to get a handful of purple grapes and slice them in half. Drop a couple grape halves down into the bottom of the popsicles molds and top off with white grape juice.
 Notes/Results
: As suspected, the kids loved the grape juice popsicles plain, without the frozen grape halves. We were all very pleasantly surprised by how sweet and tasty these grape pops actually were. My husband and I liked the pop of the frozen grape halves and enjoyed their sweetness. However, I did have trouble unmolding the pops with the frozen grapes. The popsicles kept breaking where the grape halves were attached. It happened over and over. I'd like to try it again, adding a tablespoon or so of grape juice first, then grape halves, followed by more juice. I'm hoping that this modification will work, because we really did love these popsicles. These grape pops couldn't be simpler, so we made them twice this week.
Last but not least, are these pretty
Pink Lemonade Popsicles. They were really tasty and a huge hit at my daughter's birthday party this weekend. The kids loved them and I was happy to see that some kids chose the pink lemonade popsicles over birthday cake! The pink lemonade popsicles get their pretty pink hue from the addition of strawberries. With fresh strawberries in season, this is a great popsicle to make right now. In fact, you may even have all the ingredients on hand.
 Pink Lemonade Pops
Adapted from Shelly Kaldunski
Makes 9-11 Ice Pops
1 teaspoon finely grated lemon zest
1/2 cup freshly squeezed lemon juice (from about 4 lemons)
1/2 cup plus 2 tablespoons superfine sugar
2 fresh or frozen strawberries, hulled (I used one super duper large strawberry)
pinch of salt
1-3/4 cups water
In a blender or food processor, combine the lemon zest, lemon juice, and the sugar. Pour in 1-3/4 cup water. Add the strawberries and salt and blend until the mixture is smooth and pink.
If using conventional ice pop molds, divide the mixture among the molds. Cover and freeze until solid, at least 4 hours or up to 3 days.
Notes/Results: Everyone loved these popsicles! They were super easy and quick, no simple syrup necessary. What I liked about these popsicles was that they were made with ingredients that I almost always have on hand, especially this time of year. These pops will be repeated over and over again as they seemed to be a huge hit with the kids.
THE WINNER OF SHELLY KALDUNSKI'S ICE POPS BOOK IS
DEB @ KAHAKAI KITCHEN!! Yay Deb!! I will be emailing you so that I can send the book out to you!