Showing posts with label snacks. Show all posts

Sunday, March 9, 2025

How Sweet Eats Parmesan Broccoli Roll {A Great Vegetarian Dish}!!


When you spring clean your home, you can't forget about your pantry, fridge, and freezer! I find it so much fun to make a game out of cooking up all the bits and bobs in my kitchen. That's where this recipe for How Sweet Eats Parmesan Broccoli Roll comes into play!


I had one roll of puff pastry, loads of broccoli, tons of garlic, and bits and bobs of cheese leftover. One thing about me is I WILL HAVE CHEESE AT ALL TIMES. When How Sweet Eats shared this recipe I knew it was time to put all those things together to create one flaky, crispy, buttery, cheesy, garlicky, veggie-filled puff of pastry. I mean, it really doesn't get better than this!


Parmesan Broccoli Roll

Adapted from How Sweet Eats

by Jessica Merchant

Serves 2-4

2 tablespoons olive oil

8 garlic cloves, minced

3 cups broccoli florets, chopped

salt and pepper, to taste

1/2 teaspoon crushed red pepper

1 sheet of puff pastry, thawed

1-1/2 cups shredded mozzarella or Italian blend cheese

1/2 cup finely grated Parmesan cheese, for topping

1 egg + 1 teaspoon water, beaten for egg wash


Note: Jessica of How Sweet Eats notes that she likes to use full sheet puff pastry but I use Pepperidge Farms and adapt the size of the puff pastry to my recipe. I may not be able to use all the filling, but I will save it for later or make two rolls.

Preheat the oven to 425F. Line a baking sheet with parchment paper. Heat the olive oil in a skillet over medium-low heat. Add the garlic and cook for 30 seconds. Add in the broccoli with a pinch of salt and pepper. Cook until slightly softened, about 3 to 4 minutes. Stir in the pepper flakes. Slice the puff pastry in half lengthwise. Keep one piece on the parchment paper. Sprinkle the mozzarella cheese on the one long sheet of puff pastry, leaving a 1/2 inch border. Top with the broccoli in an even layer. Sprinkle the Parmesan on top. Use the egg wash to brush the border of the puff pastry. Place the other slice of puff pastry on top, pressing down the edges to seal. Slice a few slits in the top to let steam escape. Bake for 20 to 25 minutes, until golden and puffed. Remove and let cool slightly before sprinkling with Parmesan. Slice and serve!

Spring Cleaning @ IHCC!


Sunday, December 11, 2022

Ina Garten's Parmesan Chipotle Popcorn {The Perfect Holiday Snack}!


I know what you're thinking...did she really post popcorn on her blog? Well, yes. Yes, I sure did, and let me tell you something, and I'll say it in bold so you don't miss it. DO NOT SLEEP ON THIS POPCORN! 

This popcorn is rated 5 stars of the Food Network and for good reason! It is simply coated in flavor: cheesy and buttery with a slight kick of chile. It is simply addictive and just plain impossible to stop eating. We inhaled it!

Right now we are in the thick of the holiday season and everyone is dithering about and shelling out money in a herculean effort to beat the clock and be ready for the big day. This popcorn takes all of 5 minutes to make and only cost a few dollars, if that, so I've declared it THE PERFECT HOLIDAY SNACK!

What are you waiting for? Get poppin'!


Parmesan & Chipotle Popcorn

Adapted from Food Network

by Ina Garten

Serves 3-4

1 bag microwave popcorn, such as Newman's Own Natural 

4 tablespoons (1/2 stick) butter, melted

1/2 cup finely grated Italian Parmesan cheese

1/2 teaspoon chipotle chile powder

2 teaspoons fleur de sel

Microwave the popcorn for 3 to 5 minutes, according to the directions on the package, until the popcorn stops popping. Carefully pour the hot popcorn into a large bowl and immediately pour on the butter, then the Parmesan, chile powder, and salt. Toss well and serve hot.

Tree Trimming Party @ IHCC


Sunday, April 25, 2021

Hard-Boiled Eggs, Two Ways


Stirring the Pot is undergoing a major lifestyle change in the food department. Years ago, I would call it a diet, but I've decided that I'm not going to let that word be a part of my vocabulary any longer. This is a much needed lifestyle change. Gone are the days of dieting, losing the weight, and then returning to unhealthy habits and slowly gaining the weight back. 

There is no end to the diet here. It is going to have to be full circle, a complete overhaul. Sure, there might be occasional treats and indulgences, but then it's gonna have to be right back to it. I am just done with the struggle. Beyond done.

So, I picked up Giada's newest cookbook: Eat Better, Feel Better and I'll definitely be cooking from it for the next little while. I'll also be working on a cookbook review soon.

There are certainly more interesting recipes in the cookbook than the one I'm starting with, but Hard-Boiled Eggs, Two Ways was what I felt like starting with, so here it is. 

I love a good hard-boiled egg. I use the method that became popular years ago where you add the eggs to a saucepan, cover with water, bring to a boil, turn off the heat, cover with a lid and leave on the hot burner for 10 minutes. It works like a charm.

I love to eat hard-boiled eggs plain with salt. I also like them with a dash of hot sauce and/or dipped in regular salsa. Giada's version stands out to me because she has them plated up with two different toppings and they look like a very tasty and appealing appetizer! I mean, to my knowledge everyone loves hard-boiled eggs, but who knew they could be so fancy?

The avocado mash is simple. A little avocado, a squeeze of lemon juice, a dash of curry powder and a sprinkle of salt. Delicious! The avocado version is somewhat fatty and unctuous and feels really indulgent. The olive spread is equally delicious but has the opposite feel of the avocado version. Instead the olive version feels really fresh, thanks to the salty brine of the olives and herby flavor from the basil. 

I found both options equally appealing and somewhat addictive! I also love the constrast in colorson the plate. This dish has forced me to rethink serving hard-boiled eggs as appetizers with different toppings. I can already see myself making the avocado version with cumin in place of curry powder. I have so many different ideas for various spices and herbs!

I love how Giada found a way to make the good ol' hard-boiled egg somewhat fancy. I feel like you could put out a platter like this and it would be something everyone would gravitate to.


Hard-Boiled Eggs, Two Ways

Adapted from Eat Better, Feel Better

by Giada De Laurentiis

Serves 4-6

8 large eggs

For The Avocado Mash

1 rip avocado

1/2 teaspoon curry powder

1/2 teaspoon fresh lemon juice

1/3 teaspoon salt

For The Olive Spread

1/2 cup mixed pitted olives

2 tablespoons chopped fresh basil

1/2 teaspoon grated orange

2 teaspoons olive oil 

Place the eggs in a small saucepan and cover with water. Bring to a boil over medium-high heat. Remove from the heat and set aside, covered, for 10 minutes. Drain the eggs and drop them in a bowl of ice water.

While the eggs cool, make a topping. For the avocado mash, combine the avocado, curry powder, lemon juice, and salt in a medium bowl. Mash with the back of a fork until smooth.

To make the olive spread, combine the olives, basil, orange zest, and olive oil in a food processor. Pulse just until finely chopped; you don't want to make a puree.

Carefully peel and halve the eggs. Serve the eggs with one or both of the condiments.


Rainy Day Eats @ IHCC

Sunday, March 7, 2021

Ottolenghi's Balilah {The Perfect Healthy Snack}

Ottolenghi writes, "In Jerusalem, Balilah is a popular Palestinian street food consisting of fresh chickpeas seasoned with cumin and lemon juice and it makes the most gratifying snack." He also states, "On the corner of the souk in the Old City stood the very popular balilah man. He had large piles of freshly cooked chickpeas on his stall, steaming and beautifully decorated with parsley and lemon. Like a magician, he used to whip the balilah into a newspaper cone in a flash and serve it to the eager customer."

I don't know about you, but I am a bean lover and that sounds heavenly. I have wanted to make this recipe forever and I am so glad I have finally got around to it! It is the perfect snack!

This balilah is so quick and easy to whip together, especially with canned chickpeas. Simply drain the beans, add chopped parsley, sliced green onions, chopped lemon, olive oil, cumin, salt and pepper. Give it all a mix and you are good to go. Of course, I feel this is better even the next day when the flavors have had a chance to meld together. You can even add chopped tomato or cucumber, or even feta cheese. You can eat this as a snack on its own, or served in pita or with pita chips. You can eat it warm, room temp, or cold straight from the fridge. It is also great served over chicken or fish or thrown into a salad. It is so versatile and delicious and it certainly won't last long!


Balilah

Adapted from Jerusalem

by Yotam Ottolenghi & Sami Tamimi

Serves 4, or more

1 cup dried or 2 (15oz.) cans  chickpeas

1 teaspoon baking soda, if using dried beans

1 cup chopped parsley

2 green onions, thinly sliced

1 large lemon

3 tablespoons olive oil

2-1/2 teaspoon ground cumin

salt and freshly ground black pepper

If Using Dried Beans: The night before, put the chickpeas in a large bowl and cover with cold water at least twice their volume. Add the baking soda and leave at room temp to soak overnight. Drain the chickpeas and place them in a large saucepan. Cover with plenty of cold water and place over high heat. Bring to a boil, skim the surface of the water, then decrease the heat and simmer for1 to 1-1/2 hours, until the chickpeas are very soft but still retain their shape. 

If Using Canned Beans: Use two 15.5 oz. cans! Drain the chickpeas and place in a large bowl.

To Make The Balilah: Put the parsley and green onions in a large mixing bowl. Peel the lemon by topping and tailing it, placing on a board, and running a small sharp knife along its curves to remove the skin and white pith. Discard the skin, pith, and seeds and coarsely chop the flesh. Add the flesh and all of the juies to the bowl.

Once the chickpeas are ready, drain and add them to the bowl while they are still hot (If you are using canned beans you can heat them up if you like). Add the olive oil, cumin, 3/4 teaspoons salt, and a good grind of pepper. Mix well. Allow to cool down until just warm, taste for seasoning, and serve.


Sunday, October 4, 2020

Hassan's Easy Eggs with Za'atar and Lemon {Cooking from Falastin!}

I preordered Sami Tamimi's Falastin so that I could get my hands on a copy as soon as possible.The hype was that it was going to be one of the hottest cookbook releases of the year. I can tell you now, that it is by far my favorite cookbook of the year! Sami's Falastin is one of the most beautiful cookbooks. It is full of Palestinian food, people, geography, history, language, land, identity, and culture. I found myself reading more like a novel than a cookbook.

Sami Tamimi's recipes have the Ottolenghi feel to them, but they also have a simplicity and ease that Ottolenghi's recipes do not. I found myself more taken with Sami's book than Ottolenghi's, which is heavy praise in itself. I quickly bookmarked over 50 recipes and found myself wanting to make everything from Hummus with Meatballs to Chicken Shawarma Pie to Sumac Onion and Herb Oil Buns. So many simply yet unique recipes that felt exciting and fun.

You will be seeing more of these recipes as we begin cooking with Sami and his new cookbook over at I Heart Cooking Clubs. For starters, I had to make the recipe that called to me first and that was these eggs, Hassan's Easy Eggs with Za'atar and Lemon.

 "These eggs will always remind Sami of his father, Hassan, who used to make them on the weekend for Sami and his siblings. It's proof,if ever proof were needed, that few things are not improved by the addition of some good-quality olive oil, a squeeze of lemon, and a sprinkle of za'atar."

 There is something about a plate of broken hard-boiled eggs with their sunny yellow yolks front and center. It's a welcome sight. It calls to me. Top the eggs off with a lemon juice, olive oil and za'atar mixture, some sliced green onions and hot pepper flakes and you have one delicious and welcoming platter. Simple, delicious, with a unique twist. These eggs feel both comforting and somewhat exotic.

Eat them on their own or put them inside of pita bread. Sami also says they pair well with cubed chunks of creamy avocado (I need to try that). 

This is a recipe that you can eat warm or cold. You can eat it for breakfast or lunch. You can serve it as an appetizer or a midday snack. Either way it is delicious and you can't go wrong!


Hassan's Easy Eggs with Za'atar and Lemon

Adapted from Falastin

by Sami Tamimi

Serves four

6 eggs

1-1/2 tablespoons lemon juice

3 tablespoons oliveoil

1 tablespoon za'atar

salt and black pepper

2 green onions, finely sliced

1/8 teaspoon Aleppo chile flakes

Bring a medium saucepan of water to a boil and carefully lower in the eggs. Boil for 5-6 minutes, then rinse at once under plenty of cold running water.

Meanwhile, whisk together the lemon juice, olive oil and za'atar and set aside.

Peel and roughly quarter the eggs, by hand so that they're not too neat, and arrange on a serving plate, yolk side up. Sprinkle with 1/4 teaspoon of salt and a generous grind of black pepper and drizzle the lemon juice-olive oil mix over the top. Sprinkle with the green onions and chile flakes and serve at once.


Sunday, May 17, 2020

Mark Bittman's Fruit and Cereal Bars


One of my projects during quarantine has been clearing out my pantry. Trust me when I say my pantry needs A LOT of clearing out. So far I've managed to organize the food into sections, but my cereal and breakfast section was threatening a takeover. Why do I buy granola and dried fruit like it's the only thing I eat? Can someone answer me this question? I've been doing this for years and I've never seemed to learn that a person can only eat so much granola.

Thankfully I found a recipe for Mark Bittman's Fruit and Cereal Bars. I've made my fair share of homemade granola bars and they've all been ok. I suppose that's what I was expecting with these bars. Only they completely blew my mind. These dang bars are INCREDIBLE! I'd even go as far as to say THESE ARE THE BEST GRANOLA BARS EVER, homemade or in the store. I'm dead serious.

So I don't know if it was the granola I used, or the combination of fruit, or the ratio of the recipe, or what, but I'm for real when I tell you that YOU NEED TO MAKE THESE BARS!


I followed Bittman's recipe, using a lovely granola called Grandyoats Classic Granola(worth sourcing/not sponsored), full of really fresh and healthy organic non-GMO ingredients such as oats, honey, sunflower seeds, pumpkins seeds, coconut, walnuts, cashews, wheat bran, and vanilla. It was fabulous and so fresh. Then I paired that with the required 1-1/2 cups dried fruit, mainly about 1 cup of dates, 3 or 4 dried apricots and 1/2 cup dried cherries. I think this was a magical combination of dried fruits so I'd do the same ratio again.

This is so simple and perfect for the summertime because this is a NO BAKE recipe. Simply blend up the fruit with the oil and honey and a little sea salt. Make sure it forms a very moist paste and mix it into the granola, pushing and packing it into the pan and refrigerate for about a half-hour.


THIS IS ME SCREAMING FROM A MOUNTAINTOP....PLEASE MAKE THESE BARS! Assuming that you use quality granola, as well as this combination of dried fruits, these are simply the best of the best. I ate two and a half in one sitting and had to stop myself from eating more. I could see myself making these every single week for a light breakfast and/or snack. They also make a really healthy dessert. I'm not kidding. They're so good they could pass for a dessert. 

Ok, I've held out long enough. Back to the kitchen for another one.
 

Fruit and Cereal Bars

Adapted from The Food Matters Cookbook
by Mark Bittman
Makes 10-12 bars

1-1/2 cups dried fruit*
2 tablespoons coconut oil
2 tablespoons honey
fruit juice or water, as needed
a sprinkling of sea salt
1 cup ready-to-eat breakfast cereal, like granola
Optional: coconut, nuts, cocoa, etc, for sprinkling on top

Notes:  I used the most wonderful new granola called Grandyoats classic granola. The granola was full of oats, seeds, and nuts and was probably the very best granola I've ever had - very fresh. I think the granola really made the difference in these bars. You can probably use any dried fruit, but I love dates so I used 1 cup of dates, about 3 dried apricots, and 1/2 cup dried cherries (also my favorite). This turned out to be a magical combination because these bars were incredible! Also, the sprinkling of sea salt helps to bring out all the flavors, so I feel like you really don't want to skip it!

Put the dried fruit, oil, and honey into a food processor or a blender and puree until smooth, adding fruit juice and/or water a little at a time to keep the machine running. You'll need to stop once or twice to scrape down the sides of the bowl. (Add small amounts of water or fruit juice if the fruit is dried out and is not processing.).Put the puree into a large bowl and fold the cereal into it. You may want to use your hands at first and then use a spatula.

Line an 8- or 9- inch square or round pan with foil. Spread the mixture into the pan, pushing it into the corners and evening the top. If you like, dust the top with coconut, nuts, or cocoa. Refrigerate until set, then cut into bars.


Sunday, April 5, 2020

Ruth Reichl's Blueberriest Blueberry Muffins with Streusel


I have avoided mentioning the state of the world for the past several weeks because I just can't find the words. In the beginning, I stared at the wall marveling at how surreal this all is. It was all I was capable of. Nowadays, I've concluded that I simply cannot watch the news. It's not good for my mental health. So I get up and try to be productive.

My focus is almost completely gone. I can't focus enough to watch a show or read a book. My hands are raw from cleaning (I tend to clean when I get stressed). Some days I don't feel like cooking. Some days I do. Then I worry that there are no groceries in the stores and there hasn't been for days. Should I be trying to really stretch every single ingredient I have in my house?

Trust me, I'm stocked up. We have plenty for now, but I worry. I don't want to go to the stores. It seems like there's nothing there anyway and I don't want to catch the virus. So I stay home and take stock and order food online. I've become a full-time quartermaster, doing inventory and staggering deliveries.

One thing I'm thankful for is my weekly Misfits Market box. I've mentioned it before, but I will mention it again because Misfits delivers organic fruits and veggies to your door each and every week. After your first week, you can choose from a list of things and even add some add-ons to your order. They are keeping me stocked with the most delicious organic fruits and veggies regularly! Yes, occasionally something is misshapen or has a mark, but I'm fine with that on a regular day, so I'm definitely fine with that in these uncertain times. I urge you all to find a similar source for fresh produce. Unfortunately, I think things will be like this for a while.

This week I was able to add on two packs of the most beautiful organic blueberries. They arrived in perfect condition. Not one single blueberry was bad. I debated at length on what to make with them. Did I want to make blueberry syrup for pancakes, which would really make my blueberries stretch OR did I want to make some blueberry muffins like my mom used to make all the time?

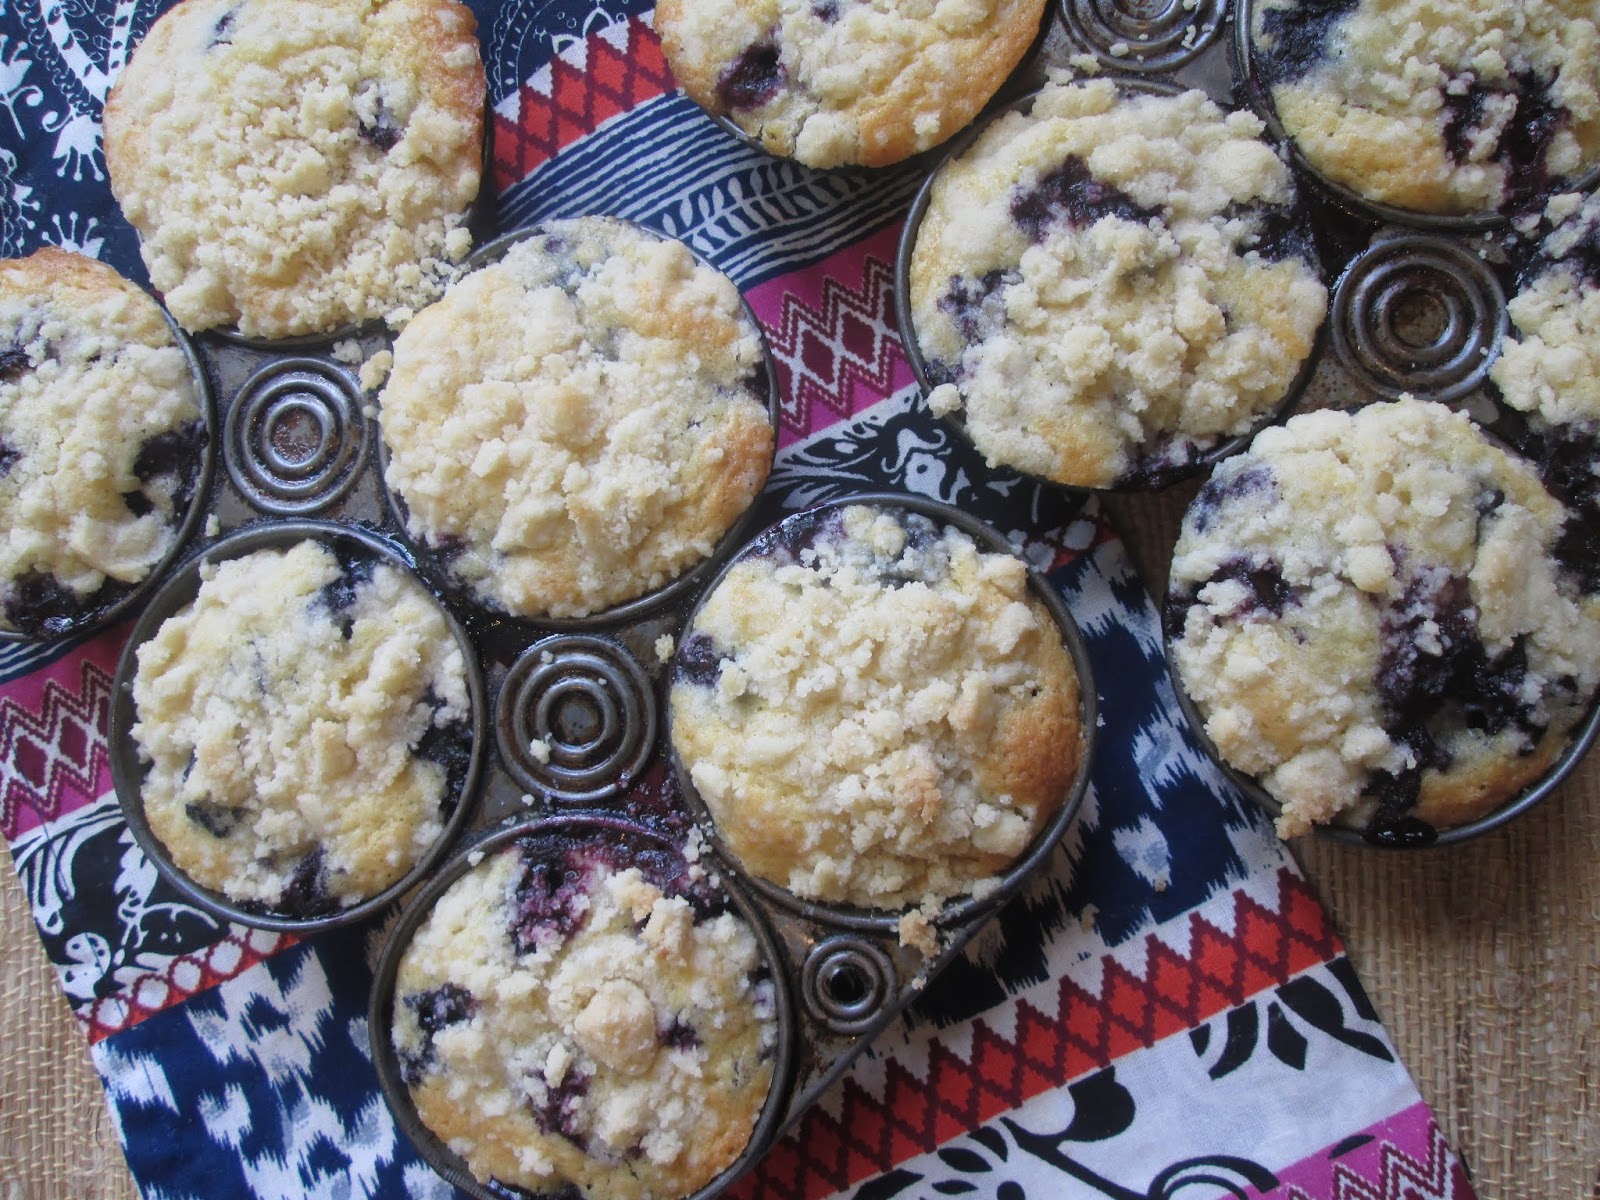
Since I've been thinking about my mom a lot lately I opted for Ruth Reichl's Blueberry Muffins with Streusel and I'm so glad I did!

With two full cartons of blueberries, these muffins are definitely blueberry forward...AND I LOVE THAT! The batter is light and tender and so is the streusel topping, which allows the blueberry to be the shining star. These are the blueberriest blueberry muffins I've ever had and I think it may very well be my all-time favorite blueberry muffin recipe!

I added a little vanilla glaze to the tops, simply because I had some on hand, but these are absolutely perfect either way. I know, without a doubt, my mom would love them. I take a bite and think of her. I know she would be in disbelief at the world around us, as I am. I know she would feel the uncertainty. I know she would tell me to put on a smile and do what I can to help, so I mail cards to my students to tell them how much I miss them. I set candy on their porch early in the morning. We organize a teacher parade around our school neighborhood and I paint messages for the kids on my car. I give pep talks. I say prayers. I cook and I bake. I feel the overwhelming sense of grief in the pit of my stomach. We do what we can and we keep going.

I hope you and your loved ones are well. Please take care.


Blueberry Muffins
Adapted from The Gourmet Cookbook
by Ruth Reichl
Makes 12 muffins

For Batter
6 tablespoons butter
1/3 cup whole milk
1 large egg
1 large egg yolk
3/4 teaspoons vanilla extract
1-1/2 cups all-purpose flour
3/4 cup sugar
1-1/2 teaspoons baking powder
3/4 teaspoon salt
2 cups (12 ounces) blueberries

For Topping
3 tablespoons cold butter, cut into 1/2-inch cubes
1/2 cup all-purpose flour
3-1/2 tablespoons sugar

Make the batter: Put a rack in upper third of oven and preheat to 375F. Generously butter muffin cups.  Melt butter in a small saucepan over moderately low heat; remove from heat. Whisk in milk, egg, yolk, and vanilla until well combined.

Whisk together flour, sugar, baking powder, and salt in a medium bowl. Add milk mixture and stir until just combined. Gently but thoroughly fold in blueberries. Divide batter among muffin cups and spread evenly. 

Make the topping and bake: Combine all topping ingredients in a bowl and rub together with your fingertips until crumbly. Sprinkle evenly over batter in cups.  Bake until golden and crisp and a wooden pick or skewer inserted into center of muffin comes out clean, 18 to 20 minutes. Cool in pan on a rack for 15 minutes, then run a knife around edges of muffin tops and carefully remove from cups. Serve warm or at room temperature.


Sunday, March 4, 2018

Chips, Chips, and More Chips {Apple, Kale, and Sweet Potato...oh my!}


Let there be chips of all colors! Red, Orange, and Green! Veggie chips and fruit chips. Chips for days.

I was feeling snacky, and healthy, and couldn't decide between Giada's Baked Kale and Sweet Potato Chips or her Spiced Apple Chips with Sweet Yogurt Dip, so I made both! In the process, I made friends with my mandoline, and my oven, because I spent the better part of the afternoon slicing apples and sweet potatoes into thin slices. Then I spent even more time standing guard over my thinly sliced beauties while they crisped up in the oven. It was somewhat of an endeavor, but a tasty one!

Giada's Baked Kale and Sweet Potato Chips are seasoned with a small amount of olive oil, salt, and pepper for a very simple preparation. I thought they made for a very colorful and unique snack and enjoyed both chips, but I definitely preferred the kale chips to the sweet potato chips. I love the kale's light airy texture and find them quite addictive! Both chips really satisfied that salty crunchy craving.


 Baked Kale and Sweet Potato Chips
Adapted from Giada's Feel Good Food
by Giada De Laurentiis
Serves 4

1 medium sweet potato (8 ounces)
1 tablespoon extra-virgin olive oil
salt and pepper, to taste
3 large kale leaves

Position an oven rack in the center of the oven and preheat the oven to 350F.

Using a mandoline slicer or a sharp knife, slice the potato into 1/8-inch-thick slices. Put in a bowl and drizzle with 1/2 tablespoon of olive oil. Toss well. Arrange in a single layer (without overlapping) on parchment-lined baking sheets.

Bake for 12 minutes. Turn the slices over and continue to bake, checking every 2 minutes, until brown and crisp, 6 to 8 minutes longer. Season the chips with salt and pepper, to taste.

Remove the thick stem from the kale leaves and discard. Cut the leaves into 2- to 3-inch pieces. Put in a bowl and drizzle with the remaining 1 tablespoon olive oil. Toss well. Arrange the kale in a single layer on parchment-lined baking sheets.

Bake the kale until crisp and slightly dark on the edges, 10 to 12 minutes. Season with salt and pepper, to taste. Let the chips cool before serving. 
 

The Spiced Apple Chips with Sweet Yogurt Dip were a fun sweet treat! The apple chips were paper thin and had a very light and delicate "melt in your mouth" texture. I wasn't sure if  I would like the chips dipped into the yogurt dip, but I have to say that I enjoyed the sweet creamy yogurt with the thin crispy apple chips and found it to be a very delightful combination. It really satisfied my sweet tooth!

Making homemade chips was a somewhat lengthy process, but it was a fun one. The best part was I didn't have to feel guilty about snacking along the way! While I enjoyed all the chips, I will say the kale chips were my ultimate favorite. I can see myself making a lot of kale chips in the future. I'm already toying with the idea of making a garlic and parmesan flavored kale chip in the very soon! Yum!

Please note: Cooking and cooling times will depend on your oven and the thickness of your chips.  You will need to check your chips every so often to make sure they are not overcooking.


Spiced Apples Chips w/ Sweet Yogurt Dip
Adapted from Food Network
by Giada De Laurentiis
Serves 4

Apple Chips
1 red apple, such as Honeycrisp
1 green apple, such as Granny Smith
Vegetable cooking spray
1/4 cup sugar
 1 teaspoon ground cinnamon
1/4 teaspoon salt

Sweet Yogurt Dip
1/2 cup Greek yogurt
1 tablespoon honey or maple syrup
1/4 teaspoon vanilla extract
pinch of salt

For the chips: Place 1 rack at the top and 1 at the bottom position and preheat the oven to 275F. Line 2 large heavy baking sheets with parchment paper. Lightly coat the parchment with nonstick spray.

For the topping: In a small bowl, stir the sugar, cinnamon, and salt until blended.

For the apple chips: Stand each apple upright. Cut 1/4 inch vertically off the right and left sides of each apple (this creates a steady surface for slicing on the mandoline and makes things much safer). Set the mandoline or v-slicer for cutting 1/16-inch-thick slices (should be paper thin and transparent). Cut slices until the apple core is exposed. Turn the apple over and cut slices off the remaining apple until the core is exposed. Arrange the apple slices in a single layer on one of the baking sheets. Repeat with the second apple. (If you're like me then all of your slices will not fit onto the baking pans. Make another batch or select only your nicest slices and eat the rest).

Using your fingertips, sprinkle the apple slices generously with the topping (I sprinkled generously but only used half the topping).  Bake until the edges curl and the chips are golden and feel crisp, 40 to 45 minutes. Pull the parchment with the apples onto the work surface and cool completely, 20 to 30 minutes (the chips will crisp more as they cool). NOTE: My chips cooked and cooled in half the time

For the dip: In a medium bowl, stir the yogurt, honey/syrup, vanilla, and salt until blended. Cover and chill until ready to serve. Serve the dip alongside the apple chips.


Sunday, November 26, 2017

Parmesan & Chipotle Popcorn


We never have a traditional Thanksgiving dinner with all the fixings. No one cares for a big roast turkey, and to seal the deal, my youngest is allergic. In years past we've had roast chicken, rib roasts, spaghetti, and even tacos. This year we opted for ham which is not only the easiest, but something everyone is crazy about, and for that I am thankful. Amen for an easy and peaceful Thanksgiving that everyone enjoyed.

Thankfully, Thanksgiving weekend is long enough to squeeze in all sorts of things: eating, shopping, resting, watching parades, Netflix, and spending lots of time with family. Now that our kids are older we love to have game night. It's a great way to have some good old fashioned fun together and it forces everyone to put their electronics away. 

On Black Friday I found the retro (1986 version) of Clue and snatched it right up. I can't even tell you how many times I played that game back in the 80's. I knew my kids (who are obsessed with the 80's thanks to Stranger Things) would love this throwback game.

Now that I had the game it was time for snacks. Ina's Parmesan & Chipotle Popcorn has been calling to me. Easy, cheesy, and spicy. I knew I couldn't go wrong. We set the table with the game, Ina's popcorn, and some buttered popcorn for the kiddos, and we were all set. It was definitely a table to be thankful for.

I loved the combination of Parmesan cheese and chile powder and thought it was perfectly balanced. My husband thought there was a bit too much cheese on the popcorn, but we all know there is no such thing as too much cheese, so he loses his vote. I will say there is probably too much butter. How do I know there was too much butter? Well, my popcorn became a little soggy in places so I think I would suggest using half as much butter next time around. Adding two tablespoons of butter in lieu of four would probably suffice. If not, you can always add a touch more. This is the perfect solution for an otherwise lip smacking and darn right addictive cheesy delight of a snack. I'd definitely make this again!


Parmesan & Chipotle Popcorn
Adapted from Cooking For Jeffrey
by Ina Garten
Serves 3 to 4

1 bag microwave popcorn, such as Newman's Own Natural
4 tablespoons butter, melted*
1/2 cup finely grated Italian Parmesan cheese
1/2 teaspoon chipotle chile powder
2 teaspoons salt 

Note: Four tablespoons of butter may be a bit too much. I'd try half (2 tablespoons) at first and then add more if necessary. I didn't have chipotle chile powder so I used regular chile powder with great results.

Microwave thepopcorn for 3 to 5 minutes, according to the directions on the package, until the popcorn stops popping. Carefully pour the hot popcorn into a large bowl and immediately pour on the butter, then the Parmesan, chile powder, and salt. Toss well and serve hot.


Sunday, October 9, 2016

Heidi Swanson's Popcorn {with Mustard, Thyme, Chives & Browned Butter}


When Heidi Swanson won the vote as our next IHCC chef I had visions of quinoa patties running through my head. Without a doubt, the very first recipe I was going to share would be her Quinoa Patties, with a southwest twist. I had visions of those golden brown patties artfully arranged on a plate with some salsa and slices of ripe avocado. I bought all the ingredients.

Hours later, I was sitting on the back porch with the dog, enjoying the cool breeze, and realized it was the most glorious fall day. No way was I going to spend that gorgeous day inside making quinoa patties. Quick glance through Heidi's Super Natural Every Day and I nearly squealed with delight when I found this perfectly easy, and quick, recipe for Popcorn with Mustard, Thyme, Chives & Browned Butter.

Score! Mustard is one of my favorite ingredients so my interest was piqued. Bonus, I was also able to clean out my pantry a bit by using the last of my popcorn kernels and the last of my fresh herbs. I love it when a plan comes together like that!

So, here it is. A delicious popcorn recipe to share with your loved ones. Perfect to eat on the sofa while you're binge watching episodes of your favorite show. Browned butter is always a welcome addition with it's warm nutty flavor. The two tablespoons of Dijon mustard was just the right amount, leaving behind a subtle flavor of Dijon. To me, the star was the addition of the chives. I found myself searching for the bits that were heavy on the chives. Those bites were quite simply my favorite! A definite make again recipe!


Popcorn with Mustard, Thyme, Chives & Browned Butter
by Heidi Swanson
Serves 4 to 6

4 tablespoons butter or extra virgin olive oil
3/4 cup popcorn kernels
1/3 cup butter
2 tablespoons Dijon-style mustard
sea salt, to taste
1 bunch fresh chives, minced
1 teaspoon fresh thyme

Heat the butter in a deep, heavy saucepan over medium heat. Add a few popcorn kernels to the pan and cover. Once they pop, add the remaining kernels and shake the pot until they cover the bottom of the pan evenly. Place the lid on the pan, leaving just a sliver of a crack, and shake intermittently while the popcorn pops, until there is a 5-second pause between pops. Remove the popcorn from heat and transfer all the popped corn to a large bowl, leaving any unpopped kernels behind.

In the meantime, melt the butter over medium heat and let it sizzle away until it has browned a bit and is fragrant. Whisk in the mustard and salt.

Pour one-third of the mustard butter over the popcorn and toss well, about 1 minute. Taste, and decide if you'd like more of the mustard butter, and add more if desired. (Note: I used all the mustard butter). Sprinkle with the chives and thyme and toss one last time. Serve in a large bowl for all to share.


Sunday, April 5, 2015

My Top Five Diana Henry Recipes

Over at I Heart Cooking Clubs we've been cooking the recipes of Diana Henry for the past six months. Usually I have a tendency to chose main dish recipes, but this time around I mixed it up and cooked quite a selection. I made breakfast, lunch, and dinner. I made vegetarian dishes as well as meat-based dishes. I cooked some of her healthy recipes but also managed a few indulgent dishes. I even made a dessert! Everything I made was tasty, but these were my top five!

Click on recipe name to be redirected to original post

Of all the Diana Henry recipes I tried, this Kale Pesto with Pasta was my personal favorite. I'm rather biased since I happen to love kale, but I will say that everyone in my house thought this was delicious! Hearty, flavorful, robust and satisfying...I've made it a few times already.


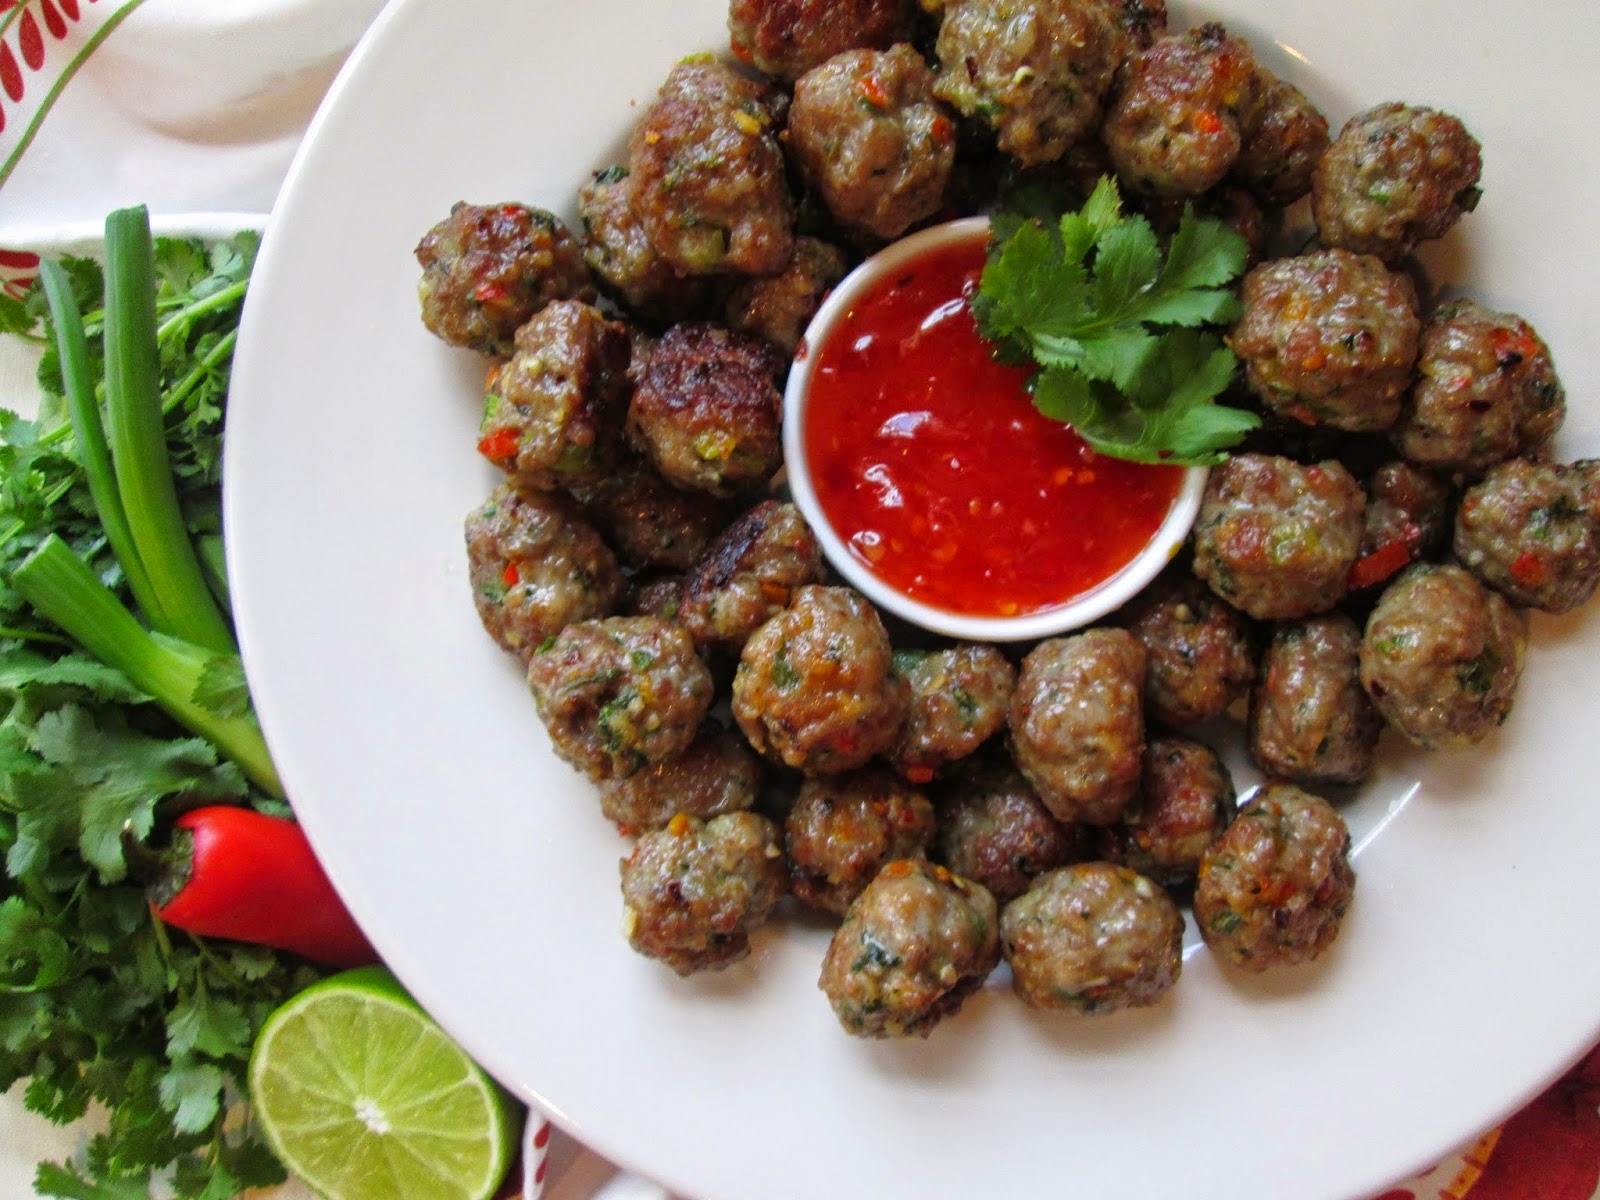
If I were to pick an overall family favorite, it would be these Asian Pork Balls with Chili Dipping Sauce. They were pretty much exploding with flavor and incredibly fun to eat. They disappeared in record time.


Of course, it's hard to beat a good ol' indulgent bowl of creamy pasta and this Spaghetti with Bacon, Egg, and Cheese is just that. This dish is a mix between Fettuccine Alfredo and Spaghetti Carbonara and is perfect comfort food. My teenage daughter loved it!


Broccoli is pretty much our favorite veggie, hands down.  My entire family enjoyed this refreshing Broccoli with Ricotta, Lemon, and Parmesan. If you're looking for a fun new way to serve your broccoli give this a try!

Lastly, I love all things maple. This maple baked granola is perfect as a snack, served with milk, or sprinkled over yogurt. Doesn't really matter what type of fruit or nuts you mix into it. Just pour the maple syrup on your choice of ingredients and bake.
Theme: Farewell Diana Henry!
For the next six months we will be cooking the recipes of the one and only Jacques Pepin! It's going to be a wonderful adventure cooking up his recipes. If you would like to cook along, visit our site at I Heart Cooking Clubs, or click here to be directed to our Welcome page.