Sunday, April 25, 2021

Hard-Boiled Eggs, Two Ways


Stirring the Pot is undergoing a major lifestyle change in the food department. Years ago, I would call it a diet, but I've decided that I'm not going to let that word be a part of my vocabulary any longer. This is a much needed lifestyle change. Gone are the days of dieting, losing the weight, and then returning to unhealthy habits and slowly gaining the weight back. 

There is no end to the diet here. It is going to have to be full circle, a complete overhaul. Sure, there might be occasional treats and indulgences, but then it's gonna have to be right back to it. I am just done with the struggle. Beyond done.

So, I picked up Giada's newest cookbook: Eat Better, Feel Better and I'll definitely be cooking from it for the next little while. I'll also be working on a cookbook review soon.

There are certainly more interesting recipes in the cookbook than the one I'm starting with, but Hard-Boiled Eggs, Two Ways was what I felt like starting with, so here it is. 

I love a good hard-boiled egg. I use the method that became popular years ago where you add the eggs to a saucepan, cover with water, bring to a boil, turn off the heat, cover with a lid and leave on the hot burner for 10 minutes. It works like a charm.

I love to eat hard-boiled eggs plain with salt. I also like them with a dash of hot sauce and/or dipped in regular salsa. Giada's version stands out to me because she has them plated up with two different toppings and they look like a very tasty and appealing appetizer! I mean, to my knowledge everyone loves hard-boiled eggs, but who knew they could be so fancy?

The avocado mash is simple. A little avocado, a squeeze of lemon juice, a dash of curry powder and a sprinkle of salt. Delicious! The avocado version is somewhat fatty and unctuous and feels really indulgent. The olive spread is equally delicious but has the opposite feel of the avocado version. Instead the olive version feels really fresh, thanks to the salty brine of the olives and herby flavor from the basil. 

I found both options equally appealing and somewhat addictive! I also love the constrast in colorson the plate. This dish has forced me to rethink serving hard-boiled eggs as appetizers with different toppings. I can already see myself making the avocado version with cumin in place of curry powder. I have so many different ideas for various spices and herbs!

I love how Giada found a way to make the good ol' hard-boiled egg somewhat fancy. I feel like you could put out a platter like this and it would be something everyone would gravitate to.


Hard-Boiled Eggs, Two Ways

Adapted from Eat Better, Feel Better

by Giada De Laurentiis

Serves 4-6

8 large eggs

For The Avocado Mash

1 rip avocado

1/2 teaspoon curry powder

1/2 teaspoon fresh lemon juice

1/3 teaspoon salt

For The Olive Spread

1/2 cup mixed pitted olives

2 tablespoons chopped fresh basil

1/2 teaspoon grated orange

2 teaspoons olive oil 

Place the eggs in a small saucepan and cover with water. Bring to a boil over medium-high heat. Remove from the heat and set aside, covered, for 10 minutes. Drain the eggs and drop them in a bowl of ice water.

While the eggs cool, make a topping. For the avocado mash, combine the avocado, curry powder, lemon juice, and salt in a medium bowl. Mash with the back of a fork until smooth.

To make the olive spread, combine the olives, basil, orange zest, and olive oil in a food processor. Pulse just until finely chopped; you don't want to make a puree.

Carefully peel and halve the eggs. Serve the eggs with one or both of the condiments.


Rainy Day Eats @ IHCC

Sunday, April 18, 2021

Ravioli with Balsamic Brown Butter {Putting It On Repeat}


It was a little over five years ago when I first made this  Ravioli with Balsamic Brown Butter. I first selected the recipe because a) I had all the ingredients on hand, b) it calls for 5 ingredients, c) it is the epitome of easy and quick. I am drawn to recipes like that. 

When I tasted it, it became an instant favorite! I have made it on repeat ever since because it is delicious, easy, quick, and economical. It makes a fabulous weeknight meal. Leftovers, if there are any, reheat very well the next day.

All you need is 5 simple ingredients: ravioli (I like to use cheese ravioli); butter; balsamic vinegar, toasted walnuts, and Parmesan cheese. The recipe comes together in no time and it's so easy a grade school kid could make it.

Today, since I'm watching my waistline, I wanted to take a turn at lightening up the recipe. Instead of using 6 tablespoons of butter, I reduced it down to 4 tablespoons and it worked perfectly. I also cooked 25 ounces of ravioli instead of 18-20 ounces so I feel confident that if 4 tablespoons was enough butter for extra ravioli, it would certainly be enough for the 18-20 ounces called for in the recipe.

When it comes to this recipe, you simply CANNOT go wrong! I love it!

Ravioli with Balsamic Brown Butter

Adapted from Food Network

by Giada De Laurentiis

Serves 4

18-20 ounces store-bought ravioli (I use cheese)

6 tablespoons butter (I used 4 tbsp. today)

2 tablespoons balsamic vinegar

1/2 teaspoon salt

1/4 teaspoon freshly ground black pepper

1/3 cup toasted, chopped walnuts

1/4 cup grated Parmesan

Note: Be sure to use toasted walnuts. I toast mine at 350F for about 4 minutes.

Bring a large pot of salted water to a boil over high heat. Add the ravioli and cook to package directions (mine only needed a few short minutes). Drain ravioli onto a large serving platter.

Meanwhile, in a medium saucepan cook the butter over medium heat, stirring occasionally. When the foam subsides, and the butter begins to turn a golden brown, about 3 minutes, turn off the heat. Let cool for about 1 minute. Stir in the balsamic vinegar,salt and pepper.

Transfer the ravioli to the pan with the balsamic brown butter. Sprinkle walnuts and Parmesan over the top. Serve immediately.


Sunday, April 11, 2021

Ina Garten's Baked Cod with Garlic & Herb Ritz Crumbs


When you're landlocked in central Kentucky, it's a next to impossible to get quality fish and seafood. I have looked high and low for center cut fillets of cod that look worthy of Ina's Baked Cod with Garlic and Herb Ritz Crumbs.

Then one day I was ordering produce from Imperfect Foods (of which I'm a big fan) and I noticed that they carried wild-caught Alaskan cod fillets, so I ordered them. I had my hopes up, but they arrived quite thin and small. What's a girl to do?

I went ahead and made the fish anyway. I will tell you that this dish has the opportunity to be outstanding as far as fish dishes go, but you really need the center cut fillets with some thickness to stand up to all the Ritz crumb topping. My fillets were thin and while it was good, they didn't really stand up to topping. So, if you can get your hands on some quality fresh fish, then go for this recipe and do yourself a favor and roast the asparagus right in the pan with it. Asparagus love crumb topping and they pair most excellently with this fish!


Baked Cod with Garlic & Herb Ritz Crumbs

Adapted from Modern Comfort Food

by Ina Garten

Serves 4

good olive oil

4 center-cut bonesless, skinless cod fillets (6 to 8 ounces each)

salt and pepper

1/2 cup Ritz cracker crumbs (15 crackers)

1/3 cup panko

2 tablespoons fresh minced parsley

2 teaspoons minced garlic (2 cloves)

1 teaspoon grated lemon zest

3 tablespoons butter, melted

1/4 cup dry white wine, such as Pinot Grigio

2 tablespoons freshly squeezed lemon juice

lemon wedges, for serving

Preheat the oven to 400F. Pour 2 tablespoons olive oil in a 9x9 dish (or a cast iron skillet) and tilt the dish to coat the bottom with oil. Place the fish fillets in the dish and turn to coat both sides with the oil. Sprinkle the fish with 1-1/2 teaspoons salt and 1/2 teaspoon pepper and bake for 10 minutes.

Meanwhile, combine the cracker crumbs, panko, parsley, garlic, lemon zest, and 1 teaspoon salt in a small bowl. Add the melted butter and stir until evenly moistened. Set aside.

Remove the fish from the oven and pour the wine and lemon juice directly on the fillets. Pat the crumb mixture evenly onto the fillets, pressing gently to help them adhere. 

Return the pan to the oven for 12 minutes, until the fillets are just cooked through in the center, depending on the thickness of the fish. Sprinkle with salt and serve hot with the pan juices and lemon wedges. 


Sunday, April 4, 2021

Ina's Easy Peasy Pea and Parmesan Risotto {The Perfect Spring Side or Main}


I'm coming at you with another recipe for peas, because when it's spring...you cook with peas. This recipe is an easy one! In fact, it's so easy a grade school kid could do it.

Simply put chicken stock and Arborio rice into a dutch oven and bake it for around 45 minutes, then stir in Parmesan, more stock, some wine if you have it, peas, butter, then season to taste with salt and pepper and you're all done. Who knew risotto could be so easy? Leave it to Ina.

The rice doesn't have the al dente texture of risotto made on the stove, but it does pretty much melt in your mouth and it is oh so creamy and dreamy against the pop of the peas. Might I say that this would be a tasty main dish, but also pairs well with just about any meat and/or possibly fish to make for an easy peasy weeknight meal. I would definitely make this again! In fact, I can guarantee that I will be making it again, and soon!


 Easy Peasy Pea and Parmesan Risotto

Adapted from Barefoot Contessa

recipe by Ina Garten

Serves 4-6

1-1/2 cups Arborio rice

5 cups simmering chicken stock, preferably homemade, divided

1 cup freshly grated Parmesan cheese

1/2 cup dry white wine

3 tablespoons butter, diced

2 teaspoons salt

1 teaspoon freshly ground black pepper

1 cup frozen peas

Place the rice and 4 cups of the chicken stock in a Dutch oven, cover, and bake for 45 minutes, until most of the liquid is absorbed and the rice is al dente. Remove from the oven, add the remaining cup of chicken stock, the Parmesan, wine, butter, salt, and pepper, and stir vigorously for 2 to 3 minutes, until the rice is thick and creamy. Add the peas and stir until heated through. Serve hot!


Sunday, March 21, 2021

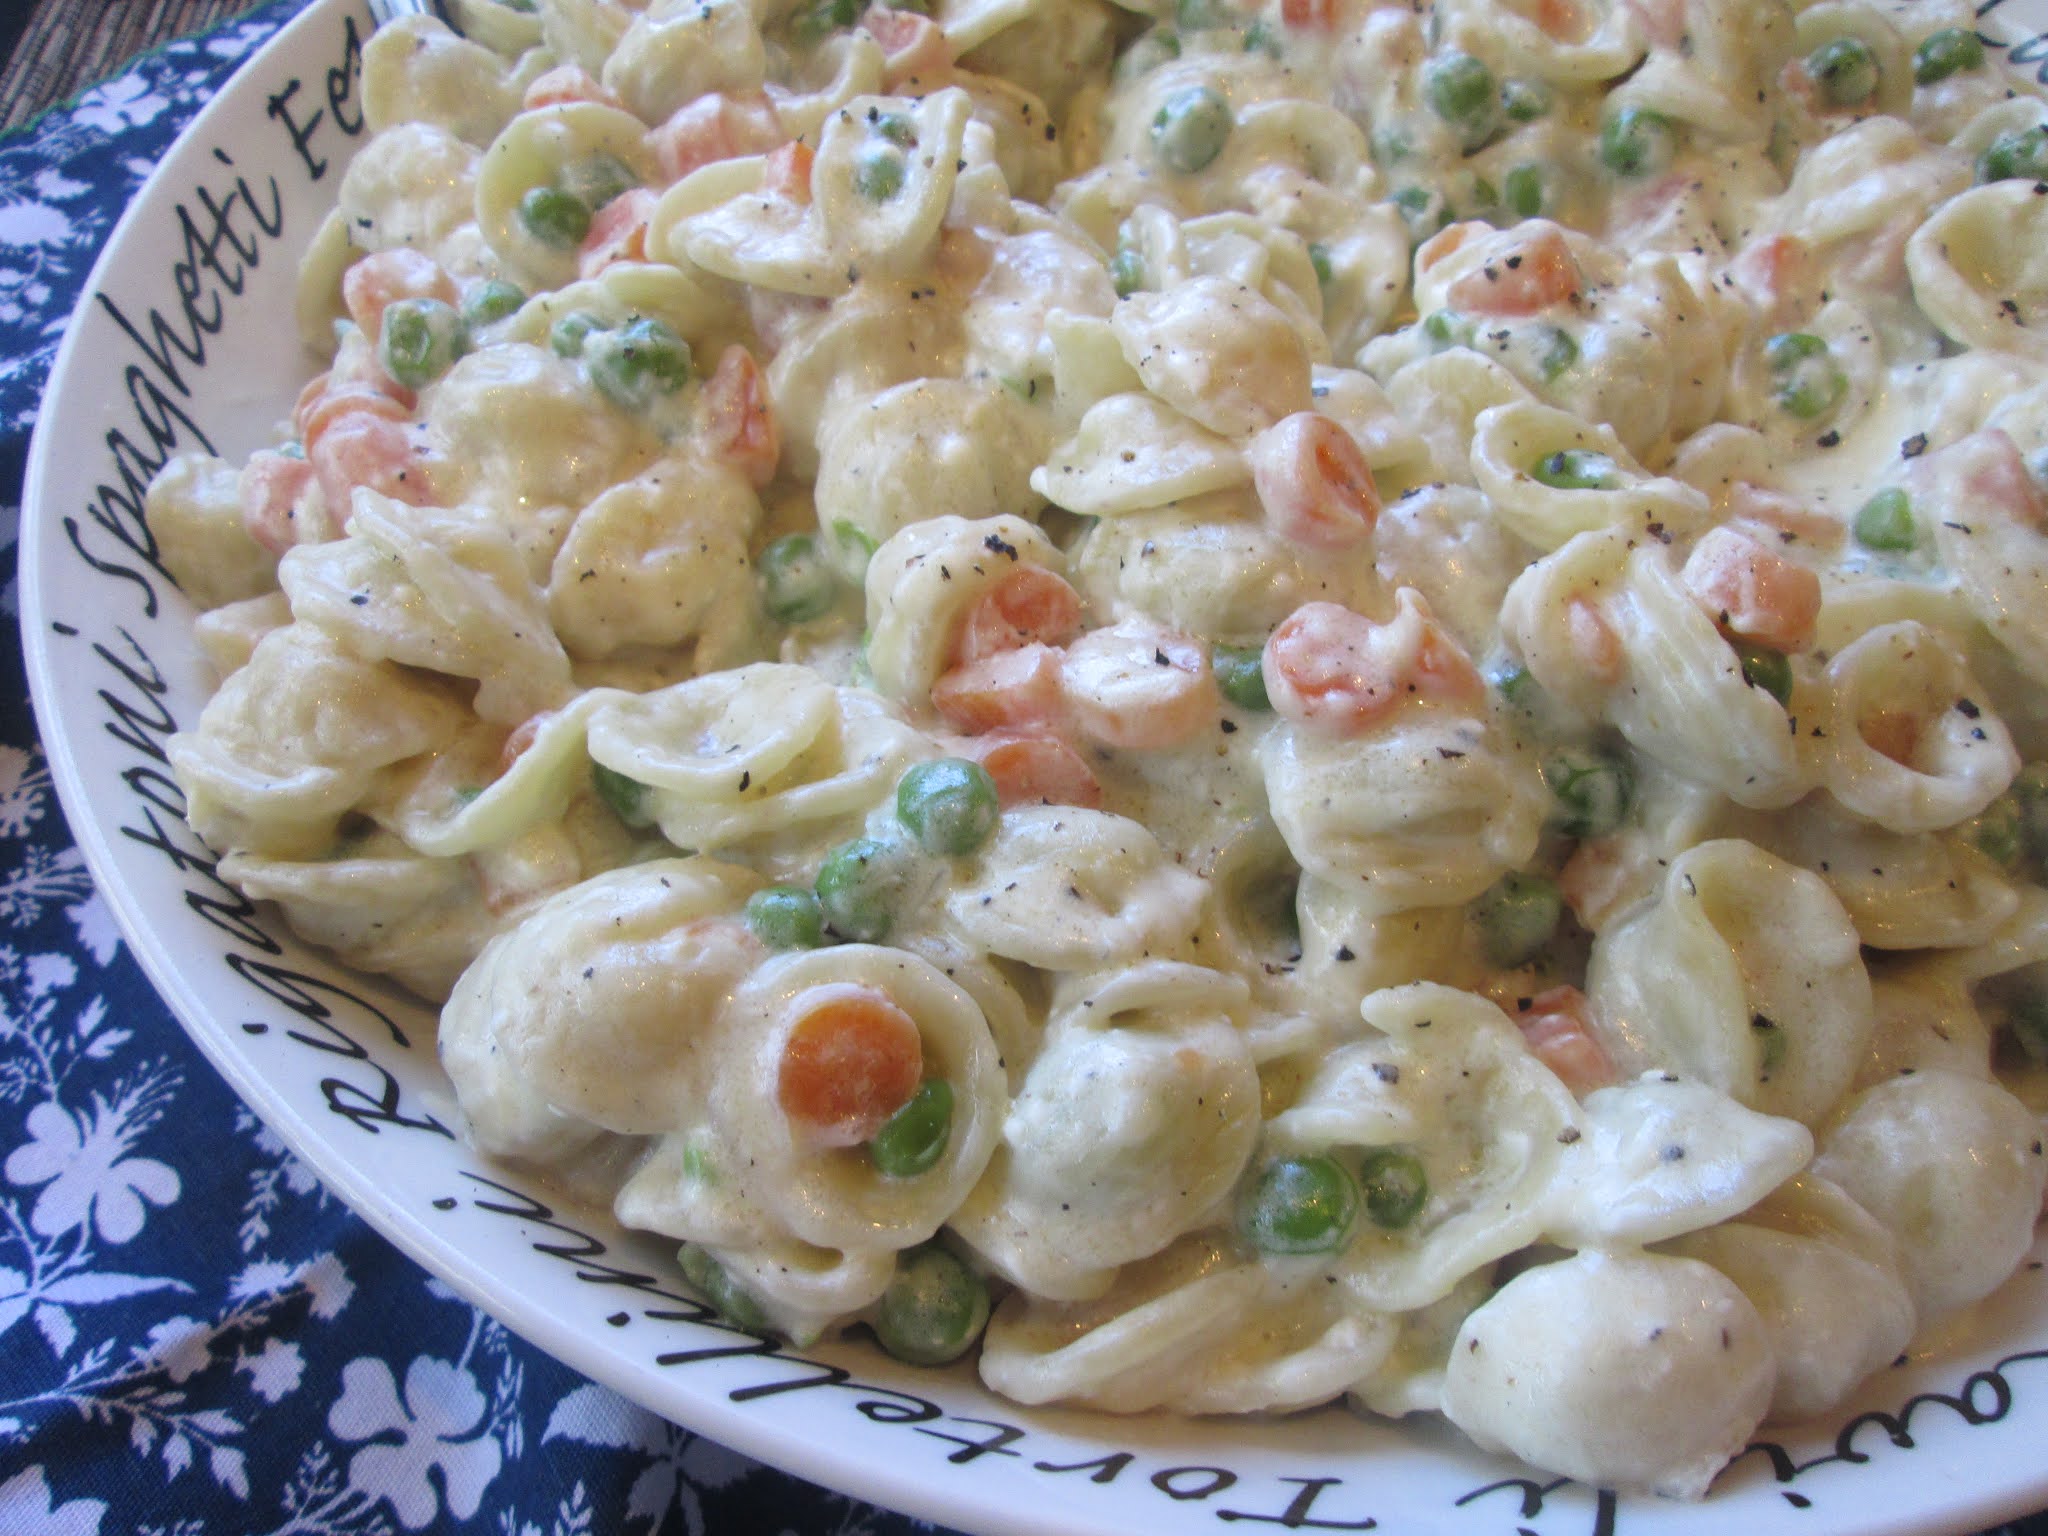
Giada's Pasta with Peas and Carrots {A Perfect Springtime Mac and Cheese}!

I had an absolute abundance of veggies on hand so I decided on a dish I've made a handful of times before, Giada's Pasta with Peas and Carrots. This is such a delicious dish and I think of it every spring because it is THE PERFECT springtime macaroni and cheese! If you are a macaroni and cheese fan and you love peas and carrots this is one recipe you simply MUST MAKE!

You need a pasta that is good for cupping peas and carrots, like orecchiette, shells, or farfalle. Any of those shapes will work, maybe even rigatoni. Then you need a bag an onion, a bag of frozen or fresh peas and lots of chopped up carrots. The cheeses of choice: cream cheese and Italian Mascarpone. You're well on your way to one delicious springtime meal.

I mean does it get anymore springtime than peas and carrots? This would also make a wonderful accompaniment to an Easter ham. Just saying.

If you love peas and carrots and are looking for another way to get them into your diet, try this recipe. highly recommend it! I've made it at least a handful of times and it's a hit each and every time! If you chose to use a veggie stock, you can make it vegetarian.


Pasta with Peas and Carrots

Recipe Adapted from Food Network

by Giada De Laurentiis

Serves 4-6

1 pound pasta (small shapes like farfallini or orecchiette)

2 tablespoons olive oil

1 small onion, finely diced

4 medium carrots, peeled and diced into 1/2" pieces

1 cup chicken stock

2 cups frozen petite peas, thawed

8 ounces cream cheese, at room temp

8 ounces mascarpone cheese, at room temp

salt and black pepper

chopped fresh basil leaves, to garnish*

Bring a large pot of salted water to a boil over high heat. Add the pasta and cook until tender but still firm to the bite, stirring occasionally, about 8 to 10 minutes. Drain, reserving about 1 cup of the pasta water.

In a large nonstick skillet, heat the oil over medium heat. Add the onion and cook, stirring occasionally until soft, about 7 minutes. Add the carrots and stock and bring to a boil. Reduce the heat to a simmer and cook for 5 minutes. Add the peas to the pan and cook for 2 minutes until the peas are warmed through and the carrots are tender. Stir in the cooked pasta. Remove the pan from the heat and add the cheeses. Stir until the mixture is incorporated and forms a sauce. Season with salt, to taste. Transfer to a large serving bowl and garnish with chopped basil.


Sunday, March 14, 2021

Mark Bittman's Roasted Asparagus with Bacon and Parmesan


 When I think of spring I think of three veggies: peas, carrots, and asparagus. Asparagus was my mom's favorite and it always reminds me of her. She used to say that it just made her feel so good to eat it. When I came across a beautiful bunch of fresh asparagus, I couldn't refuse it. 

While searching online for recipes, I found Mark Bittman's article titled, Asparagus, 12 ways. While they all sounded delicious, particularly Grilled Asparagus with Red Pepper Glaze, I opted for Roasted Asparagus with Bacon and Parmesan because, let's face it, bacon and parmesan. I'm trying to be good, but springing forward isn't my favorite, ya know? Why does the time change affect us all week?

This dish was so unbelievably good! The asparagus was still fresh with a bit of a snap to it and the roasting really brings out the flavor. The little bit of bacon and parmesan really go a long way in building flavor and I found that this veggie dish was somewhat addictive. I wanted to go back for more!

This is perfectly delicious by itself, but I'm thinking I would really enjoy it for breakfast with a crispy fried egg on top! Yum! I will be making this easy and delicious veggie many more times in the future! 

Recipe per Mark Bittman's, article linked above. Recipe is for one pound of aspargus, serves 4.

Heat the oven to 450F. Toss the asparagus with 1 tablespoon olive oil and 4 slices bacon, chopped (I wanted my bacon to be crispy and I knew the thin asparagus would only take 5-6 minutes so I cooked some chopped bacon until it was almost done in a skillet then added it to the asparagus) in a roasting pan. Roast, turning the asparagus once or twice, until done. Garnish with grated Parmesan. Serve immediately.

My asparagus was thin so it only took between 5-6 minutes, but thick asparagus would take longer. Best to check on it while it's roasting.


Spring Forward @ IHCC

Sunday, March 7, 2021

Ottolenghi's Balilah {The Perfect Healthy Snack}

Ottolenghi writes, "In Jerusalem, Balilah is a popular Palestinian street food consisting of fresh chickpeas seasoned with cumin and lemon juice and it makes the most gratifying snack." He also states, "On the corner of the souk in the Old City stood the very popular balilah man. He had large piles of freshly cooked chickpeas on his stall, steaming and beautifully decorated with parsley and lemon. Like a magician, he used to whip the balilah into a newspaper cone in a flash and serve it to the eager customer."

I don't know about you, but I am a bean lover and that sounds heavenly. I have wanted to make this recipe forever and I am so glad I have finally got around to it! It is the perfect snack!

This balilah is so quick and easy to whip together, especially with canned chickpeas. Simply drain the beans, add chopped parsley, sliced green onions, chopped lemon, olive oil, cumin, salt and pepper. Give it all a mix and you are good to go. Of course, I feel this is better even the next day when the flavors have had a chance to meld together. You can even add chopped tomato or cucumber, or even feta cheese. You can eat this as a snack on its own, or served in pita or with pita chips. You can eat it warm, room temp, or cold straight from the fridge. It is also great served over chicken or fish or thrown into a salad. It is so versatile and delicious and it certainly won't last long!


Balilah

Adapted from Jerusalem

by Yotam Ottolenghi & Sami Tamimi

Serves 4, or more

1 cup dried or 2 (15oz.) cans  chickpeas

1 teaspoon baking soda, if using dried beans

1 cup chopped parsley

2 green onions, thinly sliced

1 large lemon

3 tablespoons olive oil

2-1/2 teaspoon ground cumin

salt and freshly ground black pepper

If Using Dried Beans: The night before, put the chickpeas in a large bowl and cover with cold water at least twice their volume. Add the baking soda and leave at room temp to soak overnight. Drain the chickpeas and place them in a large saucepan. Cover with plenty of cold water and place over high heat. Bring to a boil, skim the surface of the water, then decrease the heat and simmer for1 to 1-1/2 hours, until the chickpeas are very soft but still retain their shape. 

If Using Canned Beans: Use two 15.5 oz. cans! Drain the chickpeas and place in a large bowl.

To Make The Balilah: Put the parsley and green onions in a large mixing bowl. Peel the lemon by topping and tailing it, placing on a board, and running a small sharp knife along its curves to remove the skin and white pith. Discard the skin, pith, and seeds and coarsely chop the flesh. Add the flesh and all of the juies to the bowl.

Once the chickpeas are ready, drain and add them to the bowl while they are still hot (If you are using canned beans you can heat them up if you like). Add the olive oil, cumin, 3/4 teaspoons salt, and a good grind of pepper. Mix well. Allow to cool down until just warm, taste for seasoning, and serve.